Essay 14 — What a structure that can actually stand would look like
Steve Sagnotti · steves-head.space
“The conventional view serves to protect us from the painful job of thinking.”
— John Kenneth Galbraith
“Where all think alike, no one thinks very much.”
— Walter Lippmann
What it would take to build a different room is less mysterious than the current one needs it to be.
The preceding three essays documented the mechanism: a displacement wave and a debt spiral converging on a known timestamp; the commons stripped industry by industry through a documented five-step sequence; the room that should have responded, converted over a century into one that cannot. Those essays established what is wrong and how it got that way. This essay asks what a room built on a different frame would look like — and what it has already looked like, in the places and moments where a different frame was tried.
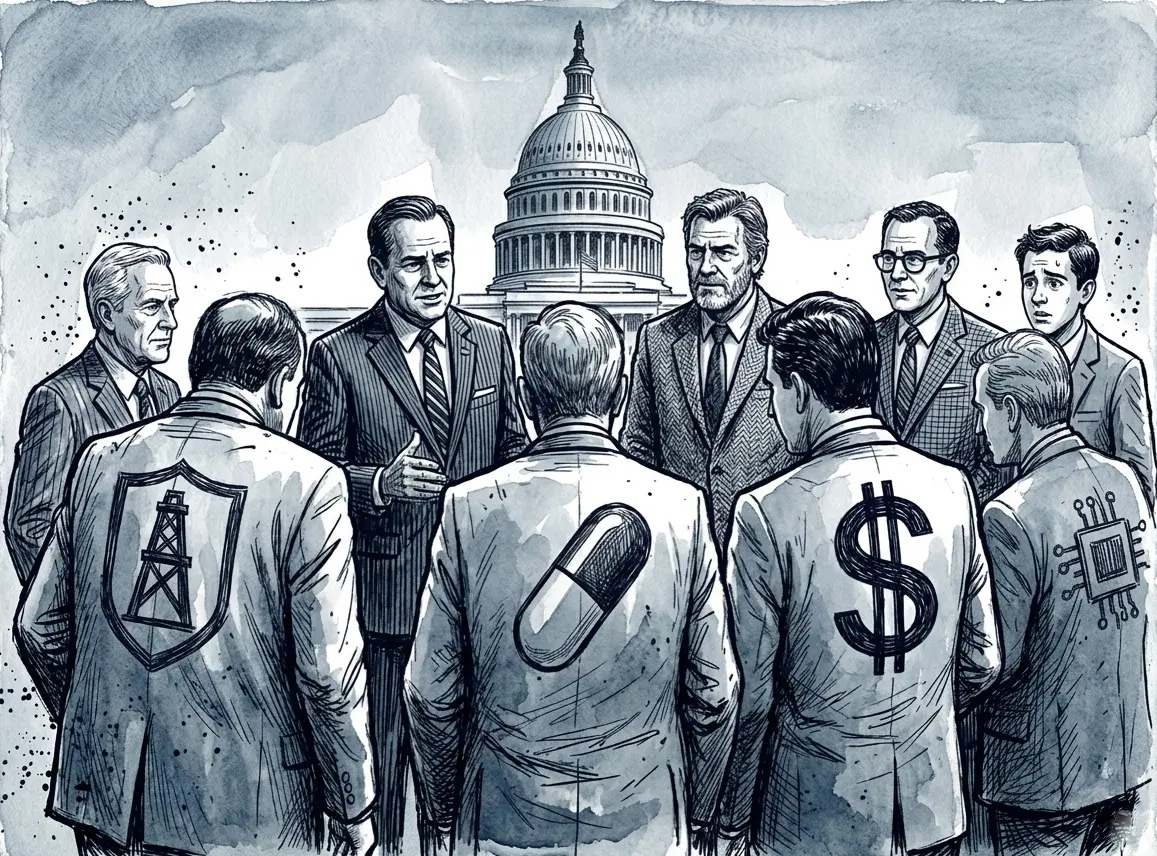
The proposals that follow are not utopian. They are drawn from existing law, running precedents in other democracies, and historical examples from within the American record itself. Each one looks radical inside the current frame. That is what this essay is about — not the proposals themselves, but the frame that makes the majority’s obvious interest look like an extreme position. The frame does not hide these arrangements by suppressing them. It hides them by presenting their absence as the natural order — as the shape of what is possible rather than the shape of what has been chosen by people with a vested interest in the choosing.
The essay is in two tiers. Tier One fixes the room: the democratic architecture that determines who gets to be in it and on what terms. Tier Two is what a repaired room could do: the policies that become available once the architecture no longer excludes them. Both tiers matter. Tier Two without Tier One produces reforms the room will spend a decade purchasing back.
TIER ONE — FIXING THE ROOM
I. Expand the House
The previous essay documented how the Permanent Apportionment Act of 1929 froze the House at 435 — and how, in the same statute, Congress removed the requirements that congressional districts be contiguous, compact, and equally populated. The rural caucus that passed it had a vested interest in a House that could not reflect the urban population arriving to outvote them. The Freeze and the gerrymandering that followed are not two separate problems. They are one act, from one room, whose consequences are still compounding.
Expanding the House removes that vested interest from the equation by making the room too large to capture cheaply. A House of roughly 1,500 members changes the geometry in specific ways. Smaller districts require less money to win. The industries that purchase outcomes in the current 435-seat room would need to purchase four times as many relationships to maintain the same influence. The cost of capture scales with the size of the room. The vested interest does not disappear — but it becomes more expensive to act on at the same scale.
The constitutional pathway does not require the room’s cooperation. Article I, Section 2 specifies that apportionment shall reflect population. Madison’s own argument in Federalist No. 58 was explicit: the purpose of the census was to augment the number of representatives as the population grew. The 1929 Act converted that constitutional instruction into a permanent exception to itself.
The Permanent Apportionment Act has never been fully tested against the plain text of Article I, Section 2, which requires that apportionment reflect population. In 2024, a constitutional challenge reached the Supreme Court making exactly that argument. The Court denied certiorari in October 2024 — not on the merits, but on jurisdiction. The constitutional question whether a statute that permanently caps a body designed to grow with population is valid on its face remains formally unresolved. The Court was handed the question and put it down without answering it.
The pattern is worth noting. The same Court that has spent decades intervening in the downstream consequences of the 1929 Act — voting rights, redistricting, the shape of districts — declined to examine the Act itself. It will manage the symptoms indefinitely. It will not look at the cause.
Bills to expand the House have been introduced in every Congress since 2017. Each one was referred to committee. None has come to a floor vote. The 435 members who would need to vote for a larger House are the members whose individual power a larger House would dilute. The constitutional challenge exists precisely because legislative action requires the cooperation of the room that has a vested interest in its own dysfunction.
The most conservative version of the fix has a name: the Wyoming Rule. Give every state at least one representative — as the Constitution requires — and size all others to Wyoming’s ratio, the smallest state by population. The result is a House of approximately 573 members. Not the 1,500 that honest proportionality would produce, but a meaningful expansion that requires only legislation, no constitutional amendment, and no argument more complicated than: the smallest state sets the floor and everyone else gets their share. Wyoming keeps its representative. New York gets the representation its population has earned. The Wyoming Rule has been introduced in Congress. It has been referred to committee. The members who would need to pass it are the members whose individual power it would dilute. The recursive trap holds here too — but the argument is simple enough that a constituency can be built around it without a law degree.
II. Sortition: The Room That Cannot Be Lobbied
In 2016, Ireland had a problem its parliament could not solve. For thirty-three years, a constitutional ban on abortion had been in place, and for thirty-three years, every attempt to address it through the normal legislative process had failed — too politically combustible for elected officials to touch, too consequential to leave unaddressed. The parliament was not corrupt. It was trapped by the vested interests of incumbency — the same dynamic that produces the American reform arc, the crisis kept alive because resolution ends the revenue.
Ireland convened a Citizens’ Assembly. Ninety-nine members, selected by stratified random lottery. A nurse. A farmer. A teacher. A retired electrician. A grandmother. They met over five weekends. They heard evidence from medical professionals, legal experts, ethicists, and advocates on all sides. They deliberated. They reached a recommendation: repeal the constitutional ban.
The recommendation went to a referendum. It passed with 66 percent of the vote. A question that had paralyzed the parliament for thirty-three years was resolved by a randomly selected group of citizens in eighteen months.
Sortition removes the vested interest entirely. A randomly selected panel cannot be lobbied in advance because its composition is not known in advance. You cannot spend thirty years cultivating relationships with people who were chosen by lottery last Thursday. The industries that purchase outcomes in the purchased room have no purchase point. The assembly deliberates without the information asymmetry that makes the committee hearing a sales call, because its members have no career to protect, no donor relationship to maintain, no reelection calculus to manage.
Belgium went further. In 2019, the German-speaking community of Ostbelgien became the first jurisdiction in the world to establish a permanent citizens’ assembly. The architecture is specific: a Citizens’ Council of twenty-four members serving eighteen-month rotating terms sets the agenda. A Citizens’ Assembly of twenty-five to fifty members, drawn by lot, goes deep on each question. The elected parliament must formally respond to every recommendation in public. Not adopt every recommendation. Respond. The assembly has no veto. It has something more durable: the elected parliament must say, publicly, what it is doing with what the assembly recommended and why.
American cities are running versions of this now. Oregon has operated the only state-authorized Citizens’ Initiative Review since 2010 — randomly selected citizens writing voter guides on ballot measures that their elected legislature had left to interest groups to define. In 2024, Deschutes County convened a civic assembly on youth homelessness, a problem its county commissioners had failed to resolve for over a decade. The objection that citizens lack the expertise to make complex decisions is most consistently made by people whose professional position depends on those decisions remaining inside a credentialed class. Ireland’s assembly outperformed thirty-three years of parliamentary expertise.
III. Campaign Finance: Floor, Ceiling, and Light
The current campaign finance architecture was built by people with a vested interest in its design. The contribution limits, the coordination definitions, the disclosure exemptions — every provision was negotiated by people who understood exactly what they were permitting and what they were forbidding. The solution requires dismantling each layer they built.
The floor is public campaign financing. New York City’s small-dollar matching program is the working model: eight dollars in public funds for every dollar raised in small amounts from constituents, up to a per-donor cap. A fifty-dollar donation produces four hundred dollars in campaign funds. The program rewards breadth over depth — a candidate who raises money from a large number of small donors receives more public support than one who raises the same amount from fewer large ones. Arizona, Maine, and Connecticut have been running versions for decades. The candidates it produces answer to a different set of constituents than the ones the current system produces.
The ceiling is the elimination of super PACs and the overturning of Citizens United — a five-to-four decision built on the premise that independent expenditures cannot corrupt because there is no direct coordination with the candidate, a premise the coordination rules themselves have made structurally incoherent. Twenty-one states have passed resolutions calling for a constitutional amendment to overturn it.
The light is mandatory real-time disclosure. The DISCLOSE Act — requiring immediate public disclosure of the source of all political spending above a threshold — has passed the House twice and died in the Senate twice. It does not ban money. It names the buyer. Dark money exists specifically to eliminate the reputational cost of visible political spending. Disclosure restores it. This is available now, while the floor and the ceiling are being built.
IV. Remove the Friction
Every structural fix in this tier assumes that the people the reforms would serve can actually get to the polls. That assumption is not safe.
Federal Election Day has been the first Tuesday after the first Monday in November since 1845. The logic was agricultural: farmers needed Sunday for church, Monday to travel by horse to the county seat, and Tuesday to vote. It was a reasonable accommodation for an 1845 economy. It has never been updated. Every other major democracy has since moved to weekend voting, multi-day voting, or a national holiday. The United States has not — not because the administrative challenge is prohibitive, but because the incumbency structure has a vested interest in a narrow Tuesday window that filters by inconvenience.
The Selective Service makes that vested interest visible without requiring any editorial comment. When an American male turns 18, the federal government automatically enrolls him in the Selective Service System. No form required. No opt-in. The government knows he exists — through birth records, Social Security numbers, school enrollment — and adds him to the register because his potential conscription is considered too important to leave to individual initiative.
Twenty-four states and the District of Columbia have automatic voter registration. The federal government does not. The argument against federal automatic registration is not administrative — the Selective Service proves the administration is straightforward. A government that can find you at 18 to register you for the draft cannot find you at 18 to register you to vote. One enrollment empowers the government. One enrollment empowers the citizen. Removing the friction removes the vested interest’s most reliable tool for shaping who actually shows up.
The full package is three items: a national voting holiday or mandatory weekend voting; automatic voter registration at 18 through existing federal infrastructure; and same-day registration for anyone who falls through. Australia’s system produces over 90 percent turnout. Non-compulsory systems with automatic registration and accessible voting infrastructure routinely produce 70 to 80 percent. The United States produces 47 percent in a high-stakes midterm. That gap is engineering. It can be re-engineered.
V. Restore Independent Technical Capacity
The previous essay documented the Lobotomy: in 1995, the incoming House majority eliminated the Office of Technology Assessment for $22 million in annual savings. The industries that filled the information vacuum had a vested interest in Congress remaining technically dependent on their testimony. Restoring independent technical capacity removes that purchase point.
What a restored OTA would do is specific. It would provide legislators with analysis whose only obligation is accuracy — not the accuracy convenient for a client, not the accuracy that supports a position already taken. A pharmaceutical company testifying on drug pricing has a financial interest in the conclusion the testimony reaches. An OTA analyst assessing the same question does not. The distinction is the difference between a sales call and an audit.
The timing has sharpened the argument to a point. In May 2025, thirty-four Representatives sent a letter to House Appropriations leadership requesting $6 million to restore the OTA — citing artificial intelligence, autonomous vehicles, and facial recognition as exactly the kinds of questions Congress is least equipped to evaluate without it. In June 2025, the same House Appropriations Committee voted to cut GAO funding by 49 percent, with the chair describing the cuts as redirecting the agency away from “self-directed, liberal initiatives.” The restoration request and the gutting of its successor agency arrived in the same month. Every institutional capacity for independent judgment is a threat to the industries with a vested interest in the vacuum.
A restored OTA would cost $6 million a year. The industries that currently fill the information vacuum spend more than that on a single lobbying contract. The European Parliamentary Technology Assessment network has operated continuously since the OTA was defunded. The capacity exists. Other rooms have kept it. The American room chose to eliminate it and has declined to restore it for thirty years.
VI. Reclaiming the Commons: The Window That Is Closing
The previous essay documented the five-step extraction sequence: public investment in, private capture, costs externalized, reclamation blocked. Each step was executed by people with a vested interest in the extraction continuing. Reclamation removes the legal architecture that protects that interest.
Norway discovered oil in 1969 and made a decision: the oil belonged to the people of Norway, not to the companies extracting it. A sovereign wealth fund was established. The fund held $1.75 trillion at the end of 2024. Alaska made the same decision in a Republican-governed state with no interest in European social democracy. The Alaska Permanent Fund has paid an annual dividend to every Alaska resident since 1982. The principle is simple: the resource belonged to everyone before the extraction began. The wealth belongs to everyone.
The AI situation is not identical — the public’s claim runs through copyright, research funding, and data contribution rather than mineral rights — but the principle the oil fund established is the same: infrastructure built on public foundations generates public equity. The training data — the accumulated written output of human civilization — was not created by the companies ingesting it. The foundational research was funded by DARPA and public universities over sixty years. Three jurisdictions have staked out positions on this in real time. The EU mandated transparency requirements with enforcement beginning August 2026. California required training data disclosure as of January 2026. The UK ran a public consultation that drew 11,500 responses; only 3 percent supported the government’s preferred opt-out model. The March 2026 report abandoned that option and endorsed nothing in its place. The content continues to be ingested. The opt-out arrived after the ingestion. The retreat did not un-train the models.
Three mechanisms for reclamation are legally available now. A research royalty on revenue from AI systems tracing their architecture to federally funded research, modeled on the Bayh-Dole pharmaceutical royalty. A data dividend converting the 70-plus active copyright lawsuits into a collective public equity stake rather than individual settlements. An IPO equity requirement directing a percentage of shares at offering price into a public fund — the public receiving equity at the same price the insiders received it, in infrastructure built substantially on public investment. Norway negotiated the public stake before the extraction was complete. The window for the AI commons stake is the window before consolidation completes. The room that could act is being outrun by the room that is acting.
Two further mechanisms belong in the same accounting.
The federal government loses an estimated fifty billion dollars annually to wage theft — employers underpaying, withholding overtime, making illegal deductions from paychecks. The Department of Labor recovered two hundred and seventy-three million dollars in 2024. Less than one percent of estimated theft. The Wage and Hour Division employs approximately 1,750 investigators. Tripling that number would cost roughly five hundred million dollars annually and could recover multiples of that in stolen wages. No new law is required. The law exists. The enforcement does not. This is the Tolentino asymmetry made fiscal: prosecuting wage theft is cheaper than processing the petty theft it eventually produces downstream. The choice not to enforce is a choice about whose property the system exists to protect.
A financial transaction tax of 0.1 percent on stocks, bonds, and derivatives would generate an estimated fifty to one hundred billion dollars annually — falling almost entirely on high-frequency trading rather than retail investors. Several countries implement versions of it. The EU has debated it for years. It directly taxes the activity that has benefited most from the conditions the preceding essays document, and funds the productive alternatives this essay proposes. The political obstacle is real. The technical feasibility is not in dispute. A payroll tax that currently falls on every dollar a worker earns but not on capital income is not neutral economics. It is a structural choice that rewards ownership over labor. Expanding the payroll tax base to include capital income closes that asymmetry at the source.
TIER TWO — WHAT A REPAIRED ROOM COULD DO
VII. Universal Basic Income: The Floor That Makes the Market Work
Henry Ford doubled his workers’ wages in 1914. The business press called it reckless. Ford called it arithmetic. His workers couldn’t afford to buy the Model T at the old wage. His workers and his customers were the same people. Paying them enough to participate in the market he was building was not charity. It was the condition of the market’s existence.
The displacement wave documented in the preceding essays is the Ford calculation running in reverse at civilizational scale. The CEO who approves the layoff sees the cost reduction immediately. The revenue consequence — the thousand workers removed from the consumer base — distributes across the entire economy invisibly and appears in no one’s quarterly report. Every executive making the same rational individual decision is collectively dismantling the consumer base that makes the decisions rational. This is not a moral argument. It is a description of how markets fail when the people who make production decisions are not the same people who bear the consumption consequences.
A universal basic income is the Ford calculation applied honestly to the displacement wave. Not a replacement for work. A floor beneath which participation in the economy cannot fall. The gap — the years between displacement and replacement — is precisely what the 2031 fiscal threshold makes unbearable. UBI does not eliminate the gap. It makes the gap survivable.
The evidence against the idleness objection is now substantial. Finland’s two-year pilot found that recipients were more likely to be employed at the end of the study than the control group and more likely to have started businesses. The Stockton, California pilot found that people receiving unconditional income worked more, not less, but shifted toward work that matched their skills. The consistent finding: people stop taking bad work. Workers with a floor negotiate differently than workers without one. A critic will note that pilots of hundreds of participants cannot straightforwardly predict the macroeconomic behavior of a civilizational-scale program — that is correct, and the Jones and Marinescu study of Alaska’s Permanent Fund, which has run since 1982 for the entire state population, addresses it directly: no significant decrease in aggregate employment. The employers who benefit from a workforce with no floor have a vested interest in UBI remaining outside the range of the politically possible. The evidence documents what happens when it isn’t.
Universal basic income addresses the gap between displacement and replacement. Universal basic services addresses what that gap costs. Rather than cash transfers, guarantee the services: healthcare, education, housing, transit, broadband. The distinction matters because cash transfers tend to flow back into the extraction economy — consumed by rent, healthcare premiums, and debt service, returning to the same concentrated ownership the transfer was meant to offset. Guaranteed services change what cash is needed for. A person who cannot be evicted and cannot be denied healthcare negotiates differently in the labor market than one who can. The University College London framework for universal basic services, less discussed than the UBI pilots but structurally more durable, makes the same Ford calculation UBI makes — but upstream of the market rather than downstream of it. The two are complementary. UBI sets the floor. UBS changes what the floor has to cover.
The care work the delivery of universal services requires is also, not incidentally, the work the displacement wave cannot touch. Home health aides, childcare workers, teachers, transit operators — the World Economic Forum’s Future of Jobs report identifies care roles as among the fastest-growing by absolute numbers through 2030. These roles cannot be automated at scale. They require people. They are chronically underpaid because the people who perform them have historically had the least bargaining power. A public employment option in care work — a wage floor and guaranteed employment delivering the services a universal basic services framework requires — absorbs displacement and delivers something the market will not fund on its own. That is not a new idea. It is what the next essay documents in detail.
The debt that makes the gap unbearable is also, in part, addressable directly. One point eight four trillion dollars in outstanding student loan debt is carried by forty-two million borrowers in the prime consumption years of their lives — years when prior generations were buying houses, starting businesses, and having children. The drag on aggregate demand is measurable in each of those categories. A targeted jubilee — income-contingent, focused on the cohorts whose degrees did not produce the promised labor market premium — is not primarily a moral argument, though it is that too. It is a macroeconomic argument: releasing that drag into the economy produces consumption, investment, and household formation that the debt is currently suppressing. The counterarguments — inflation risk, moral hazard, the question of who didn’t borrow — are real and have documented responses. The Reframe does not require resolving them here. The Reframe does not require advocacy for the jubilee. It requires naming it as a documented mechanism with a documented fiscal case and letting the reader sit with the arithmetic.
VIII. Land Value Tax: Recovering What the Public Created
There is a parking lot in midtown Manhattan. The owner bought it decades ago and has done nothing with it since. Every year it is worth more — not because of anything he did, but because the city around it grew. The subway lines beneath it were built with public money. The streets surrounding it were maintained with public money. The appreciation in the land’s value was produced by the community’s collective investment. The owner captured it entirely. Two blocks away, a teacher pays income tax on every dollar she earns. His windfall is almost untaxed until he sells. This is not an accident of the tax code. It is a choice, made in the tax code, by people who owned land, in the rooms where tax codes are written. They had a vested interest in the windfall staying untaxed.
A land value tax taxes the underlying value of land, not the buildings or improvements on it. The owner of the parking lot pays tax on the value of the location — the value the community created — regardless of what he chooses to do with it. If he develops it productively, his taxes don’t increase. If he sits on it while the surrounding community’s investment makes it more valuable, he pays for the benefit he is receiving. The tax cannot be offshored. It rewards productive use. It penalizes land-banking.
In 1975, Harrisburg, Pennsylvania was on the federal distress list — over 4,000 vacant buildings, businesses leaving, the tax base collapsing. The city adopted a split-rate land value tax: land taxed at a significantly higher rate than buildings, penalizing owners who held land idle while the city’s investment made it more valuable, rewarding those who developed it productively. By the early 2000s, vacant buildings had fallen from more than 4,000 to roughly 500. The number of businesses had increased more than fourfold. Over $1.2 billion in new private investment had arrived. Pittsburgh ran a version of the same system for decades, then in 2001, under political pressure from landowners, reversed it — equalizing the rates. To compensate for the lost revenue, the city raised taxes on buildings. The people told they would pay less paid more. The mechanism runs in both directions. Harrisburg shows what it produces when it runs forward. Pittsburgh shows what happens when the room that benefits from the old arrangement gets it reversed.
Estonia has run a national land value tax since the 1990s. The revenue funds local municipalities entirely. The result: Estonia has roughly a 90 percent rate of owner-occupied residences — compared to 67 percent in the United States. Taxing the value the community creates rather than the income individuals earn produces, over time, a more stable ownership society. That is not a theoretical projection. It is Estonia’s current census data.
Milton Friedman called it the least bad tax. He was not a radical. The consensus among economists across the political spectrum is unusual in its breadth: most efficient, least distorting of productive behavior, most directly recovers value created collectively for the collective. It is also not exotic. More than thirty countries use some version of it: Australia, New Zealand, Denmark, Lithuania, Taiwan, Singapore, Kenya, Namibia, South Korea, and others. It is a policy instrument in routine use across democracies of every size and ideology. The United States has thirty-three municipalities in one state running split-rate versions and no federal adoption. The gap is not because the evidence is thin. The evidence has been accumulating since 1913. The gap is because the people who write the tax code own the land.
VIII. Ownership as the Structural Fix
The payroll tax asymmetry Essay 12 documents — workers paying on every dollar earned, the ownership class paying on none — has a repair that goes deeper than taxation. The asymmetry exists because the people who benefit from AI-driven productivity gains do not overlap with the people whose labor those gains replace. The structural fix is ownership.
Worker cooperatives, employee stock ownership plans, platform cooperatives for gig workers — these are not theoretical constructs. The Mondragon Corporation in the Basque Country of Spain is the proof of concept at scale: eighty thousand worker-owners across manufacturing, retail, finance, and education, operating as a federated network of cooperatives. When the 2008 financial crisis hit, Mondragon’s worker-owners voted to take pay cuts and transfer workers between cooperating firms rather than execute layoffs. The surrounding conventional firms laid off workers at the rates conventional firms do. Mondragon did not. The difference was not generosity. It was ownership structure. The people making the decision about layoffs were the people who would be laid off. The incentive ran differently.
ESOPs — employee stock ownership plans — already cover roughly fourteen million American workers in six thousand companies. The evidence on performance is consistent: ESOP companies have higher productivity, lower turnover, and better survival rates through economic downturns than comparable non-ESOP firms. The tax incentives for ESOP formation already exist in federal law. The room has not chosen to expand them. It has not chosen to obstruct them either. This is one of the few items in this essay where the room’s inaction is not actively purchased — it is simply the result of ownership being outside the frame of what the current architecture encourages anyone to ask for.
If workers owned a share of the productivity gains from the tools displacing them, the revenue column / expenditure column problem Essay 12 documents partially self-corrects. The displaced worker who holds equity in the system replacing her is not the same fiscal problem as the displaced worker who holds nothing.
VIII. Two Repairs That Cost Nothing
Not every item in this essay requires new law, new funding, or the cooperation of a room with a vested interest in refusing. Two of the most significant structural repairs available cost nothing and require only the enforcement or restoration of existing law.
Antitrust enforcement was the primary tool American democracy used for most of the twentieth century to prevent the employer consolidation that Essay 12 documents as the mechanism of job ladder collapse. The Engbom study established the finding: workers today are half as likely to receive a competing job offer as workers were in the 1980s. The primary cause is consolidation — fewer competing employers means less competitive pressure on wages and less mobility for workers. The Sherman Act, the Clayton Act, the tools to prevent consolidation — they exist. They were used. Four decades of weakened enforcement permitted the consolidation that produced the job ladder collapse. Restoring enforcement requires no new legislation. It requires a Department of Justice and a Federal Trade Commission willing to use the authority Congress already gave them. The room will resist this because the consolidated industries fund the campaigns of the people who confirm the attorneys general and the FTC commissioners. That is the mechanism. The tool is available regardless.
Noncompete agreements — signed by more than a third of the American workforce, including hourly and part-time workers — make it illegal for workers to take competing job offers when they exist. The Federal Trade Commission banned them in 2024. Business groups sued. A federal court blocked the ban. The Fifth Circuit has not yet ruled. But state-level elimination is already happening: California, Minnesota, and Washington have eliminated noncompetes entirely. The Engbom research establishes the mechanism — noncompetes are responsible for a measurable share of the job ladder collapse documented across forty years of federal labor data. Eliminating them restores worker mobility, competitive wage pressure, and upward income mobility. It does not cost a dollar of public money. It removes a legal instrument that was installed to suppress the bargaining power of workers who already had less of it than their employers. The people with a vested interest in keeping it are the employers who benefit from a workforce legally prevented from leaving.
IX. The Window and the Clock
Franklin Roosevelt’s advisors did not design the New Deal during the Depression. They designed it before it, in the years when there was no political path to pass it. When the Depression arrived and the window opened, the argument was ready. The window opened for roughly four years. A program built in four years under crisis conditions would have been less coherent, more reactive, more easily dismantled than the one built in advance and deployed when the moment arrived.
The 2031 convergence is a crisis on a known schedule. The fiscal threshold and the displacement wave are not natural disasters. They have clocks. The political path to the proposals in this essay does not exist today in the current room. It will exist when the conditions that make the current arrangement unsustainable arrive visibly enough that the cost of maintaining it exceeds the cost of changing it. That is the historical pattern without exception.
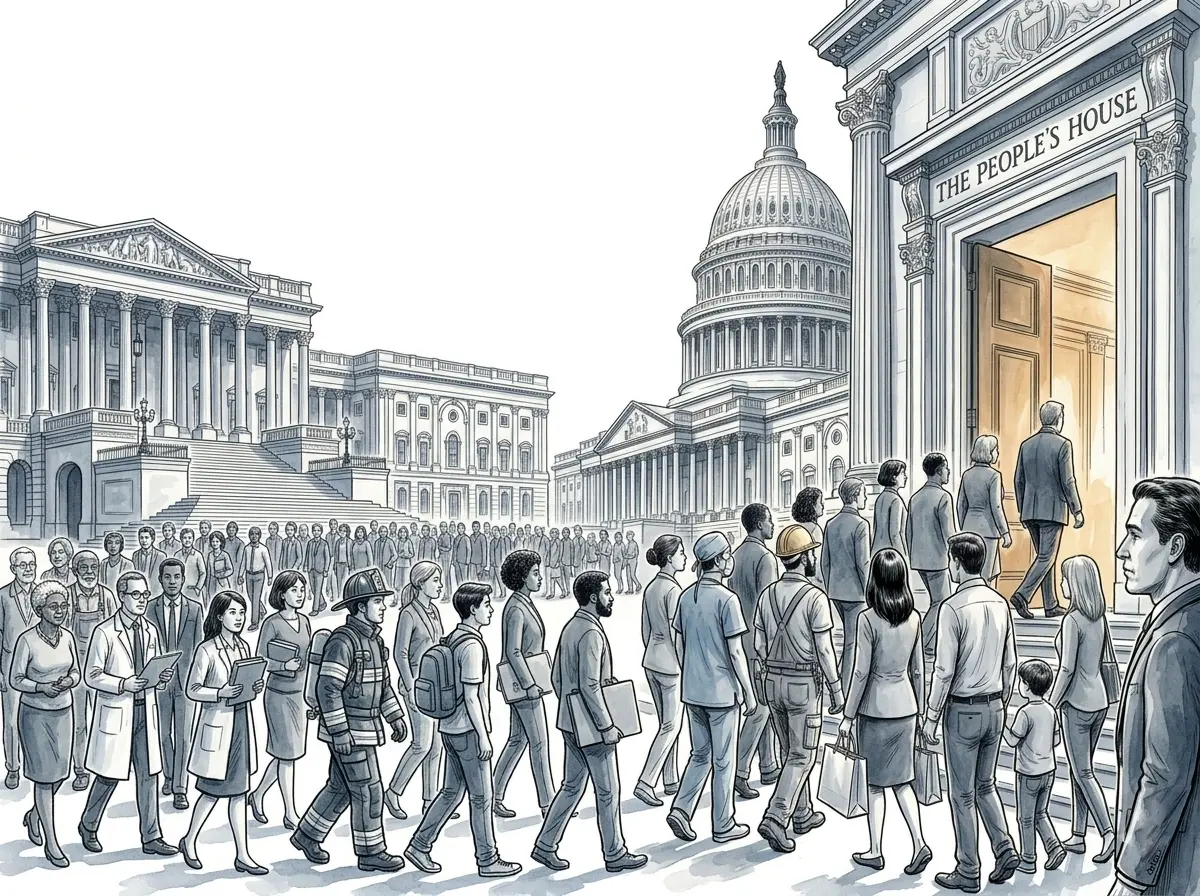
In 2025, a record 45 percent of American adults identified as political independents — the largest single group in the electorate, larger than either party. Of those, Gallup finds only 10 percent lean toward neither party. But even the leaners have no formal mechanism: in most states they are excluded from primaries, hold no party position, and have no structural claim on the candidates they help elect. The largest single group in the American electorate has the least institutional leverage over it. That is the pressure system. The proposals in this essay are the channel — not because they will become law tomorrow, but because they name what the pressure is about and give it somewhere to go other than toward a neighbor. Inside the frame, each looks radical. Outside it, each is simply the arrangement that serves the majority rather than the room. A third position standing on specific commitments — the expanded House, sortition, public campaign financing, automatic registration, restored independent technical capacity, the commons made whole, a floor beneath displacement, the public value returned to the public — makes the emptiness of the negative campaign visible. The negative campaign only works when the binary looks like the full range of what is possible.
What makes the reframe possible is not political strategy. It is the perceptual shift the next essay completes. You cannot build the new room until you can see the walls of the old one. And the oldest evidence that the walls were always chosen — not given, not natural, not the inevitable shape of human society — is where this project has been going from the beginning.
The proposals in this essay are the harder architecture. They require the room to be rebuilt before they can be used — and rebuilding the room requires the sustained pressure of a majority that understands what the room is. They are worth building. They are not fast.
The next essay names what can be built now, by the people the displacement wave has already reached, on the work that has been waiting undone. It is not a replacement for the structural repairs above. It is a floor beneath them — and a demonstration, in concrete terms, that the alternative to the warehouse is not abstract. The essay after that returns to what was there before the room was built. Not as theology. As evidence. What the frame excluded, they named. What the institution managed, they kept saying anyway.
Steve Sagnotti is a serious amateur photographer, writer, and technologist based in Oregon. With his camera he tries to capture common images not often seen, leading to common questions not often asked.
steves-head.space
© 2026 Steve Sagnotti
Sources
Section I — Expand the House
Permanent Apportionment Act of 1929: Pub.L. 71-13. Constitution, Article I, Section 2. Madison, James. Federalist No. 58. The Avalon Project, Yale Law School, 1788.
Schroeder v. United States, No. 23-1331. Petition for certiorari denied October 7, 2024. Prior proceedings: E.D. Wash. No. 2:22-cv-00172-MKD; 9th Cir. No. 23-35606, decided May 9, 2024.1920 Census: U.S. Census Bureau historical data. Current district size (760,000): U.S. Census Bureau, 2020 apportionment.
Fair Representation Act (H.R. 7040, 2023) and predecessor bills. Danielle Allen and Yoni Appelbaum, ‘A 700-Seat House,’ The Atlantic, December 2019.
Section II — Sortition
Ireland Citizens’ Assembly 2016–2017: final report on the Eighth Amendment, June 2017. Referendum result: May 25, 2018 (66.4% in favor).
Ostbelgien Citizens’ Assembly: established February 2019.
Oregon Citizens’ Initiative Review, authorized by statute 2011, administered by Healthy Democracy (Portland, OR).
Deschutes County Civic Assembly on Youth Homelessness, September–October 2024.
New America. Comparing Citizens’ Assemblies Across the United States. 2024.
Helene Landemore, Open Democracy (Princeton University Press, 2020). Claudia Chwalisz, The People’s Verdict (Rowman and Littlefield, 2017).
Section III — Campaign Finance
NYC small-dollar matching: NYC Campaign Finance Board, 2024 cycle (8:1 match). Arizona Citizens Clean Elections Act: Ariz. Rev. Stat. § 16-940. Maine Clean Election Act: Me. Rev. Stat. tit. 21-A, § 1121.
Citizens United v. FEC: 558 U.S. 310 (2010). State resolutions: 21 states as of 2025, Free Speech For People. DISCLOSE Act: passed House 2019, 2021; died in Senate both sessions.
Section IV — Remove the Friction
Election Day statute: 2 U.S.C. § 7 (1845, codified). International voting day comparisons: International IDEA Voter Turnout Database, 2024.
Selective Service automatic enrollment: 50 U.S.C. § 3802; Military Selective Service Act, Pub.L. 80-759.
Automatic voter registration: Ballotpedia. Automatic Voter Registration. Updated 2025. Brennan Center for Justice (above). MIT Election Data and Science Lab. Automatic Voter Registration. February 16, 2023. National Conference of State Legislatures. Automatic Voter Registration. March 28, 2026.
Section V — Restore Independent Technical Capacity
Office of Technology Assessment: established Pub.L. 92-484, 1972; terminated January 1995. Annual budget: $22 million.
FY2026 restoration letter: Rep. Takano et al., May 2025 (34 signatories, $6M). GAO cuts: House Appropriations Committee, June 22, 2025 (49% reduction, chair Tom Cole statement).
European Parliamentary Technology Assessment network: EPTA.
Section VI — Reclaiming the Commons
Norway Government Pension Fund: Norges Bank Investment Management, annual report 2024 ($1.75T). Alaska Permanent Fund: APFC annual report 2024 (dividend since 1982).
EU AI Act: enforcement from August 2026. California AI training data transparency law: effective January 2026. UK Government Report on Copyright and AI: March 2026.
Bayh-Dole Act:, 1980; march-in rights. AI copyright litigation: 70+ active federal cases as of April 2026. The Open Questions in U.S. Generative AI Copyright Litigation
Section VII — Universal Basic Income
Henry Ford wage increase (1914): David Hounshell, From the American System to Mass Production (Johns Hopkins University Press, 1984).
Finland Basic Income Pilot 2017–2018: Kela, final report, May 2020.
Stockton SEED 2019–2021: Dr. Stacia West (University of Tennessee) and Dr. Amy Castro Baker (University of Pennsylvania), first-year results March 2021.
Damon Jones and Ioana Marinescu, The Labor Market Impacts of Universal and Permanent Cash Transfers. American Economic Journal: Economic Policy, 2022. DOI: 10.1257/pol.20190299.
Section VIII — Land Value Tax
Harrisburg split-rate tax: adopted 1975
Outcomes reported in Urban Land Institute analysis, 2013
Pennsylvania Economy League, 1996–2004 data. $1.2 billion investment figure: Mayor Stephen Reed letter to Allen Home Rule Commission (reproduced in Pennsylvania’s Success with Local Property Tax Reform, Lincoln Institute, 2003).
Pittsburgh reversal: split-rate abandoned 2001; tax rate consequences: Lincoln Institute of Land Policy, 2002–2004 analysis.
Estonia land value tax: adopted 1990s; owner-occupancy rate (~90%): Statistics Estonia, 2021 census; U.S. rate (67.4%): U.S. Census Bureau, 2020 American Community Survey.
Milton Friedman on land value tax: Free to Choose (1980). Henry George, Progress and Poverty (1879). Countries using LVT: International IDEA; World Economic Forum, ‘How land value tax could fix the housing crisis,’ March 2022 (30+ countries).
Section IX — The Window and the Clock
New Deal preparatory work: Ira Katznelson, Fear Itself (Liveright, 2013). CBO, Budget and Economic Outlook: 2026 to 2036, February 2026.
Gallup Party Affiliation historical trends, 2025 (45% independent). United States Elections Project, 2022 midterm turnout.