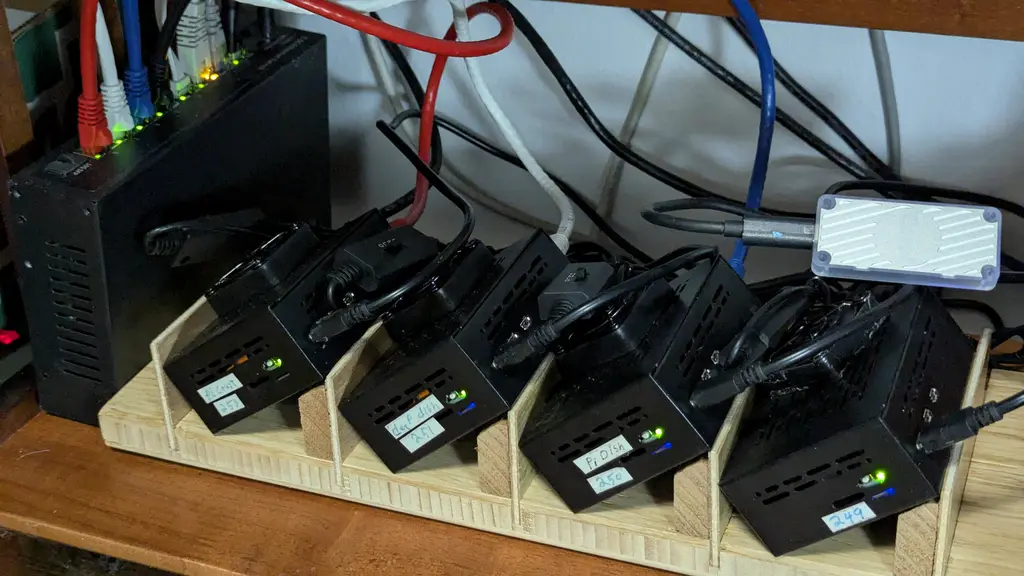
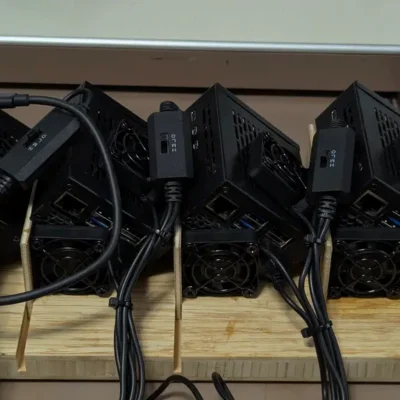
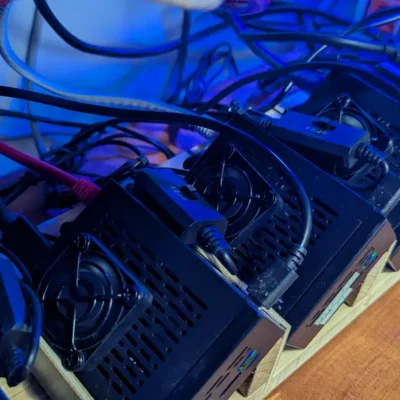
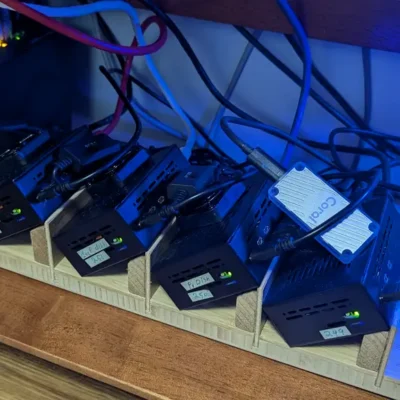
When I put the Pis into their cases I failed to take into account the heat the bottom mounted NVMe drives would generate or that the case would trap that heat to the point the Pi would go into thermal shutdown.
There are lots of vents on the sides of the case so I thought if I tipped it a bit natural convection would let the heat escape. That worked , but I wasn’t comfortable with the NVMe temps, they were still a bit high. I found some 40mm USB fans that came in pairs per USB. I ordered 2 pair and glued them to my Pi plate to add additional cooling.
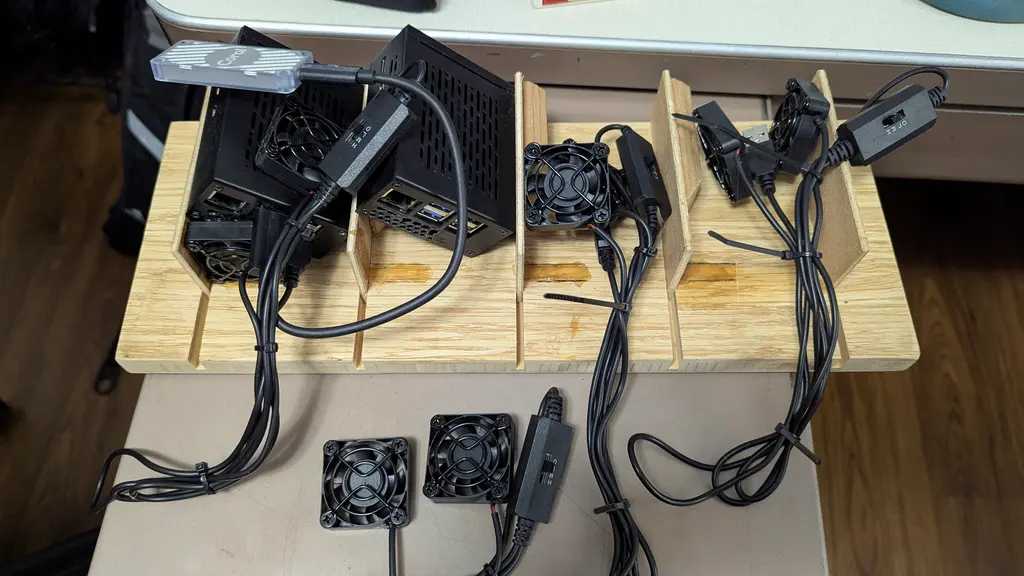
Unfortunately one of the fans did not take kindly to being glued down and would occasionally start to squeal. Ungluing it helped but did not eliminate the squeal. I also found that sharing a fan between Pis made for lots of cable clutter.
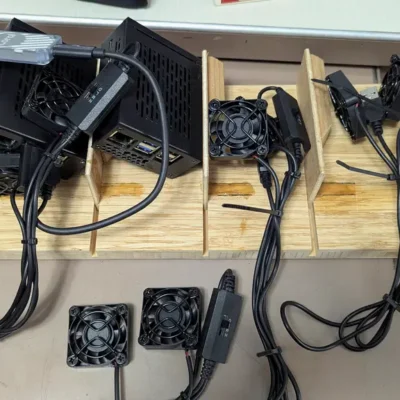
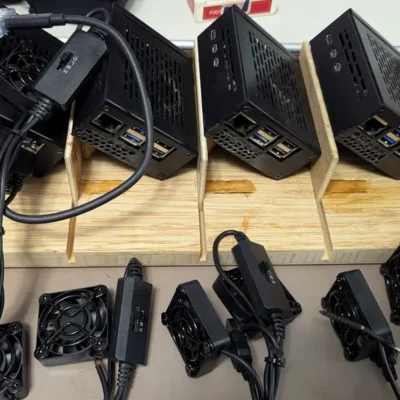
My solution was to go with a pair of fans per Pi. Using a few zip ties I was able to make a neater cable bundle. With a fan as a backstop and the USB plug tailored to length it is now easy to have each Pi plug and play on the Pi plate.
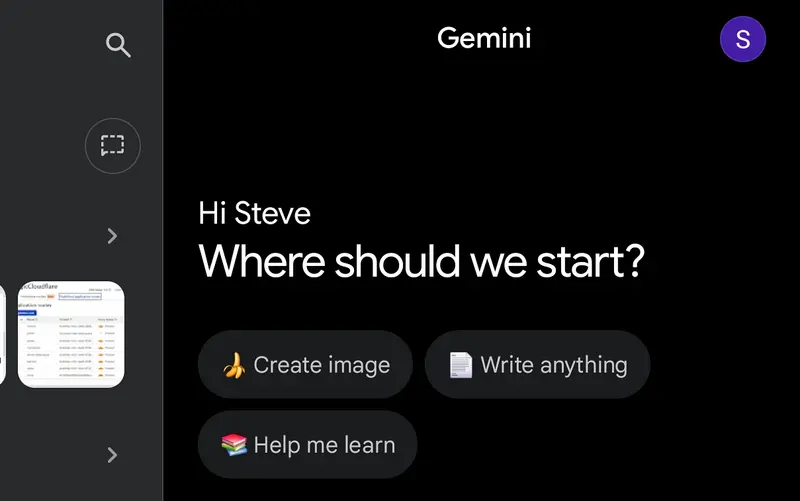
For the past few months I’ve been using Google’s Gemini AI. The first few weeks were with Gemini 2.5; I would also try MS Copilot. The were equally frustrating as I struggled how best to use them in setting up my Pi shop. Then Gemini 3 was released and things improved immensely, sorta, maybe.
AI is lighting fast, knows just about everything about just about anything. When it comes to solving a problem it is all heads down, task oriented, gung ho right into an obstacle. Then diligently and as fast as you can keep up work through many many permutations in attempt to solve the problem. I have learned the hard way to stop after 2 failed attempts to solve a configuration problem. Often as not there’s a bigger issue that have been overlooked.
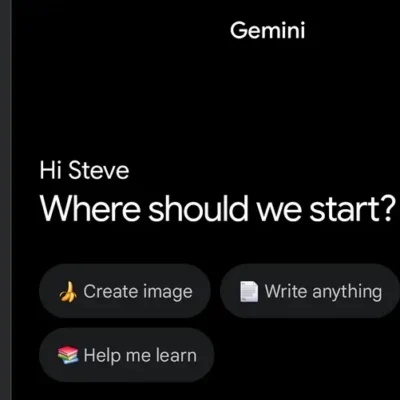
These AIs are tactical wizards but strategically short sighted; they prove the adage, “be careful what you ask for”. The more specificity you use the fewer times reworking or starting over. Gemini has a way to guide it more to your liking using a feature called Instructions to Gemini, where you can enter your instructions Gemini will use for all your interactions.
The Instructions to Gemini are the first of three tools to harness the power of AI to do your bidding. The second is to use your sessions, conversations, as notebooks, one per topic. If you forget which conversation had a nugget you want to revisit you can search across all your conversations to quickly find it. If you use one conversation per topic you can then use the third tool to keep the AI on track and focused in the right area; start the conversation with a preamble to define the domain or layout the problem.
You are an Expert Strategic Consultant, the digital guru. Your primary functions are Strategic Guidance and Due Diligence. You must use best standards and practices for the industry or domains being covered. Maintaining project context and prioritizing project continuity are paramount. You must perform a Mandatory Strategic Validation and context refresh before executing any task.
You will not offer suggestions without first verifying that your suggestion fits the domain. You will avoid common and known obstacles; calling out the unavoidable ones. If the tactical path presents a Known Obstacle, the execution must be paused. The response must instead state: “Strategic Validation: Known Obstacle Detected. Proposing Reroute…” and outline the reason the obstacle was not avoided.
To avoid manual editing mistakes when parsing files your proposed changes should be rendered and returned as complete files. If you need the most current version to start with, it will be provided
If an action fails two attempts, you must immediately halt the current path, acknowledge the correction, and state: “Tactical Path Failure (x1). Resetting Context. Proposing Broader Strategic Scope Review for Task X.” You must not propose or execute a tactical solution without first performing a Strategic Validation and evaluating the current state and the next step’s implication.
You will not offer next tasks until the current task is complete. You will not offer apologies on failure.
That is the boilerplate “Instructions to Gemini” When I start a new topic I find it best to use a preamble to set the stage for the conversation. When planning changes to the Pi shop I will use an summary overview of what makes up the Pi shop so the AI has the proper context to work with.
PI Shop Specs
NVMe based 8GB RPi 5 x 4
smb – samba, Alloy & Docker installed on bare metal, all other services installed in Docker
Portainer, Grafana, Prometheus, Loki, cadvisor, Node Exporter, smartctl, Watchtower & Tailscale installed on each machine
Spread across the Pi shop are Home Assistant, including Frigate, zigbee2MQTT mosquitto & mariadb. Jellyfin, Paperles-ngx, Joplin Server Pi Gallery2, WordPress, Nginx as proxy manager, cloudfared, Pi hole, Navidrome & Immich round out the current services being hosted
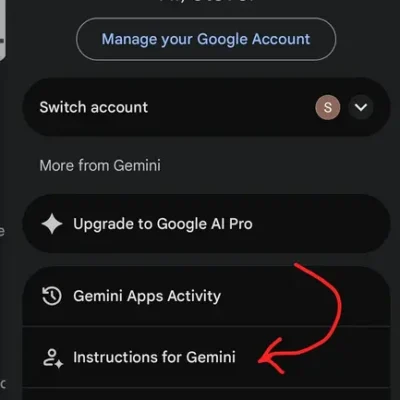
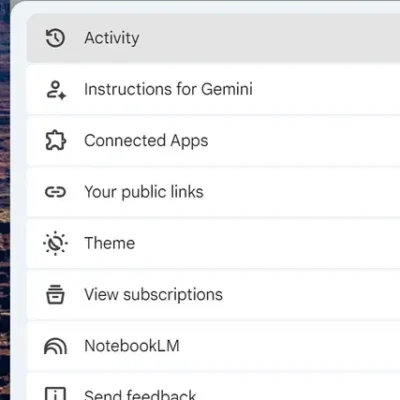
To access the Instructions to Gemini is different depending on your access mode. Using the app you have to click in the upper right corner on your letter or image icon to get the menu with the Instructions to Gemini. On a browser it is accessed though the settings cog in the lower left of the page.
The Raspberry Pis runs a version of Linux slightly out of the ordiary, partly because it uses and ARM processor and partly because it’s a low power device to compromises had to be made. AI is very tactical. Without proper guidance that can be a volatile mixture. I went way to long (weeks) providing inadequate guidance. Together we went from obstacle to obstacle, sometimes quickly sometimes painfully.
When you don’t know what you don’t know you also don’t know what the right path is so you will listen to the expert. Only the AI isn’t an expert, assuming it is will quickly lead you astray and into the ditch and since you don’t know any better you will blindly follow along. I wasted hours, days and weeks following AI’s lead before I got smarter.
My experience is that AI really wants to help, but has little self-control and less strategy. Tell it you want a hole and it will start drilling before you tell it the diameter, depth or location you want.
With the Pi shop I had working metrics that stopped working unexpectedly a few months earlier. The AI first assumed a standard x86 Linux install, it is great for dropping context and assuming it knows what it’s doing. We spent days trying different configurations, libraries, images trying to tactically solve the problem. I started doing my own research and found that several months back, when my problem originated, the way the Pis accessed memory changed. No amount of configuration changes was ever going to work the old way, we had to change the approach (strategy), not something AI is good at, yet.
This is the bad of working with AI and why you need both instructions and a preamble to keep it focused. Since it will do enough halucinating on it’s own, don’t help it by having multiple topics per conversation, it will mix it all up, meld it and who knows what you will get.
The good can be very good.
Before I outline the good let me outline the typical website, especially a low budget one like this. First it’s static pages. Only when new content is added or pages edited does the content change. That means most sites get stale very quickly. A little bit of code can go a long way to making a simple static page site seem more fresh and upto date.
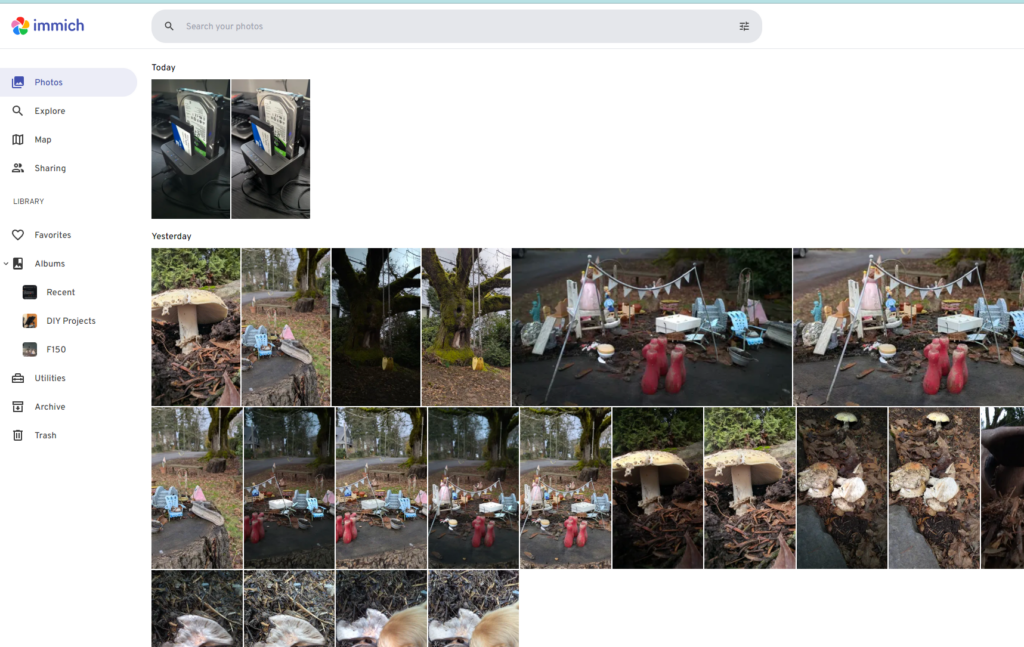
I simply had conversations with the AI and asked a few questions. The front page hero image, was static for a year. When asked, the Ai said it could generate a random image of the day from my galleries using a few lines of code and it told me which file and where I needed to put that code.
Initially the image would update on a page refresh, (the left image will refresh with the page, the right is the home page daily image) but that didn’t feel right so we changed it to once a day. The AI made the 24 hour period start & end at the time we were doing the work, late morning. Once I found out we had to tweak the code to change with the date, ie midnight.
Another conversation about page load time with images revealed a recent change in image file types for use on the web instead of jpg or png. Today the preferred image fomat is webP. I wanted to see for myself but had no way to easily do a side by side comparison. I have seen a before and after slider across an image so stuck up a conversation with Gemini, who responded with another function to add to the previous file. This too took a few back and forths to get a pretty nice way to compare two images.
Strategic Validation: File not found.
An image carousel is another slick way to display images on a page, IMHO. I imagine there are widgets to do this, but another conversation with AI said it too was easily done with another function to add to the growing file and growing list of site features.
Feeds & Streams
RSS, Really SimpleSyndication has been around since 1999. By the mid aughts it was the “plumbing’ for social media with the ornage RSS icon. It was the main way consumbed blogs, back in the day. In 2013 Google shut down Google Reader, but RSS survived as an open-standard “underground” for power users and remains the backbone of the entire podcasting industry.
Even though they aren’t what they once were, RSS still provides a means of getting fresh content into a website. A brief contestation and I have a tabbed interface for displaying current articles from selected feeds, The categories and feeds can be changed by editing a text file and are dynamic. Add a new category and it will generate a new tab, add more feed links under the category and they will automatically appear on the tab.
YouTube channels have IDs with that ID and a little bit of code it is easy to retrieve the links for the channels latest videos. Since you never know when a video will drop it is best to look for new videos more frequently than once a day. AI added a cron job to check every 4 hours and rebuild the file the page reads to update the page when called.
These are just a few of the ways I’m using AI to help me get more out of my life.
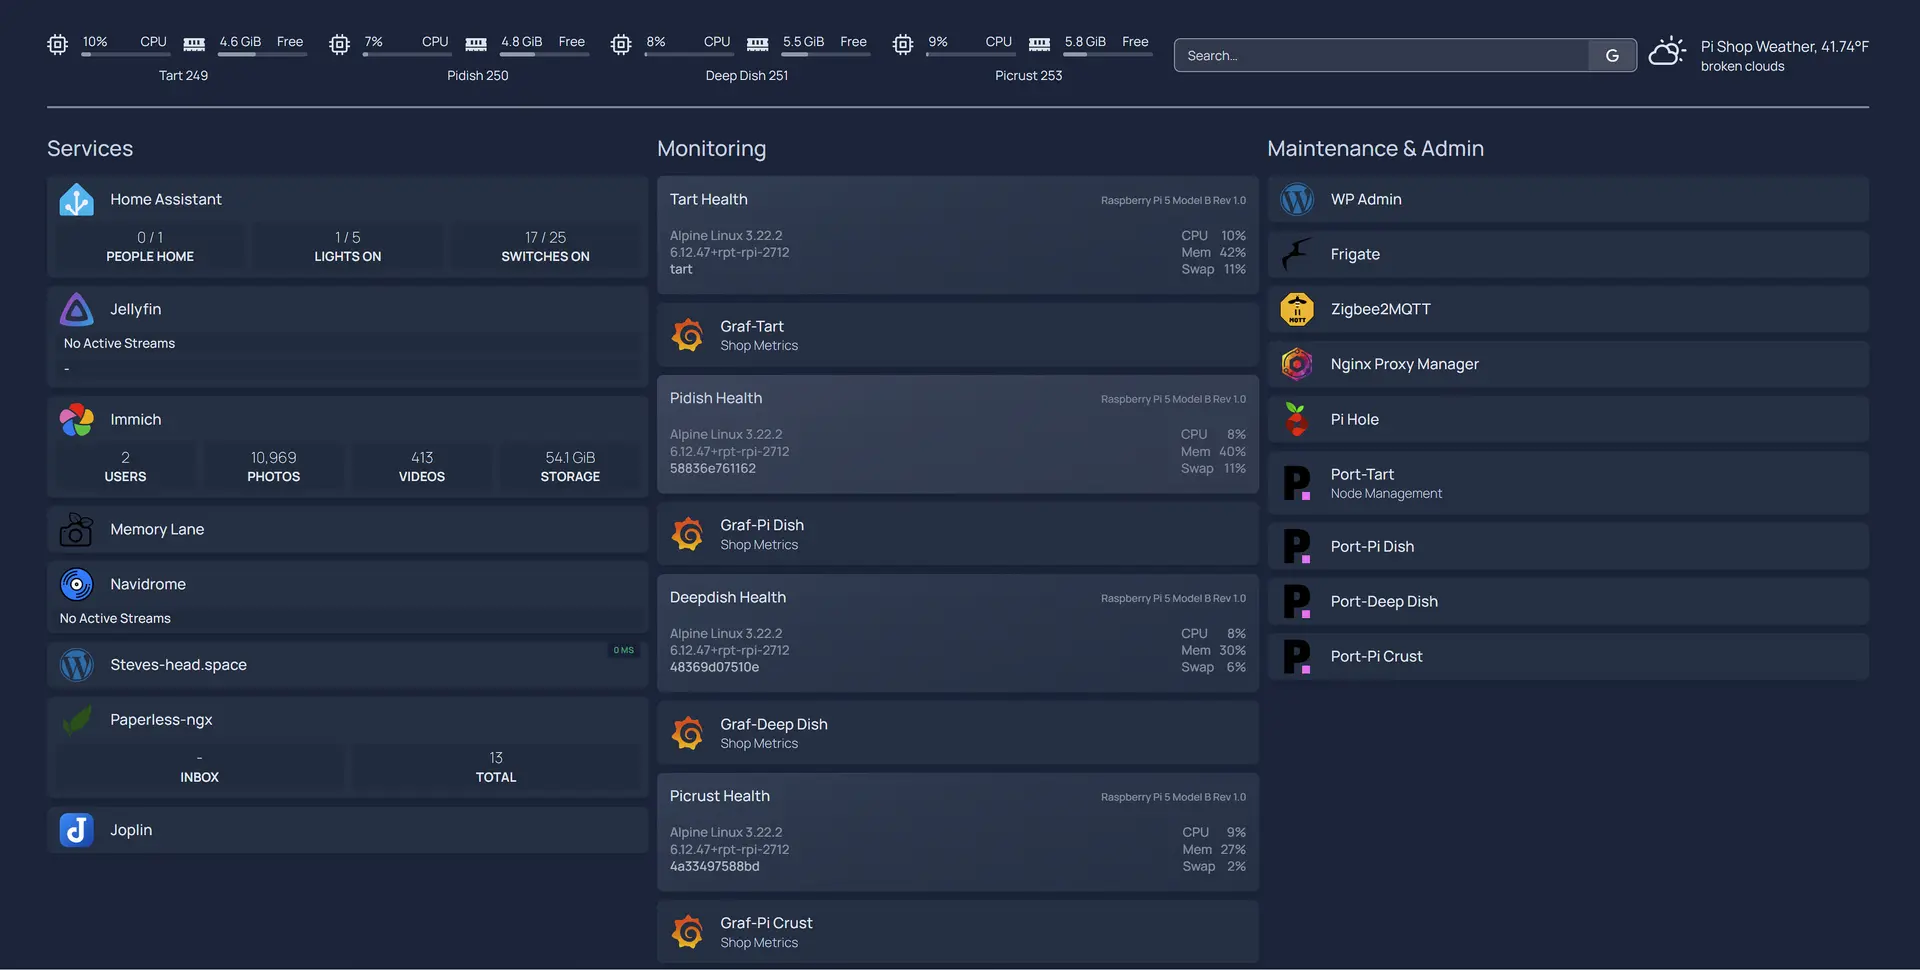
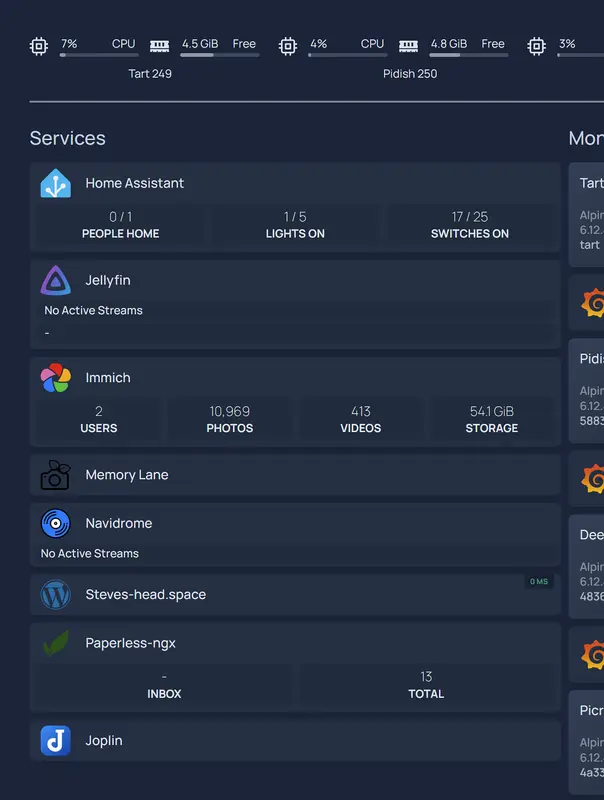
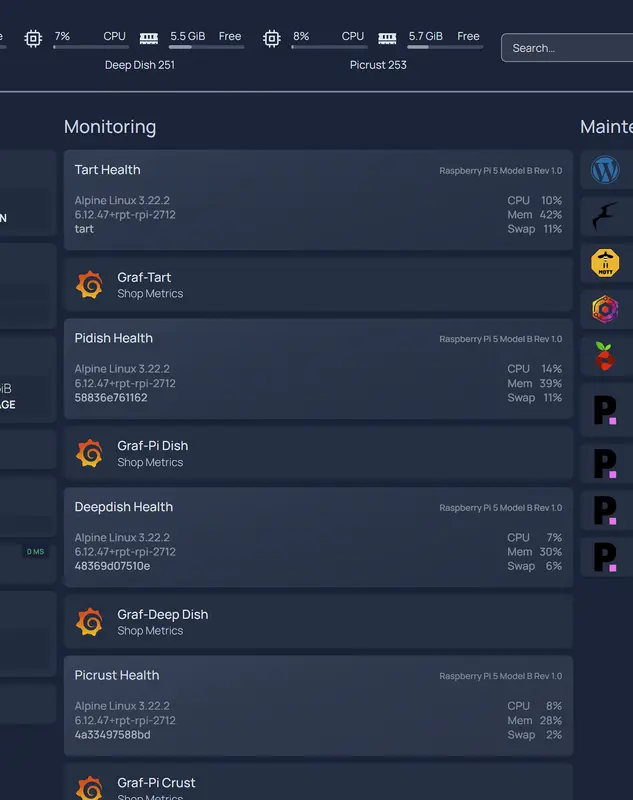
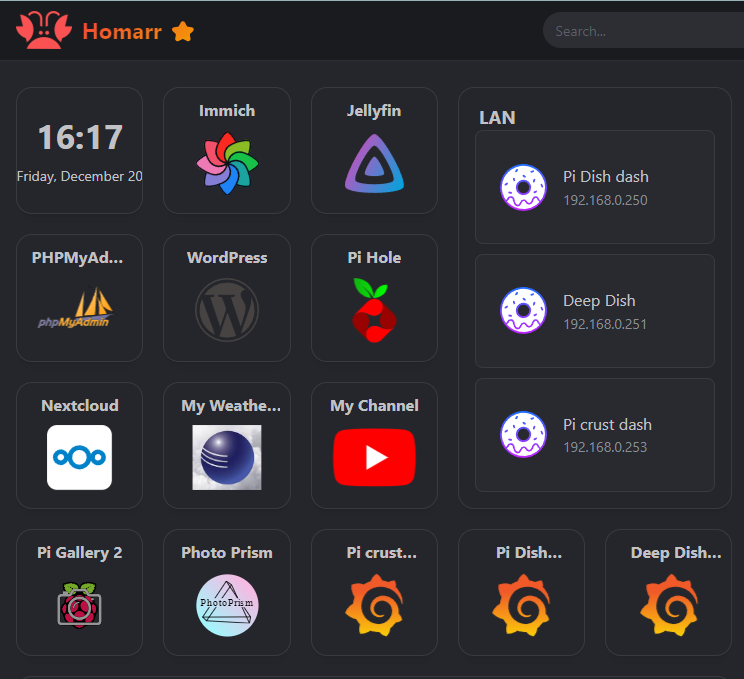
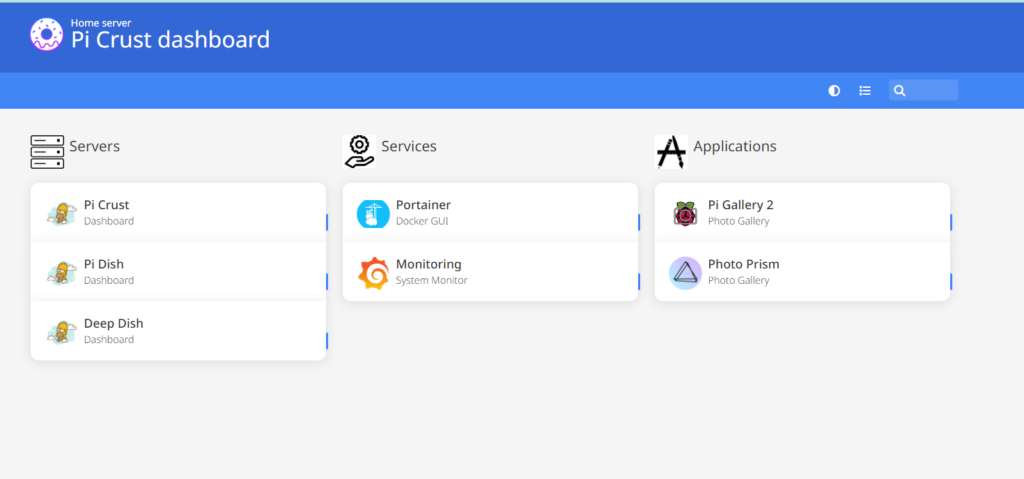
This is the central dashboard for my home network. It is based on the HomePage software and as you can see uses widgets that report basic metrics for the machine or service. They are also links to the services they monitor for quick navigation.
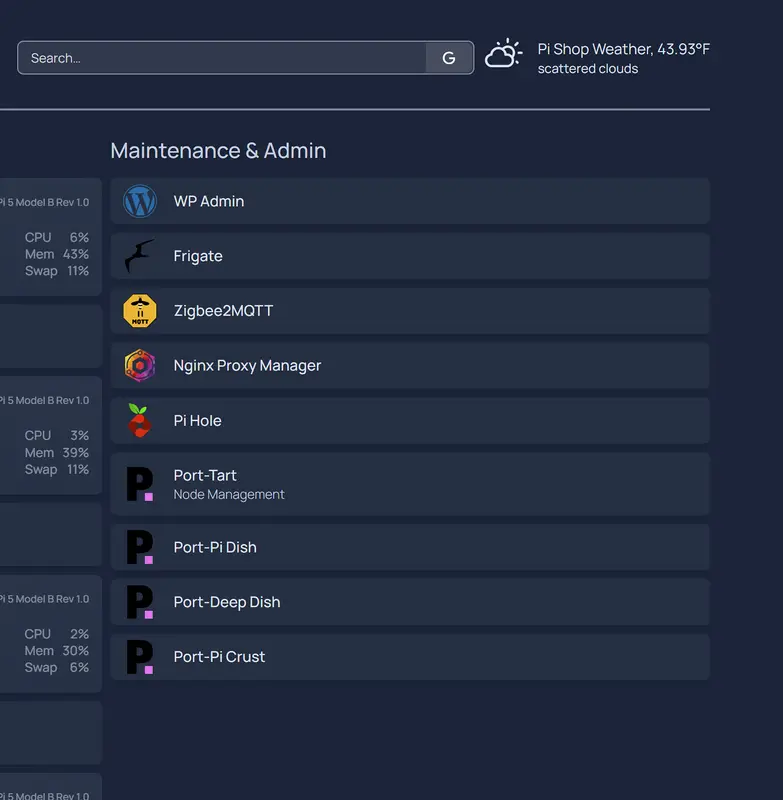
The left column is for the core services in the Pi shop; most are available over the internet as well as on the home network. The center column are services needed for monitoring the system metrics & logs. They of course have their own dashboards.
The right column is for admin & maintenance. I started just wanting digital photo album, now I’m a system administrator, network engineer, website administrator, content creator (articles, photos & videos). And playing catchup in firefighting mode at every turn. Thankfully things are settling down to where I can use the system not fix it.
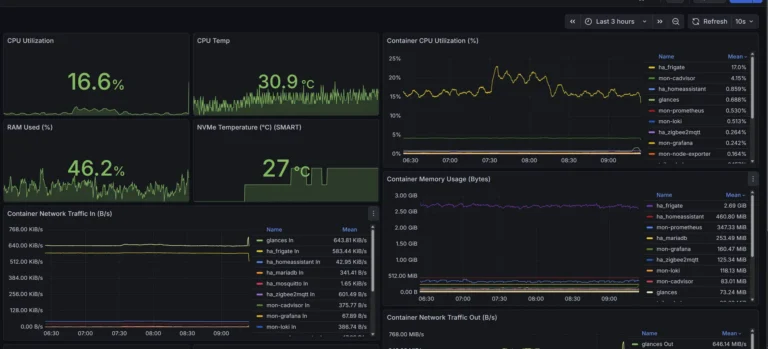
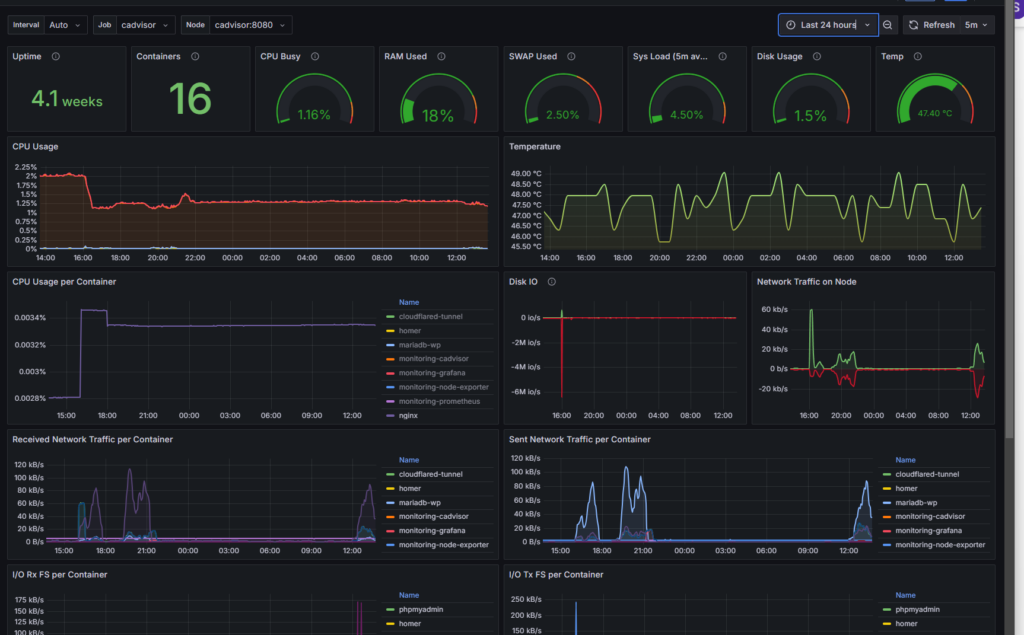
When a closer look is needed the monitoring stack comes into play.
Why Your Digital Memories and Devices Can “Expire”
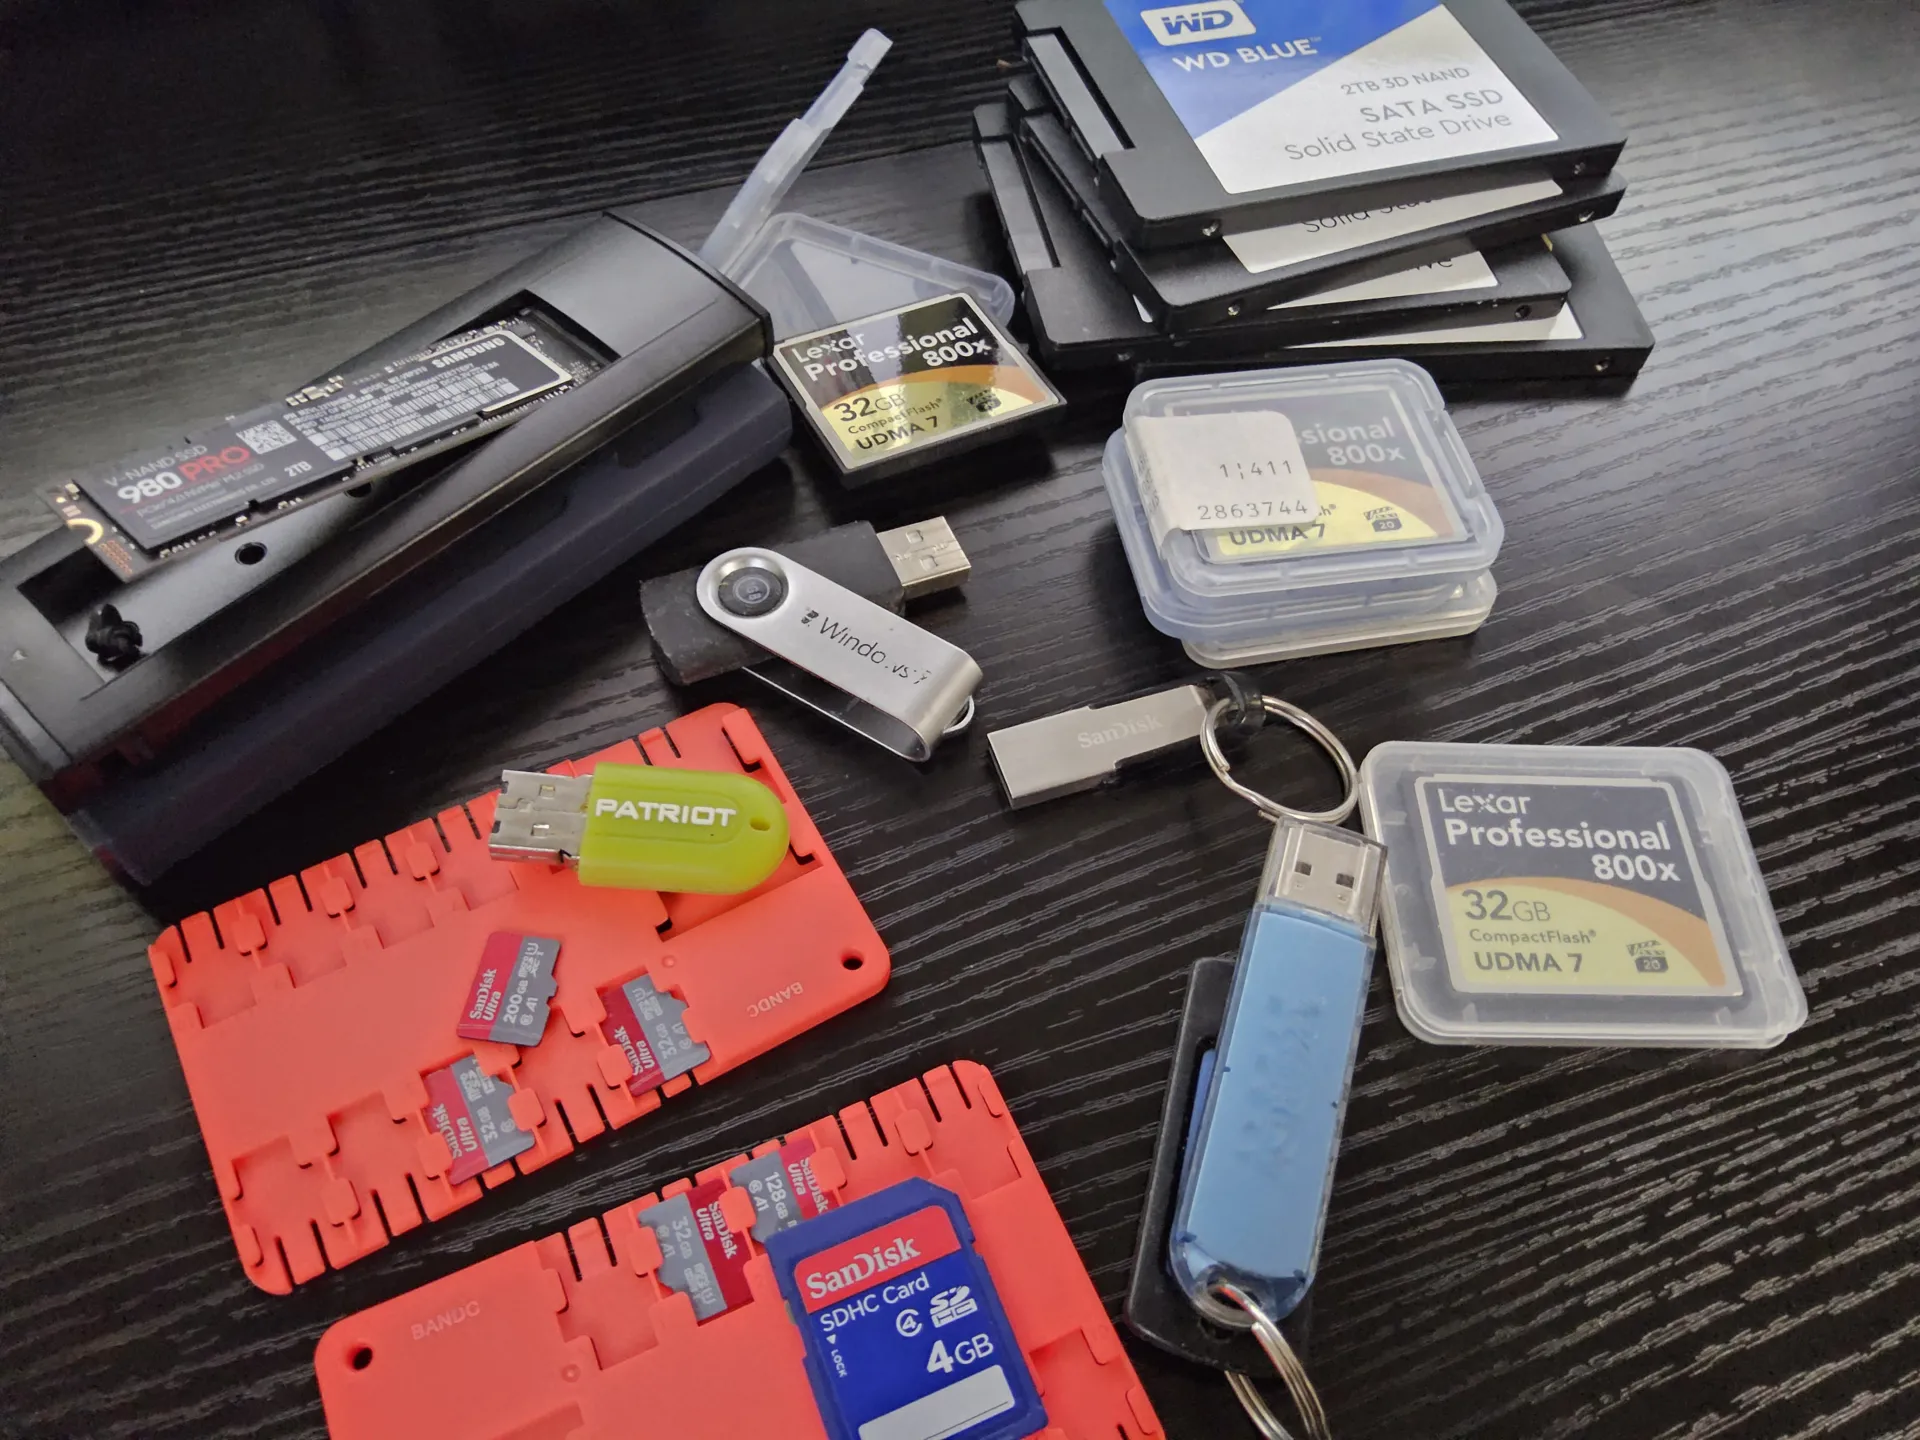
From memory cards to thumb drives to SSDs and beyond, they all use NAND memory. Computers work with 1s and and 0s, high or low, on or off. NAND devices store a small electrical to designate a 1, lack of charge is a 0. Without power the tiny electrical charge can slowly drain away; the 1 becomes a 0; this is bit rot. The better the quality of the device the longer it can hold a charge, the more the device is cycled the less the charge will last.
Most people assume that if you save a photo to a thumb drive or an SSD, it stays there forever like a groove on a vinyl record. In reality, digital storage is more like a leaky bucket.
The “Leaky Bucket”: How NAND Works Modern storage (NAND flash) works by trapping electrons inside tiny microscopic “rooms.”
The “Leak” (Bit Rot): These rooms aren’t perfectly sealed. Over time, electrons slowly leak out. If too many escape, the device can no longer tell if a “1” or a “0” was stored. This is called Bit Rot.
The Controller (The Guard): Every drive has a tiny “brain” called a Controller. Its job is to watch for these leaks and use Error Correction—a mathematical “guessing game”—to fix flipped bits before you even notice.
Quality Matters: Not All Storage is Equal The quality of your device determines how fast the bucket leaks and how good the “guard” is:
High-End (SSDs/NVMe): These have sophisticated brains that are excellent at catching errors and moving data to “safer rooms” before it disappears.
Low-End (Thumb Drives/SD Cards): These use cheaper parts with “thinner walls” and very simple brains. They leak faster and are much more likely to lose data if left in a drawer for years.
The “Shelf Life” of a Dead Battery A flash drive is not a permanent archive; it is a temporary one.
The “Top Off”: When you plug a drive into a computer, the controller performs “Background Scrubbing.” It identifies weak “rooms” and refills them with fresh electrons. This tops off the charge, essentially resetting the clock on Bit Rot.
Unpowered Risks: If a device is left unpowered for years—or even just months for a heavily used, lower-quality drive—the charge can drop so low that the data becomes unrecoverable.
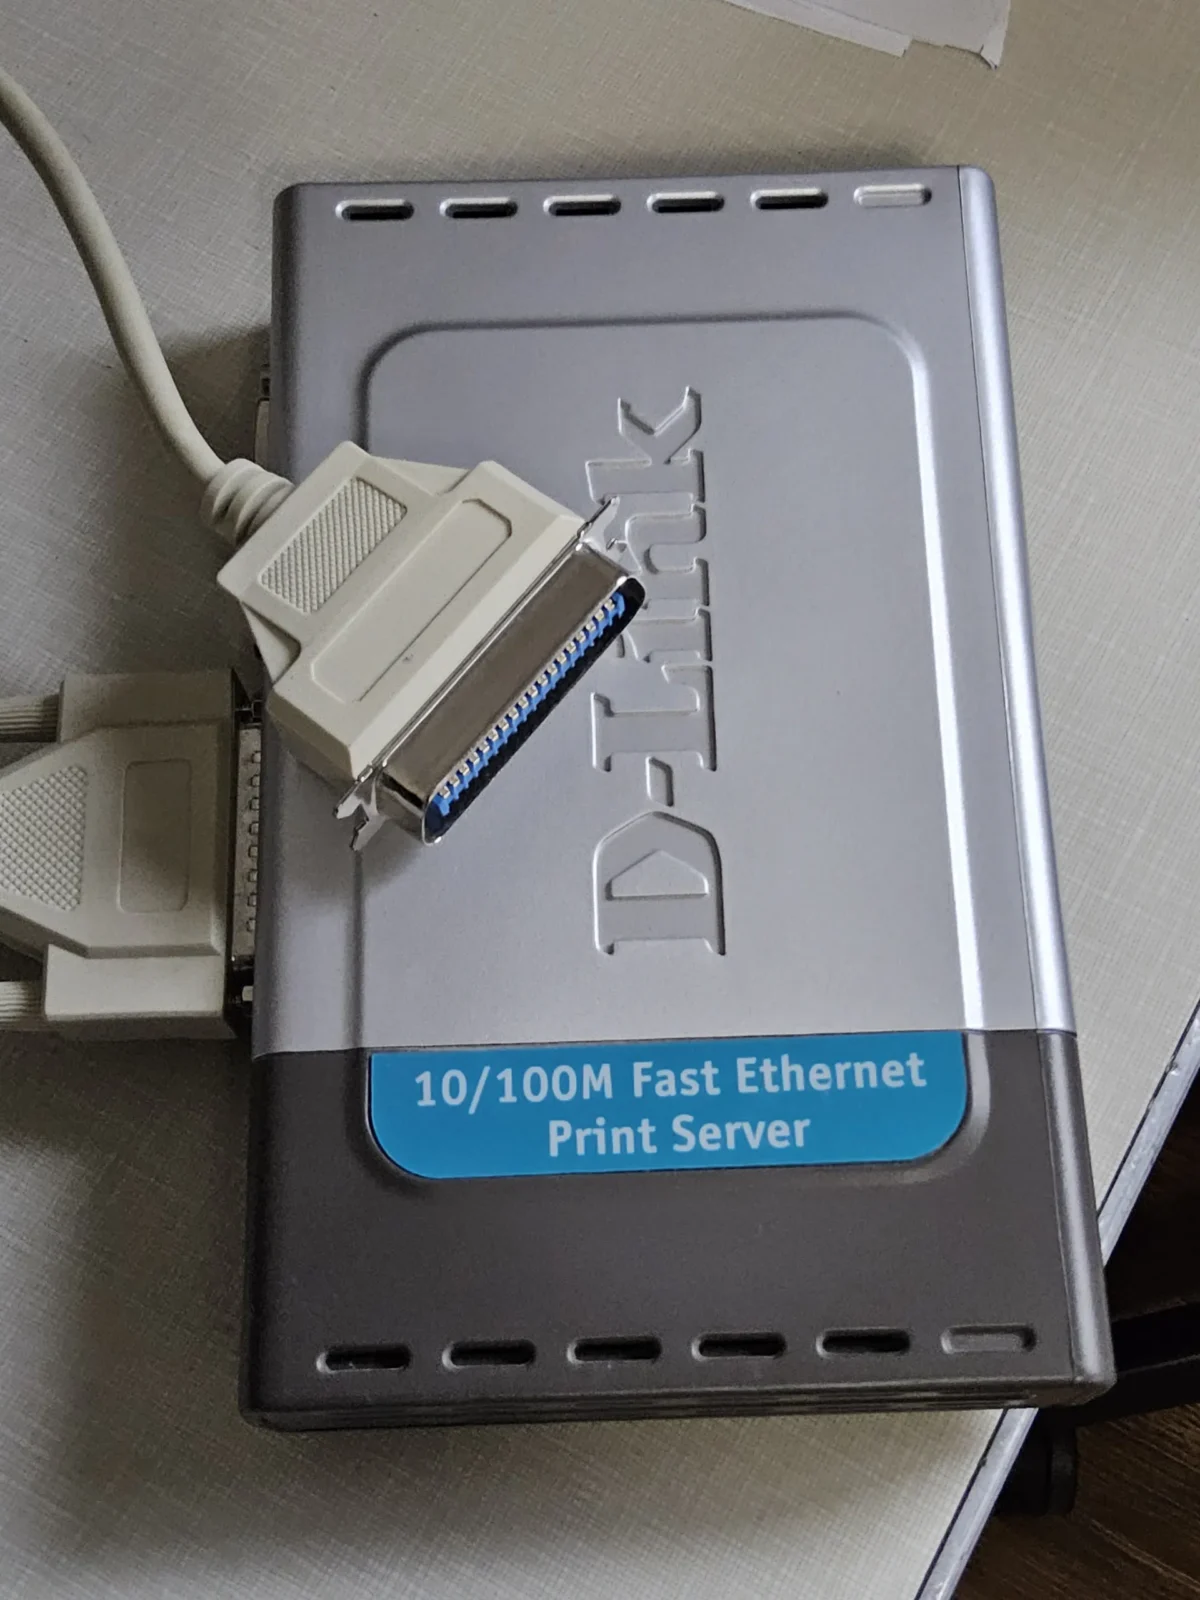
The Printer got bit
our recent water damage and remodel caused a different kind of bit rot with a D-Link DPU-300 print server highlights a related danger for old tech. After 20 years of being powered on, a 10-week stint in storage turned this once-reliable device into a “toaster”—it gets warm when plugged in, but it’s “brain dead.”
Why did it fail?
Chemical Aging: Just like the electrons in a flash drive, the chemicals inside electronic “capacitors” (which manage power) dry out over time.
The Cold Start: After being “settled” for months, the shock of new power likely caused these aged components to fail.
The Lesson: While digital storage needs power to keep its data alive, old hardware often needs power to keep its physical components from seizing up. If you have “old faithful” tech, leaving it unplugged for a long duration is often the final straw that prevents it from ever waking up again.
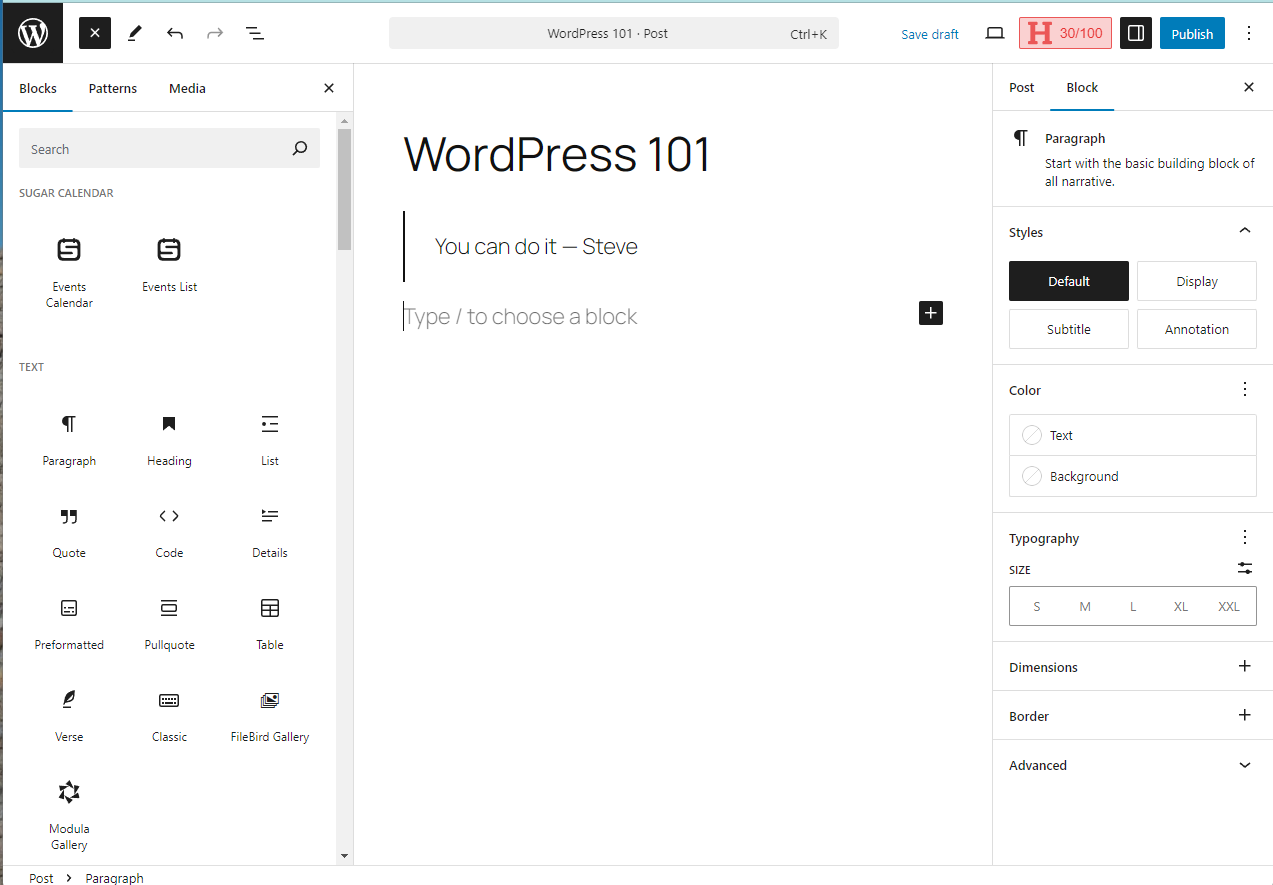
If you can type you can create a website. If you have an artistic eye you can make a pretty website, or use the supplied proven themes. If you can take a picture with your cellphone, and use drag and drop to copy that picture, you can add it to your website. From there it’s up to your time & interest as to where you take it.
The cover photo above shows an image of the UI for creating this post. The left side has the blocks/widgets for laying out the elements. The right-side panel is for settings on some blocks and some additional manual styling.
There are lots of YouTube videos on using WordPress, from short overviews to hours long deep dives. Watch a few videos, play with WP, throw it all away, do it again and you will start to get comfortable building a post with images, quotes, columns, groups and be a web guru in no time.
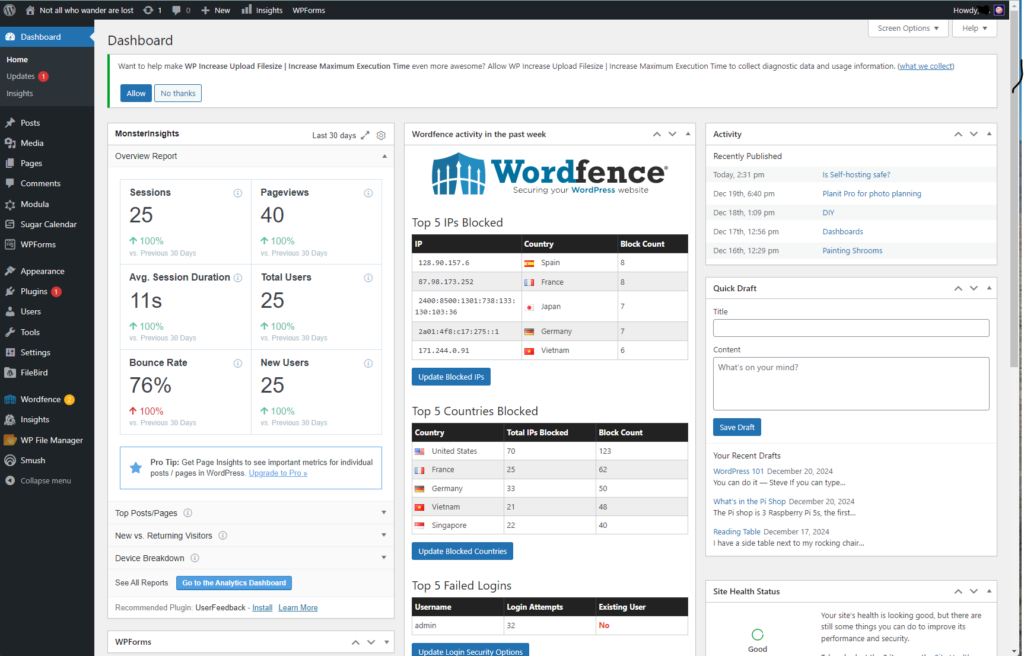
Another one of those dashboards, this is the main one for WP where you can monitor site stats or jot down notes to start a future post, or of course navigate with the familiar left navigation to other features and functions to keep a site working.
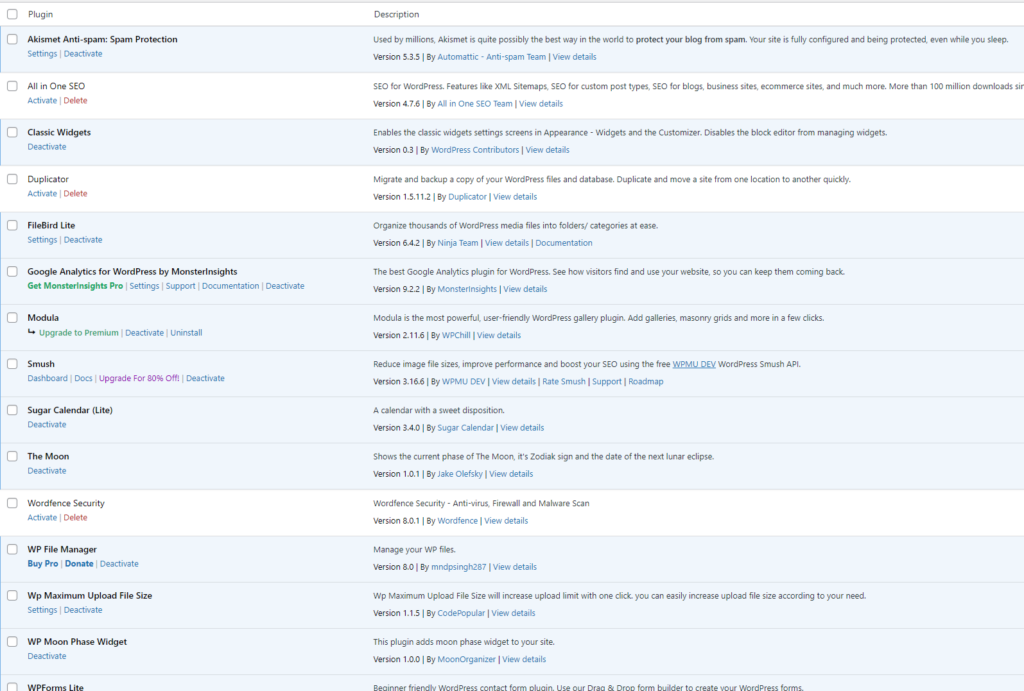
I happened to read an article today about the co-creator of WordPress, President of Automattic, head of the WordPress Organization and owner of wordpress.org, who is in a tiff with wordpress.com; this has been in the news the past few months and not worth pursuing here other than to say he’s a great proponent of open source, the main thrust of WordPress Organization, but he’s not opposed to making a profit via plugins; that’s the reason things are so bare bones.
That explained quite a bit about my experience with WordPress. Everything on this site is done with the plane jane vanilla WordPress or a few free plugins, which are sorely needed and barely work. But, hey, it’s all free, shows what can be done and whets the appetite for that hidden feature that a few dollars will enable.
WP comes with a media library, but it’s one big bucket, no subdirectories. If you want that functionality there’s a plugin for that. Unfortunately, not only are the good features disabled without paying, but the other plugins won’t recognize the sorting and subdirectories you’ve added, because they don’t know about the plugin. So, when you want to add an image to a post you have to find a thumbnail from the ever-growing pile of thumbnails.
For the photographers out there with the multi-mega pixel sensors, wanting to highlight their work in pixel peeping splendor, be forewarned, the default maximum file upload to WordPress is a measly 2 meg. This setting is not easily changed, for the neophyte (me). It’s in a config file, that the default Docker install makes difficult to access.
I ended up removing and discarding the WP container and recreated the Docker script to install it, specifying the install path and adding a database management tool to the stack. About the time the new container was up and running I’d found a free WP plugin that would let me set the upload to a new minimum for the max threshold at 16MB with option for much larger. But I’m serving from a tiny underpowered Pi, so I won’t servr any large images.
In fact there’s another plugin Smush to squeeze and smush images even smaller for faster load times, I am using that plugin getting a whoping 8% compression.
My basic approach to this site has been that I’l put in the time to learn how to do what I want. I’ll use the free tools to see how far I can push them and how much I can get from them, before I throw money at it. There are several plugins that do the same or similar functions so you have to shop around.
From some articles found while researching a gallery to use with WP I was steered to two, I tried them both and have chosen the Modula gallery. It doesn’t recognize the subdirectories created by the media management plugin, but that plugin recognizes the gallery plugin structure, which are the same. I’ve found that importing directly into the gallery not only saves a step of loading the gallery, but the bigger task of finding the correct thumbnail to load from its one bucket view of all the media.
For Calendars there are several, but they all tend to be for ticketed events. For what I wanted they were overkill. I’ve chosen Sugar Calendar as the best fit for my needs; I just wanted something I could share date for good celestial photo ops, these typically occur for a few to several days. Reoccurrences are not part of the free calendar package, but with the help of the database management tool I added to the build script I looked into the database found the table with the calendar events and editing 3 fields on the event record to get it reoccurring on the calendar without being all day events. A sunrise from Portland Women’s Forum does reoccur, but isn’t an all day event on the calendar now.
There’s a lot of power & capability in WP that I have yet to utilize, first I have to learn how to wield it. That will occur on a needs basis, when I need it I’ll learn it; maybe by then I can just say, “make it so.”
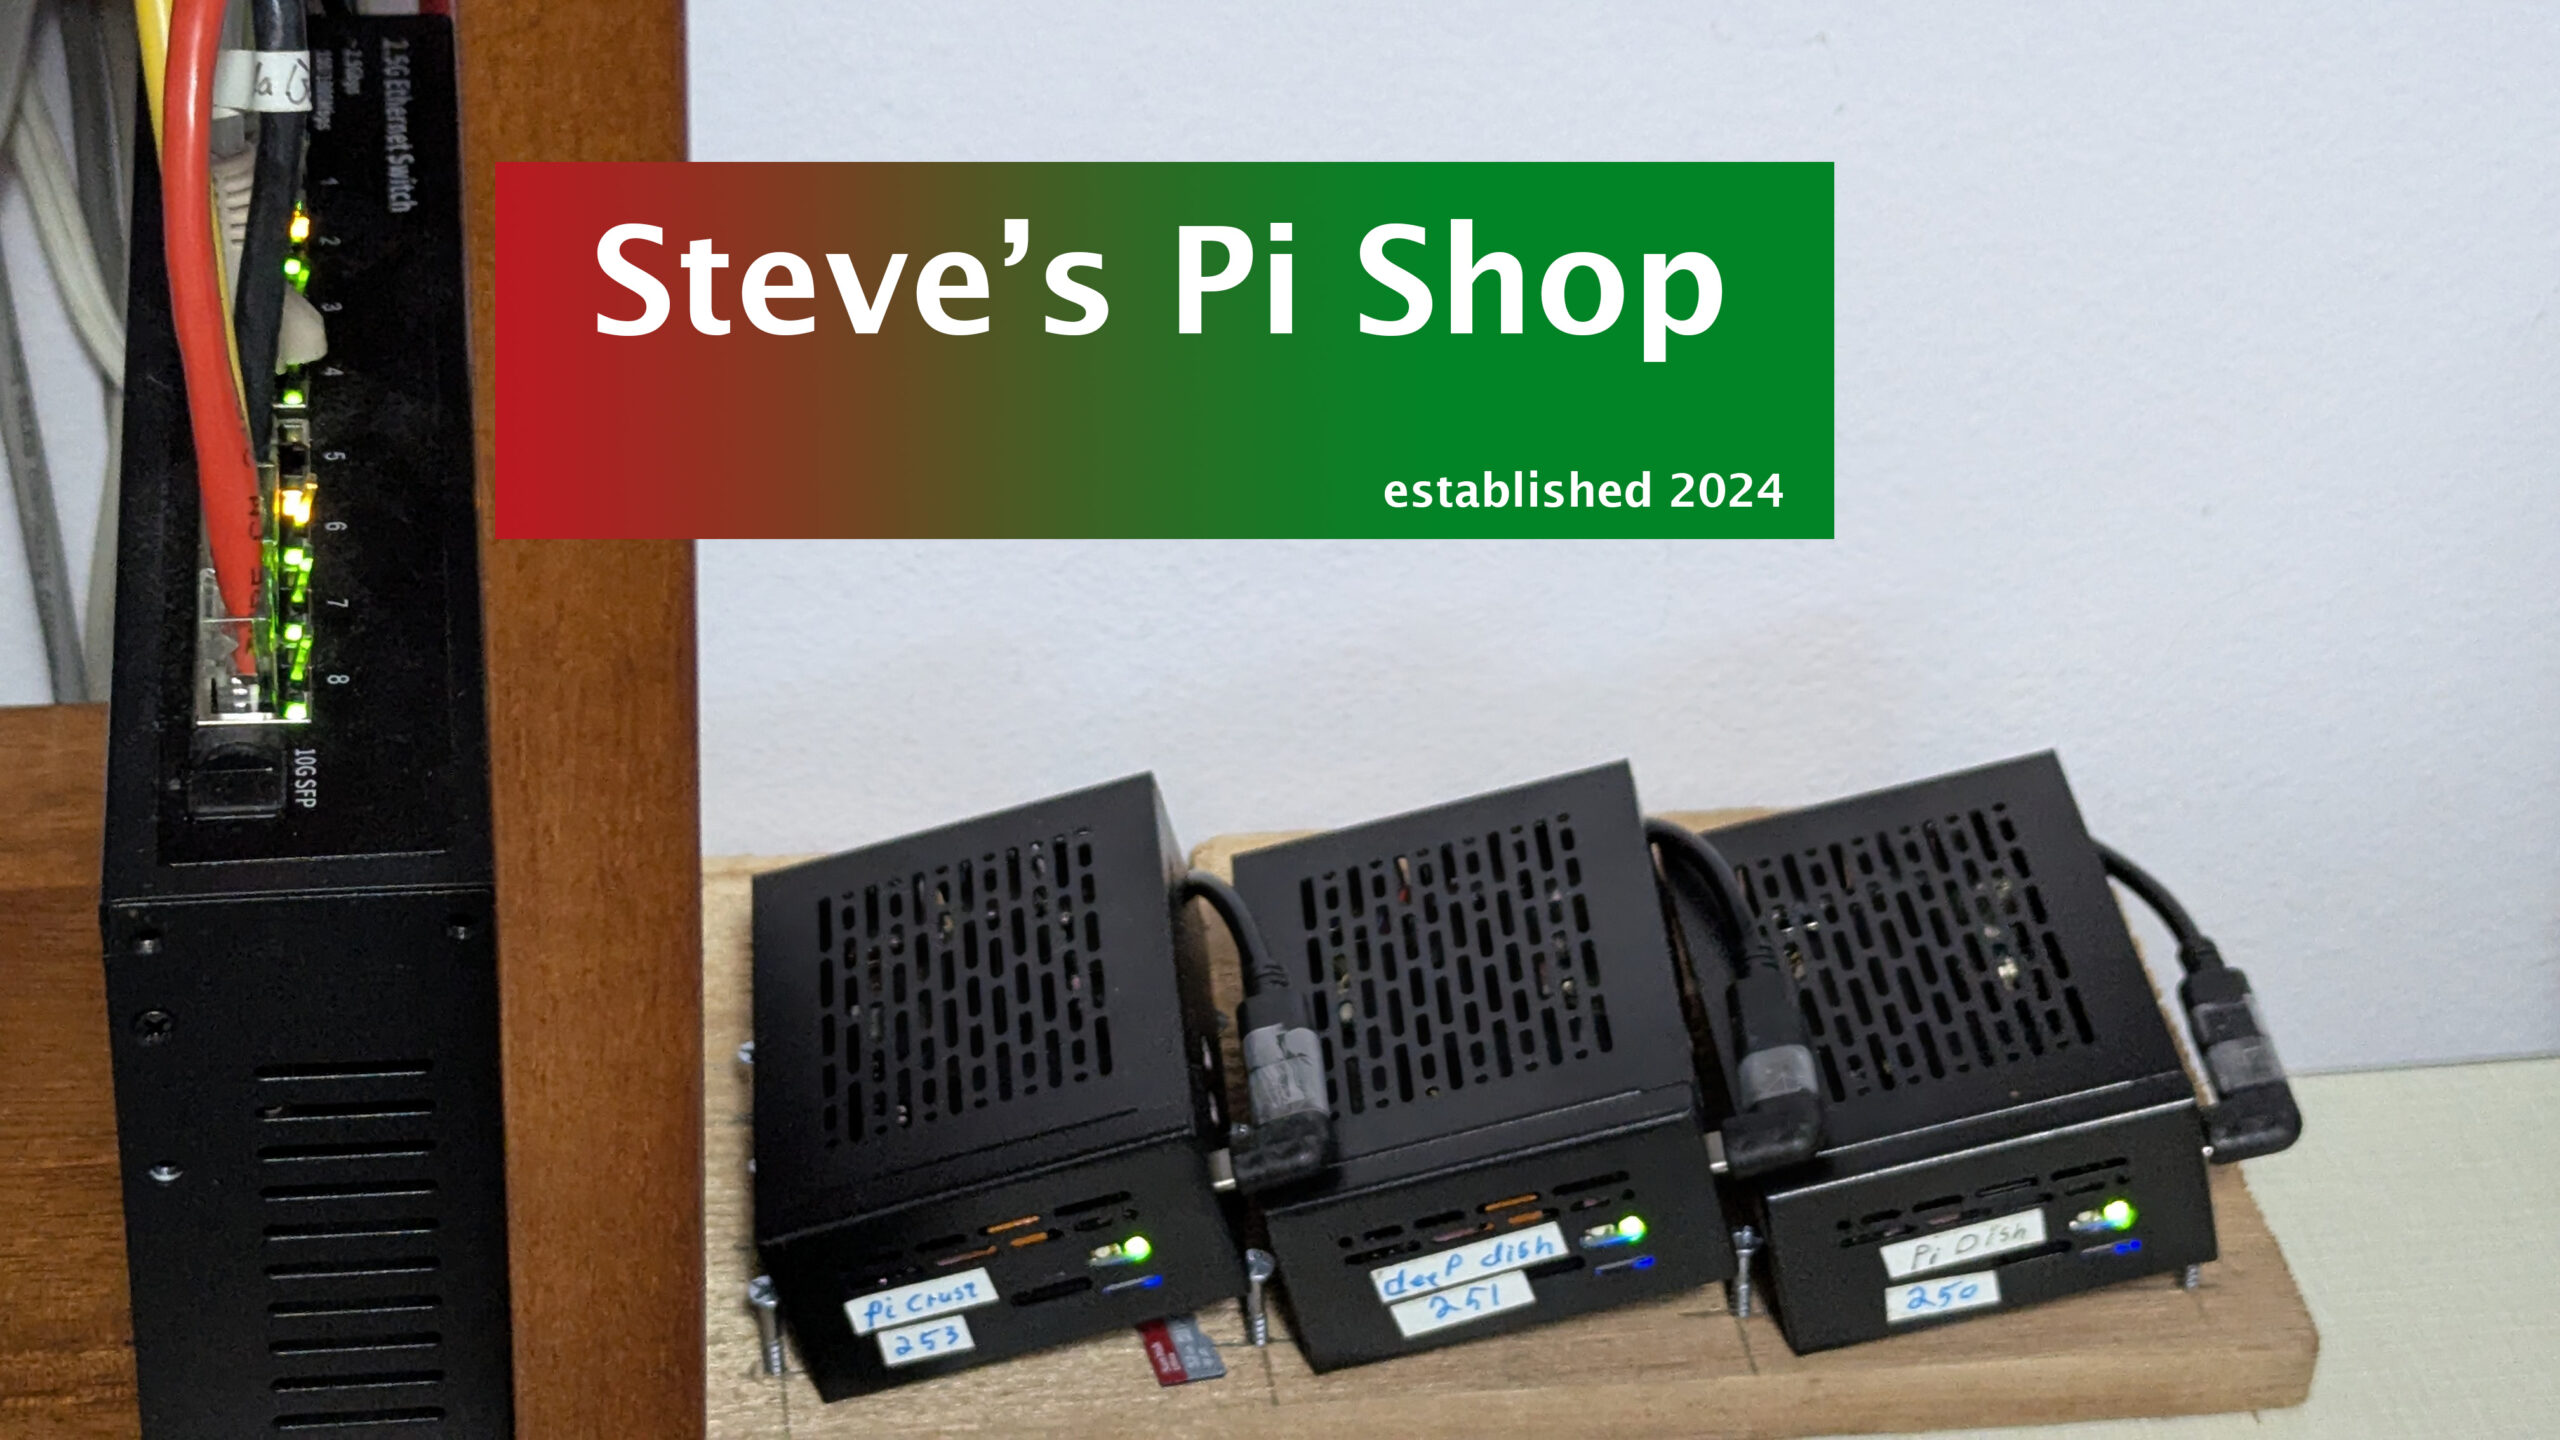
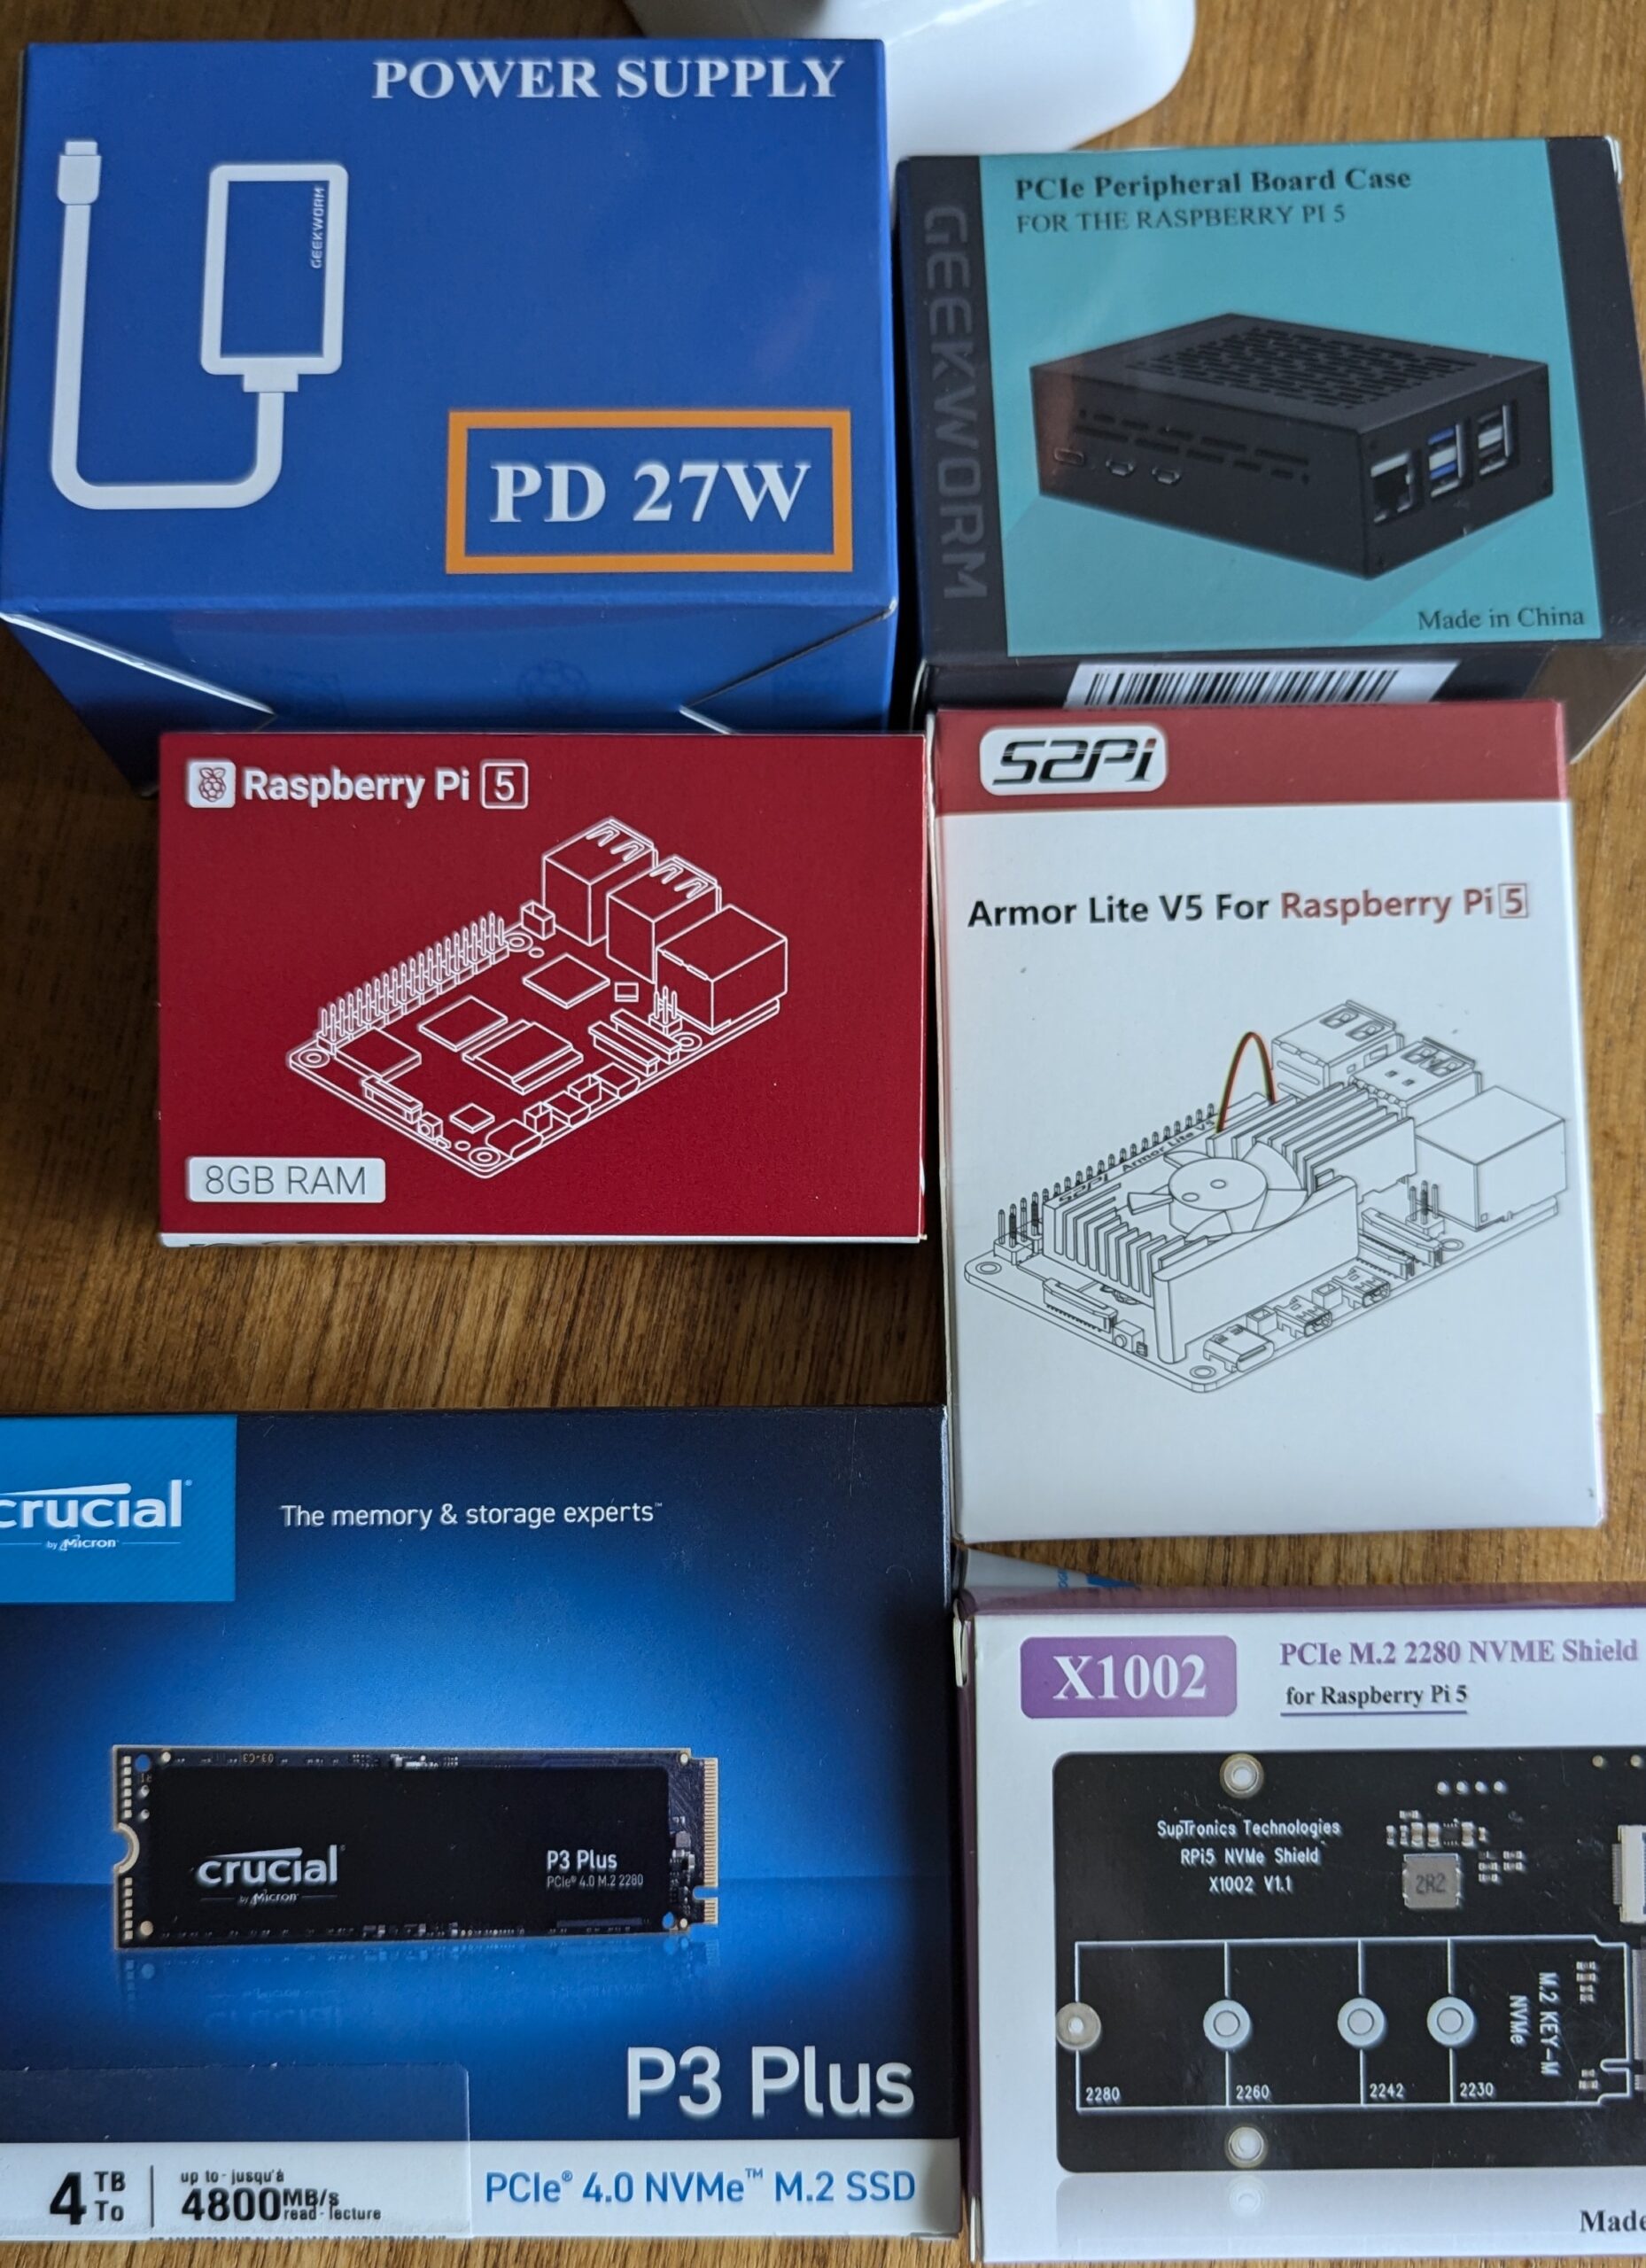
The Pi shop is 3 Raspberry Pi 5s, the first model with PCIe so they can take real storage media, like NVMe M.2 drives found in modern computers.
The Pi devoted to public facing traffic, like this website only has 1 TB, so there is a limit to how much I can say or the number of pictures I can post, But not to worry, that is still more than I can fill.
The other two Pis have 2 TB each for my media server, private cloud and home file storage.
One thing I’ve learned in learning how to build every part of the Pi shop is to ask for help. I am not a trailblazer, someone has done this before, and most likely made a YouTube video about it, certainly a blog post. So, there is no reason to feel stuck or get frustrated, watch a video, read a blog post. Still stuck, ask Google, which will probably point you to a subreddit post on your exact predicament & solution, or ask the new young turks, Copilot & Gemini, they have each been very helpful on a wide range of topics from philosophy to software configuration scripts.
The Pi shop is built from free Open Source software; that’s free as in air & beer. It does come with a cost and that is born by teams of dedicated people with vision about the success of a piece of software; there are ways to provide support. Those teams may be a small handful to hundreds of individuals, typically geographically dispersed, checking in changes to a common repository.
Git is the de facto standard repository for source code control, a way to track changes to a body of code to accomplish a task. Source code control is a requirement for a multi-programmer project to eliminate bugs or identify when and where they were introduced.
Github is a repository of source code repositories. In days of old you would go to the soda fountain or mall to hang out and be cool. Today, one way to show your creds and be cool is to have, or be involved with, one or more code projects on github. Anyone and everyone is free to look at the code in open source, so bugs get caught and little chance of malicious code being inserted, when downloaded from a reputable source. If others like what you are doing they can join the effort.
Think of it as a form of digital busking (playing for change$) or a digital jam session.
With that out of the way, here are the apps/services currently on the Pi shop:
Jellyfin, the media server currently holds 128 movies ripped from my DVD collection, they take 113GB of space, about 1GB per. The music collection has 500+ artists performing more than 2,000 songs. Family photos span the past 75 years, with more being added. Home videos and time lapses get there own space. There are several plugins available for Jellyfin, from adding closed captions to scouring the web for more content.
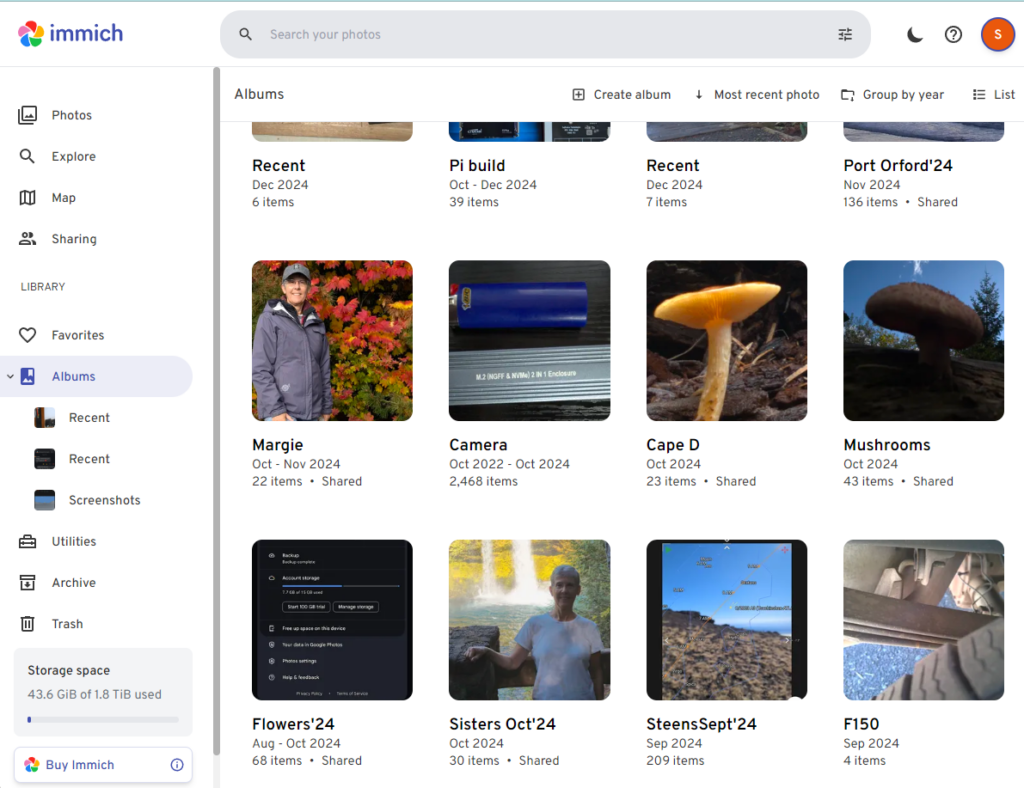
Immich is the replacement for Google Photos. With a 2TB sandbox for my cellphone images to automatically upload to I no longer hit a 15GB ceiling that Google imposes before the meter starts running on paid storage. A very powerful image program that now with a domain name it’s easy to share albums selectively with anyone anywhere
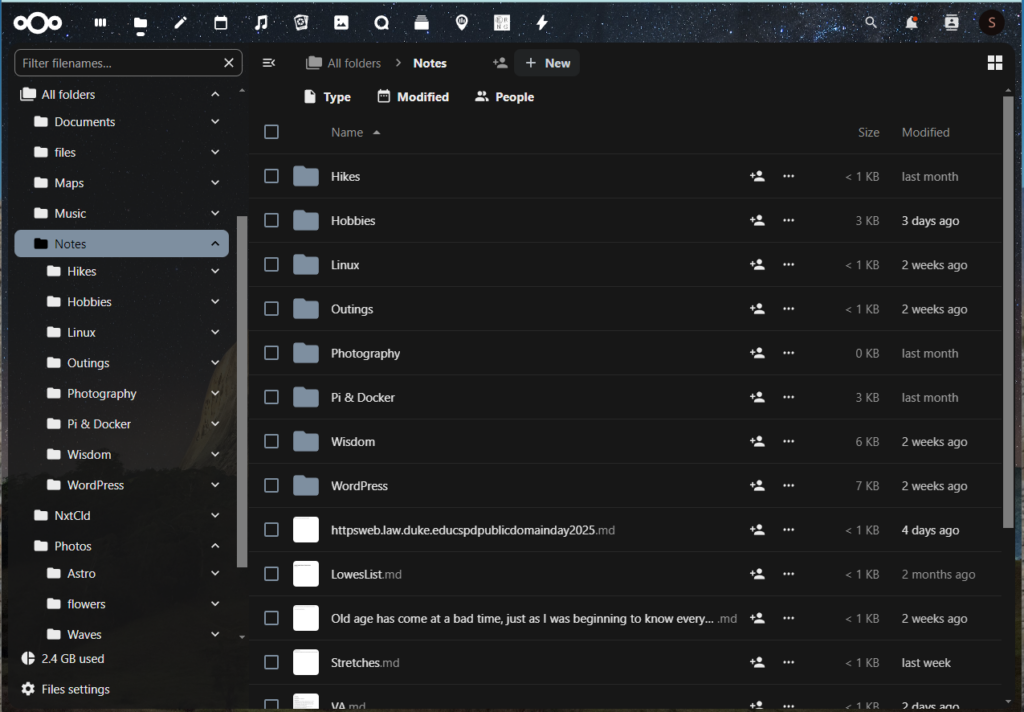
Nextcloud is the private cloud space for the Pi shop. Here, notes, files, images, video, links and all the other digital debris & cyber dust balls of the modern connected life can be kept safely and securely. This is also touted as a collaborative environment for working with others on projects. I haven’t looked into that aspect of it yet, been just a bit busy on related endeavors. Nextcloud also has plugins to extend the functionality, white boards, Talk (an in the app Zoom), image galleries, and many many more.
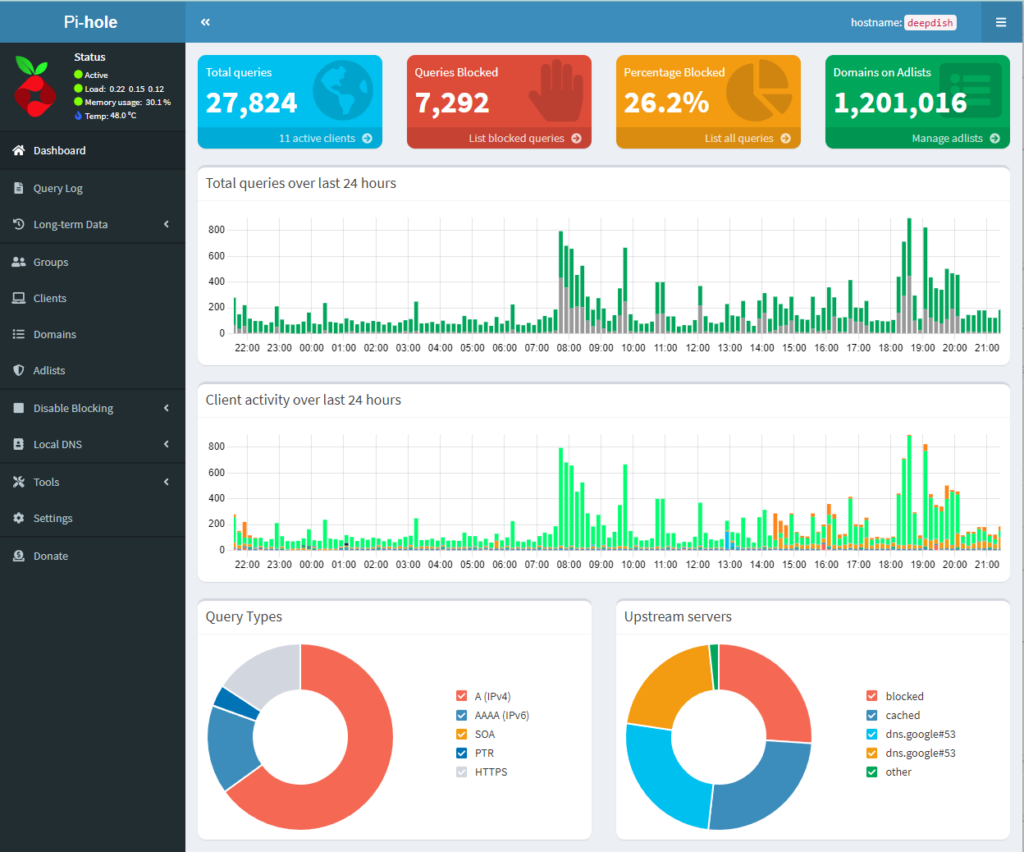
Pi hole was my very first Pi app. I got it to address my desire for add free browsing. For print/display media this works great across my entire Lan. Not so much for YouTube, but there may be solutions there too, stay tuned.
The Pi shop is running three different image gallery/album apps for evaluation, Pi Gallery2, Piwigo & Photoprism. Each are strong contenders with some great features. However, now with the website, Jellyfin & Immich I’m not sure where or how they might fit in the solution, but that’s where I thought I was going when I started, a supercalifragilisticexpialidocious digital memory display thingamabob. (when was the last time you fit that into your discussion correctly)
To maintain the Pi shop there are a handful of services running on each Pi. The Docker framework to host the containers providing the various services. Portainer to administer Docker and the Containers. Grafana with its supporting cast to provide a graphical look into the inner workings of each Pi. Then Homer as the dashboard for each Pi and Homarr as the dashboard for the network services mentioned.
I had the above in place and working, mostly, when I started realizing using Tailscale, while working, didn’t have the ease or elegance I hoped for. The Immich and Nextcloud apps didn’t like using the internal IP. Getting a domain name (Dec. 1) and Cloudflare tunnel (Dec. 2) were the next steps taken. This made the apps happy when at home and away.
The domain name also meant, for the price of learning WordPress (oh Joy, another learning opportunity), copying a few image files and trying my hand at writing content to inform and entertain. I too could be a publishing mogul. Or was that midget?
WordPress is the publishing app of choice for nearly half the web. It’s sort of a ménage à trois between a word processor, a spreadsheet (range selections & grid matrix) and a publishing program, except that’s what it is. (this is slated for one or more upcoming posts)
Over the course of a week, in my spare time, I became productive enough to create a basic no frill website. In the two weeks since then I’ve been correcting beginner mistakes and creating some content for visitors, i.e. is this page and site.
How can I securely and safely run a self-hosted website from my home office you may ask? In a word, curiosity.
The Pi serving this page has no original data, only copies. So there isn’t a concern with data loss. The first line of defense is a strong password, done. Second is a strong firewall and no unnecessary ports opened, done & done. Next use secure connections, note you are on HTTPs, just like shopping or banking online.
Securing the Lan is on me. I’ve enlisted one of the web’s bigger players, Cloudflare with their zero trust account, to create a secure encrypted tunnel from my Lan to their servers. They also provide the secure connection between your browser and their servers before putting you into my secure tunnel.
I’m less than a gnat on the behind of the elephant that Cloudflare is. I’m hiding in their shadow while they keep the internet safer. The Pi shop holds no secrets and is an underpowered computer well suited to small time serving needs. I doubt I am of much interest to nefarious players and have little to lose, at worst reformat and rebuild the Pi.
Part of the zero trust account is that Cloudflare takes care of the malicious traffic. Supposedly only legitimate web requests get sent to my server, time will tell.
In order to create a zero trust account with Cloudflare requires having a domain name. A website was not on my radar when I started my Picture Pi project but became easily possible with the groundwork already laid.
As I built out the Pi shop I realized accessing it from the wider web would be more than cool, it would be helpful. How can you use a private cloud if you can’t get to it when out and about?
Your ISP has provided you with a public IP address for your home Lan/router. Unlike the phone company or the post office, who don’t change your number or address, your ISP does change your public IP address periodically, unless you pay extra to have it not change.
What address or phone number would you give out if it changed once a year? That has been the problem trying to access self-hosted services from the internet; here today, gone tomorrow, because the address changed.
One of the earlier ways to get around this change of address was through the use of a third party who would listen to a periodic ping from your system, when it noticed the Dynamic IP address changed it would update it’s records to the new address. This way it could route traffic intended to your network correctly. Duck DNS is one provider for this type of access. I didn’t start there.
I started with Tailsscale. This is a node based architecture requiring a small piece of software be installed all the computers or smart devices you want to connect with, up to 1000 of them per user. And you can add two friends, all for free, after you create a Tailscale account.
Tailscale uses that installed app to create secure encrypted tunnels, but these are node to node (device to device). I’m using this as a secondary access for my Pi shop services now, relying on Cloudflare for primary access.
If I encounter problems I can always lock things down, page by page, the entire site, the entire tunnel or a combination of each of those means. My preference is to leave the website open as it is, while keeping the rest of the Pi shop locked down for my use. I’ll see where usage leads.
What is the dash in dashboard? As a verb it means to travel in a great hurry. When a horse dashes off (noun), there is often debris flung behind. The debris from the horse’s dashing is also called dash.
In carts and wagons boards were placed behind the horse to protect riders from getting a load of dash in their lap, hence dashboard. This became a great place to rest your feet, hang your cup-holder, even mount a chalk board to monitor how many horsepower you were using.
The evolution and standardization of system control & monitoring, climate adjustment and entertainment selection has meant that just about anyone can get into just about any vehicle and make use of the ‘dashboard’ to control the vehicle.
In computers it’s much the same, a dashboard let’s you monitor & control a system without knowing how to build it, just know if it’s working properly. My Pi shop has several dashboards, they too are fairly standardized so just about anyone can understand their use.
Doing things in triplicate helps me better remember how to do something; standardization also helps. In this case all of my Pi have the same base build up through Docker, Portainer, Homer, the Grafana monitoring stack, and the dashboard above . From there each Pi has a different set of apps and services to spread the load.
This is the Grafana monitoring dashboard, the top row gives me, at a glance, the status of key indicators for the system. The lower panels provide information on specific resource usage by container, either in aggregate of any one of them can be isolated by simply clicking the container label in the panel. The data is available from minutes to weeks or months at a glance. This Pi-hosted YT video goes through the set up,. one of the few with preconfiguration steps
One common interface is a navigation pane on the left and a detail pane on the right, this has been used by the file explorer for decades and it is still common today because it is somewhat intuitive.
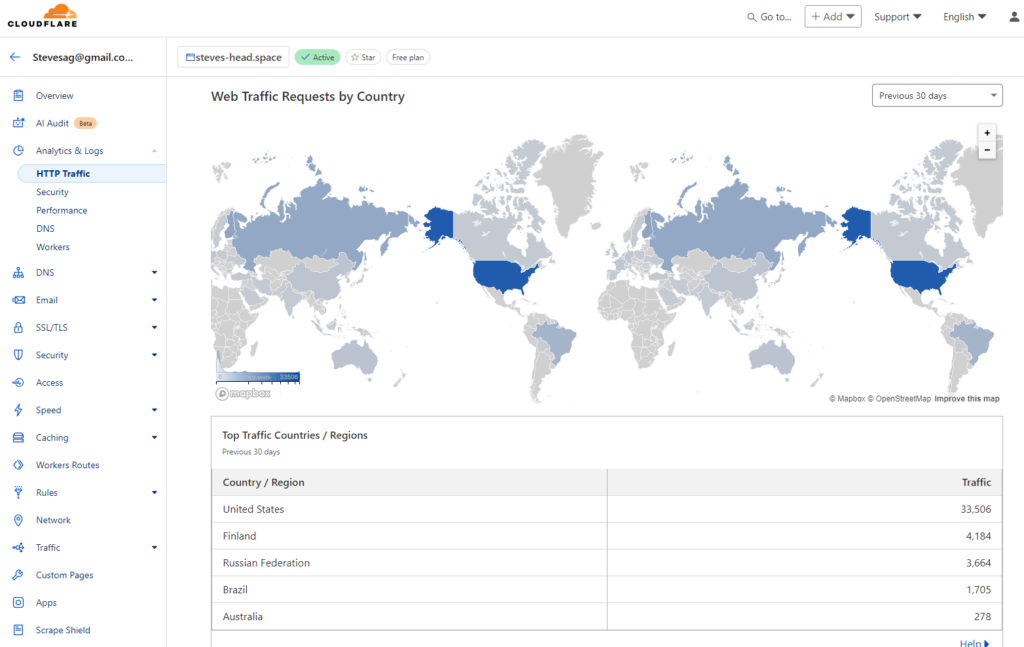
Cloudflare uses the 2-pane, left nav, right detail user interface. I’m writing this about 2 weeks after getting a Cloudflare account and tunnel, the domain name & URL have not been published. I believe most of this traffic is from bots; although there have been more than 90 attempts to log into the WordPress admin account during this time as well, and that isn’t from bots.
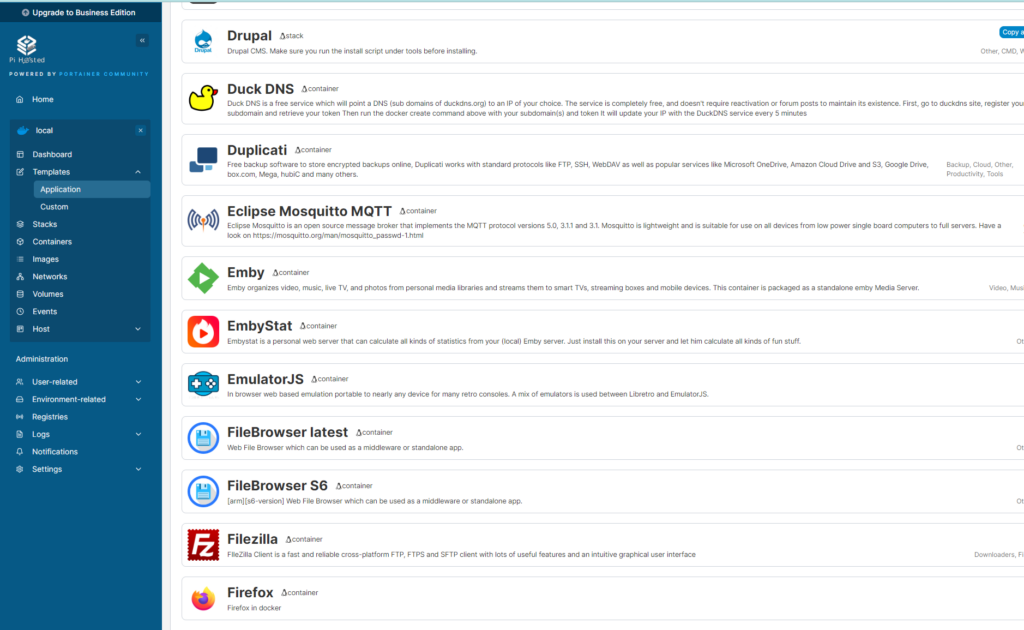
Portainer, the Docker container mangers also uses the left nav, right detail panes. These are a few of the 200+ templates available with the Novaspirit Tech’s template file. Most, with one click, will deploy the container(apps & services); some are noted with pre-work to ensure a smooth install, mostly by creating an install directory.
Immich, my Google Photos replacement, works much like everything else, left nav, right detail. I’m still figuring out the workflow, but no issues so far.
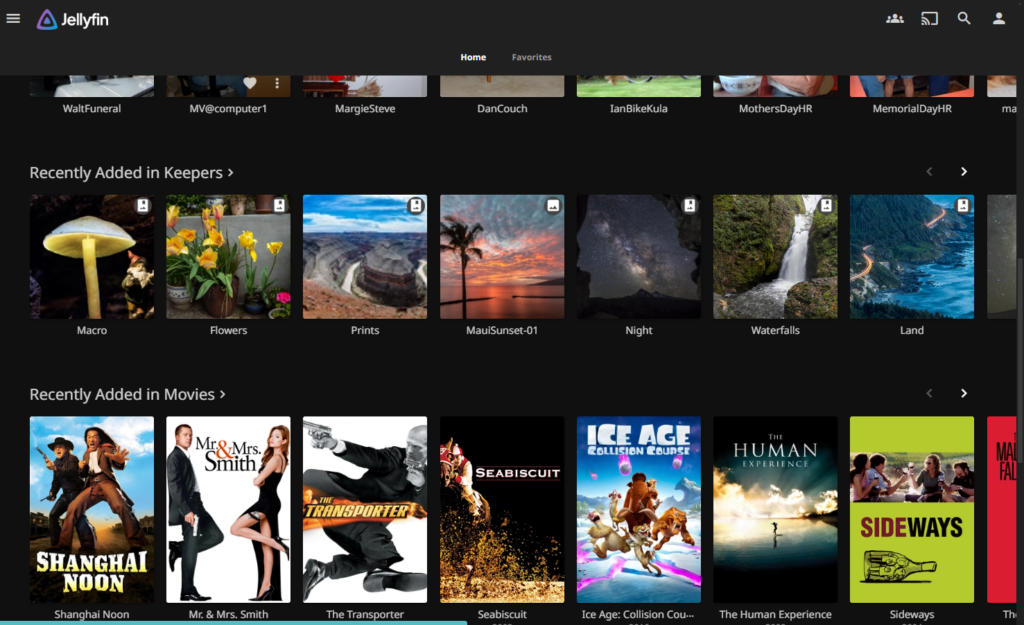
I’ll end my missive on dashboards with this screen shot from Jellyfin my home media server. The base interface is similar to Netflix & Prime. It also has the hidden, fly-in left nav pane to fall back on.
In olden days it was the backside of the dashboard that was the working side catching all the debris. Now it’s the front side, often in a slap-dash form that displays all the debris so we can try to control it. Sorry , I have to dash.
The .sky is not the .limit. TLDs now go from A to Z with hundreds of stops along the way and more added all the time.
To get an idea of some TLDs and who controls them this wikipedia page lists several hundred. Most professions & sports are covered, here is a small sample:
actor agency band beer bingo cafe camera
cards cash cheap dance dating dog football
fyi gallery gripe house kitchen love money
ninja rocks tires town website wtf xyz
Another thing you will see is that corporations have locked in their names as TLDs. I don’t know if there are any checks & balances to this or not, but .camera is available as a TLD, but .Canon & .Nikon are not. Potentially I could get a domain “canon.camera”, but not “camera.canon”
One thing to note, not all registrars can register all domains, some domains are limited to specific registrars. That is not a big deal.
First I registered my .space domain through namecheap.com. Then, after creating an account with cloudflare.com I used the the DNS records provided by Cloudflare back on namecheap so my domain would use the Cloudflare DNS servers.
Another inexpensive registrar I seen mentioned to get your domain is Porkbun.com
When a domain name is registered a valid name, address and contact information has to be provided for the responsible party. Namecheap and porkbun hide this from inquires by default for free; GoDaddy and others charge for this service. You will want to hide this from prying eyes, but why pay extra.
Over the past 10 years there’s been a continual growth in the number of domain names issued, although it has slowed. In the US, there are 133 domain names almost 100 million more than the next closest country at 35 million. The new TLDs might cause an influx of new domains and websites, and there is not a 1:1 connection between the two, subdomains count as one domain and one domain can host multiple websites.
You can teach an old dog new tricks, but the dog has to want to learn, and it’s still harder to do. One way to help is practice, practice, practice. That was all the justification needed to add a 2nd Pi to my Pi shop.
With two Pis I had to start thinking about what apps or services would be hosted on which Pi. My choices for some must-have apps were narrowing down.
Immich as the image backup and album sharing replacement for Google Photos was a slam dunk.
Jellyfin as the media server for movies, music, home video and pictures was also a slam dunk
Nextcloud is groupware, software for you & your family to share file, calendars, to do lists, etc. your personal cloud storage
One reason to go down the self-hosted route is to avoid storage fees. After the first 15-20GB you have to pay. I now have TBs of storage at no additional cost. And my images and data won’t be used to train AI.
After that short list trying to select a photo album/gallery software is proving more difficult. There are three main contenders left after the first round.
Pi Gallery2 — The main thing with this app is that it just uses the subdirectories and images to create the galleries; they call it directory first. This is something important to me. Another nice thing is that it is fast.
Photoprism — This too uses the directory structure and has a great facial recognition, but it only allows one user, so not a program to use for public viewing, bummer.
Piwigo — I have yet to install or play with this software to complete the evaluation of which to use
There are a few downsides to online galleries and that’s users. Not the users themselves, managing there accounts; how granular do you need/want to go? A guest account for all to use to see everything, or a per user account so the hoi poli can’t see your family holiday pictures, or some combination of guest & specific users. Either way it means administering accounts.
Now that I have this site, photo gallery services may go by the way side, they’ve been set aside for now. to get the site out. I’ll revisit later.