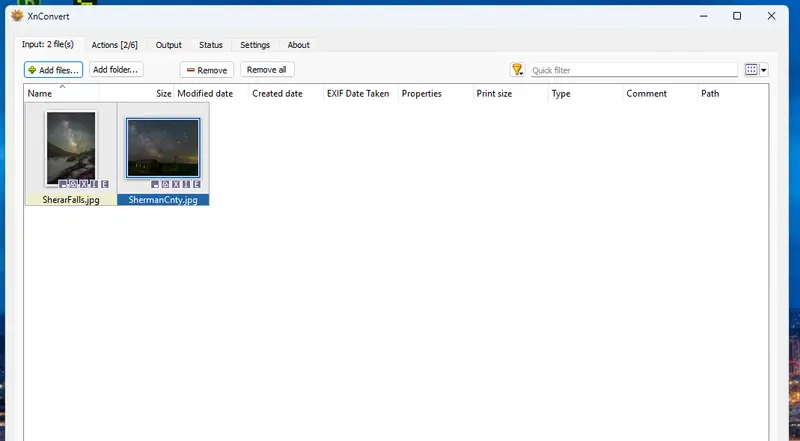
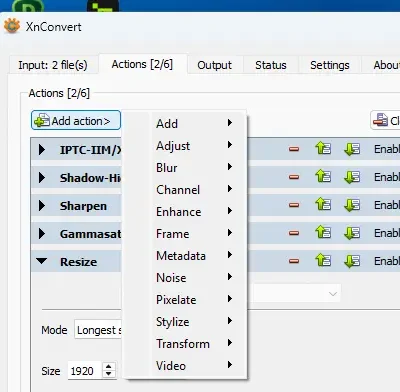
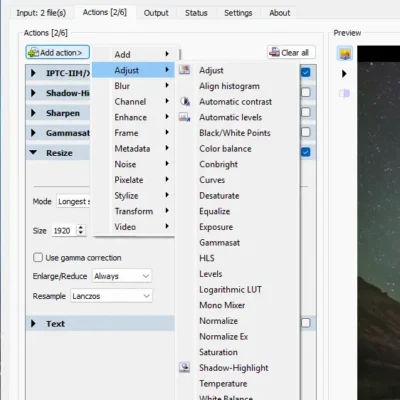
XnConvert is a great tool for resizing and converting images in one go. You can set up scripts by simply saving your settings to reload at a later time to get the same output.
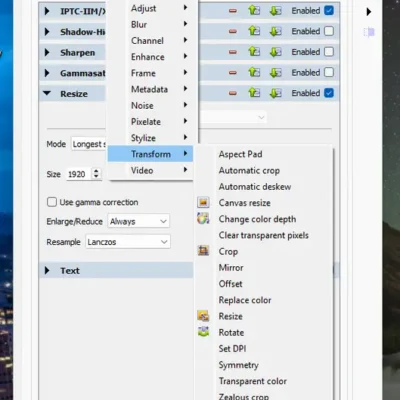
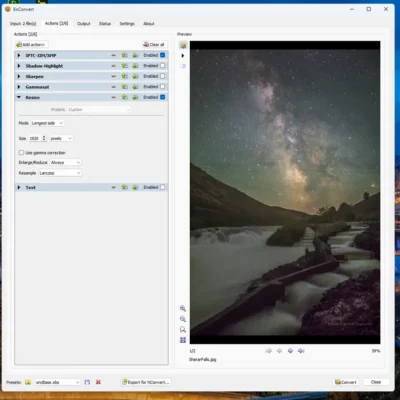
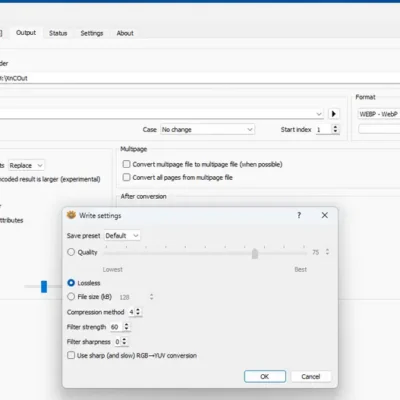
XnConvert is a fast, powerful and free cross-platform batch image converter. It allows to automate editing of your photo collections: you can rotate, convert and compress your images, photos and pictures easily, and apply over 80 actions (like resize, crop, color adjustments, filter, …). All common picture and graphics formats are supported (JPEG, TIFF, PNG, GIF, WebP, PSD, JPEG2000, JPEG-XL, OpenEXR, camera RAW, AVIF, HEIC, HEIF, PDF, DNG, CR2). You can save and re-use your presets for another batch image conversion.
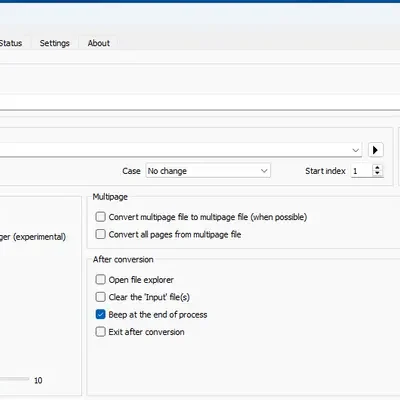
The interface is intuitive with a drag and drop, left to right flow. The desktop version has way more image adjustments than the mobile version. You can set it up to automatically save your actions as a preset and to automatically load the last used preset as the starting point for the current batch. One note of caution, on the output tab I’ve had the radio button switch to the sorce folder, putting the converted files where the originals were, not the desired output folder. Easy to overlook.
I see this as being a regularly used tool in my camera to website pipline.
In the digital age, a photographer’s website is their most important gallery. However, it presents a constant dilemma: how do you showcase high-resolution work without slowing down your site or making it too easy for others to steal your images?
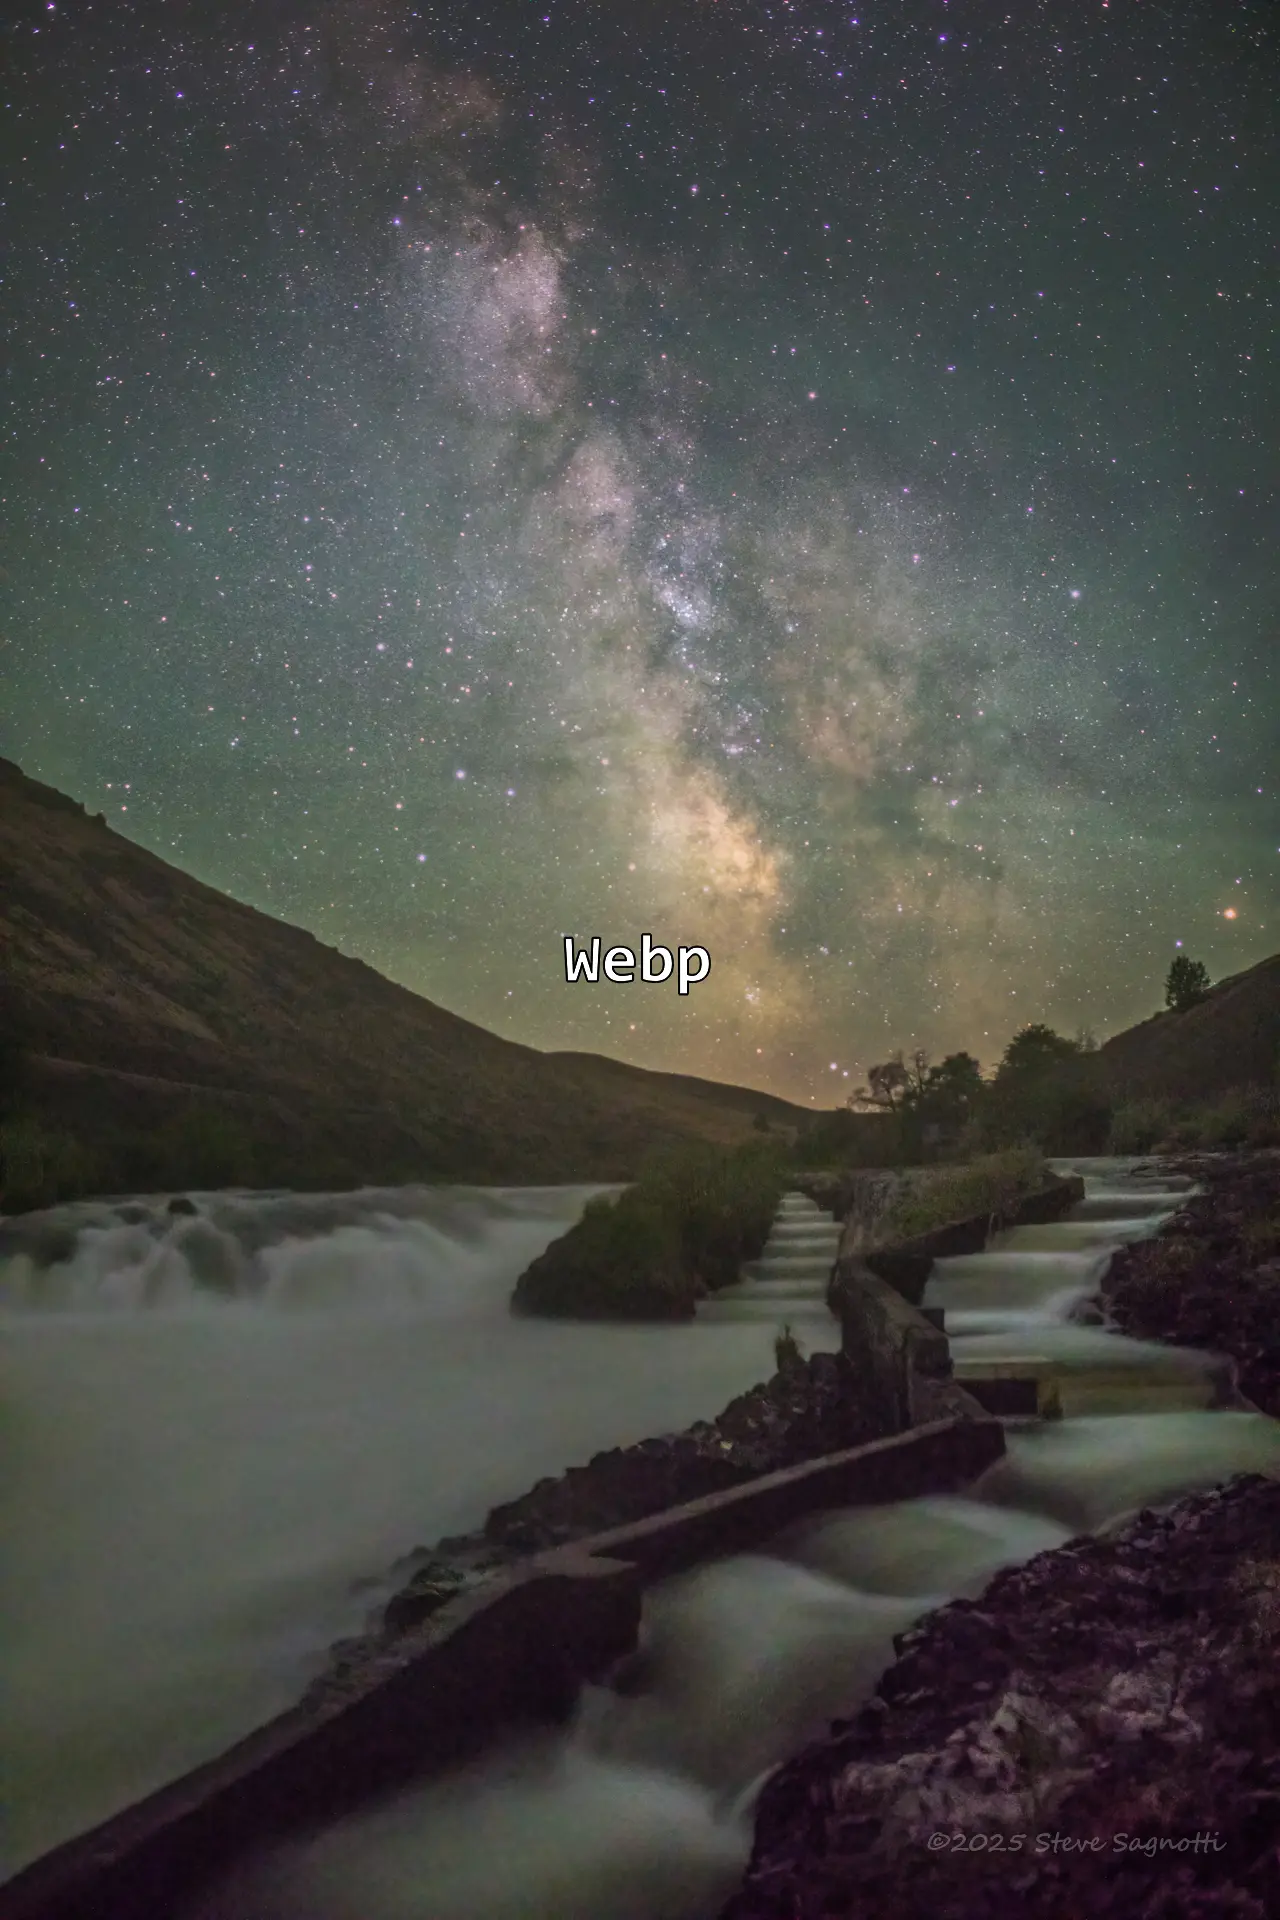
For years, the JPEG was the only option. In 2026, the strategic choice for professionals is WebP.
WebP (pronounced “weppy”) isn’t just a technical upgrade—it is a specialized “delivery format” that offers a unique combination of visual excellence, lightning-fast performance, and a surprising layer of protection for your creative assets.
❐
1. Visual Superiority Without the “Heavy” Lifting
The biggest misconception among creatives is that smaller file sizes mean lower quality. Because WebP uses advanced predictive coding (derived from professional video codecs), it handles gradients and fine details more efficiently than the aging JPEG standard.
The Result: WebP images are typically 25% to 34% smaller than JPEGs of the exact same visual quality.
The Strategic Benefit: Your portfolio can display crisp, full-width hero images that load instantly, even on mobile devices. This keeps potential clients on your page rather than losing them to a slow-loading “spinner.”
2. The “Format Friction” Factor: Deterring Image Theft
One of the most valuable “side benefits” for photographers is how WebP handles unauthorized use. While it isn’t a locked vault, it creates Format Friction that discourages casual scrapers and thieves.
The “Dead-End” Delivery Format
In a professional workflow, you have your Source Files (RAW, TIFF) and your Exchange Files (JPEG). WebP should be viewed as your Delivery Format—the “shrink-wrapped” version of your work.
Generation Loss: WebP is designed for viewing, not re-editing. If a thief “right-clicks and saves” your WebP file and attempts to open it in an older editor or re-save it as a JPEG, they encounter significant Generation Loss. The image quickly develops artifacts and color banding, making it useless for high-quality re-publishing or professional use.
Ecosystem Resistance: While browsers love WebP, many legacy print-shop workflows and older design suites still do not support it natively. This creates a technical hurdle; a casual thief will often give up and look for an easier-to-use JPEG on a competitor’s site.
Print Deterrent: WebP is optimized for screens (RGB). It lacks the deep metadata and CMYK structure required for high-end physical printing. It allows you to show the beauty of your work online while making the file technically “hollow” for someone trying to print it without your permission.
3. Dominating the SEO Landscape
Google created WebP, and Google rewards those who use it. Search engine rankings are now heavily influenced by Core Web Vitals.
By serving WebP, you satisfy the “Next-Gen Image Format” requirement, giving your portfolio a significant ranking boost over competitors who are still serving heavy, legacy files. For a photographer, this is the difference between being on page one or page ten of search results.
Comparison for the Creative Professional
Strategic Factor
Legacy JPEG
Modern WebP
Site Loading Speed
Slow / Heavy
Ultra-Fast / Light
Visual Fidelity
Standard
High-Efficiency
Transparency (Alpha)
No
Yes
Theft Deterrence
Low (Easy to edit/print)
Moderate (Format Friction)
Search Engine Rank
Neutral
Positive Boost
The Strategic Verdict: Protect the Craft
WebP allows you to showcase your best work in high definition without giving away the “keys to the kingdom.” By serving WebP on your front-end, you provide a world-class viewing experience while ensuring that your high-resolution “Master JPEGs” and RAW files remain safely in your private archives.
You aren’t just optimizing your images; you are strategically protecting your digital intellectual property.
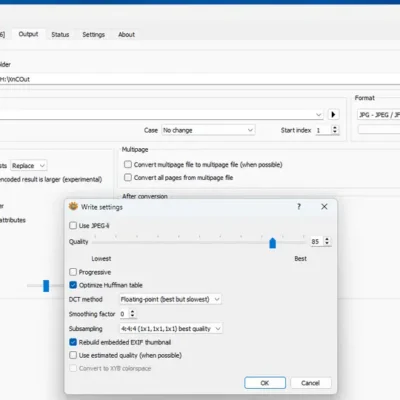
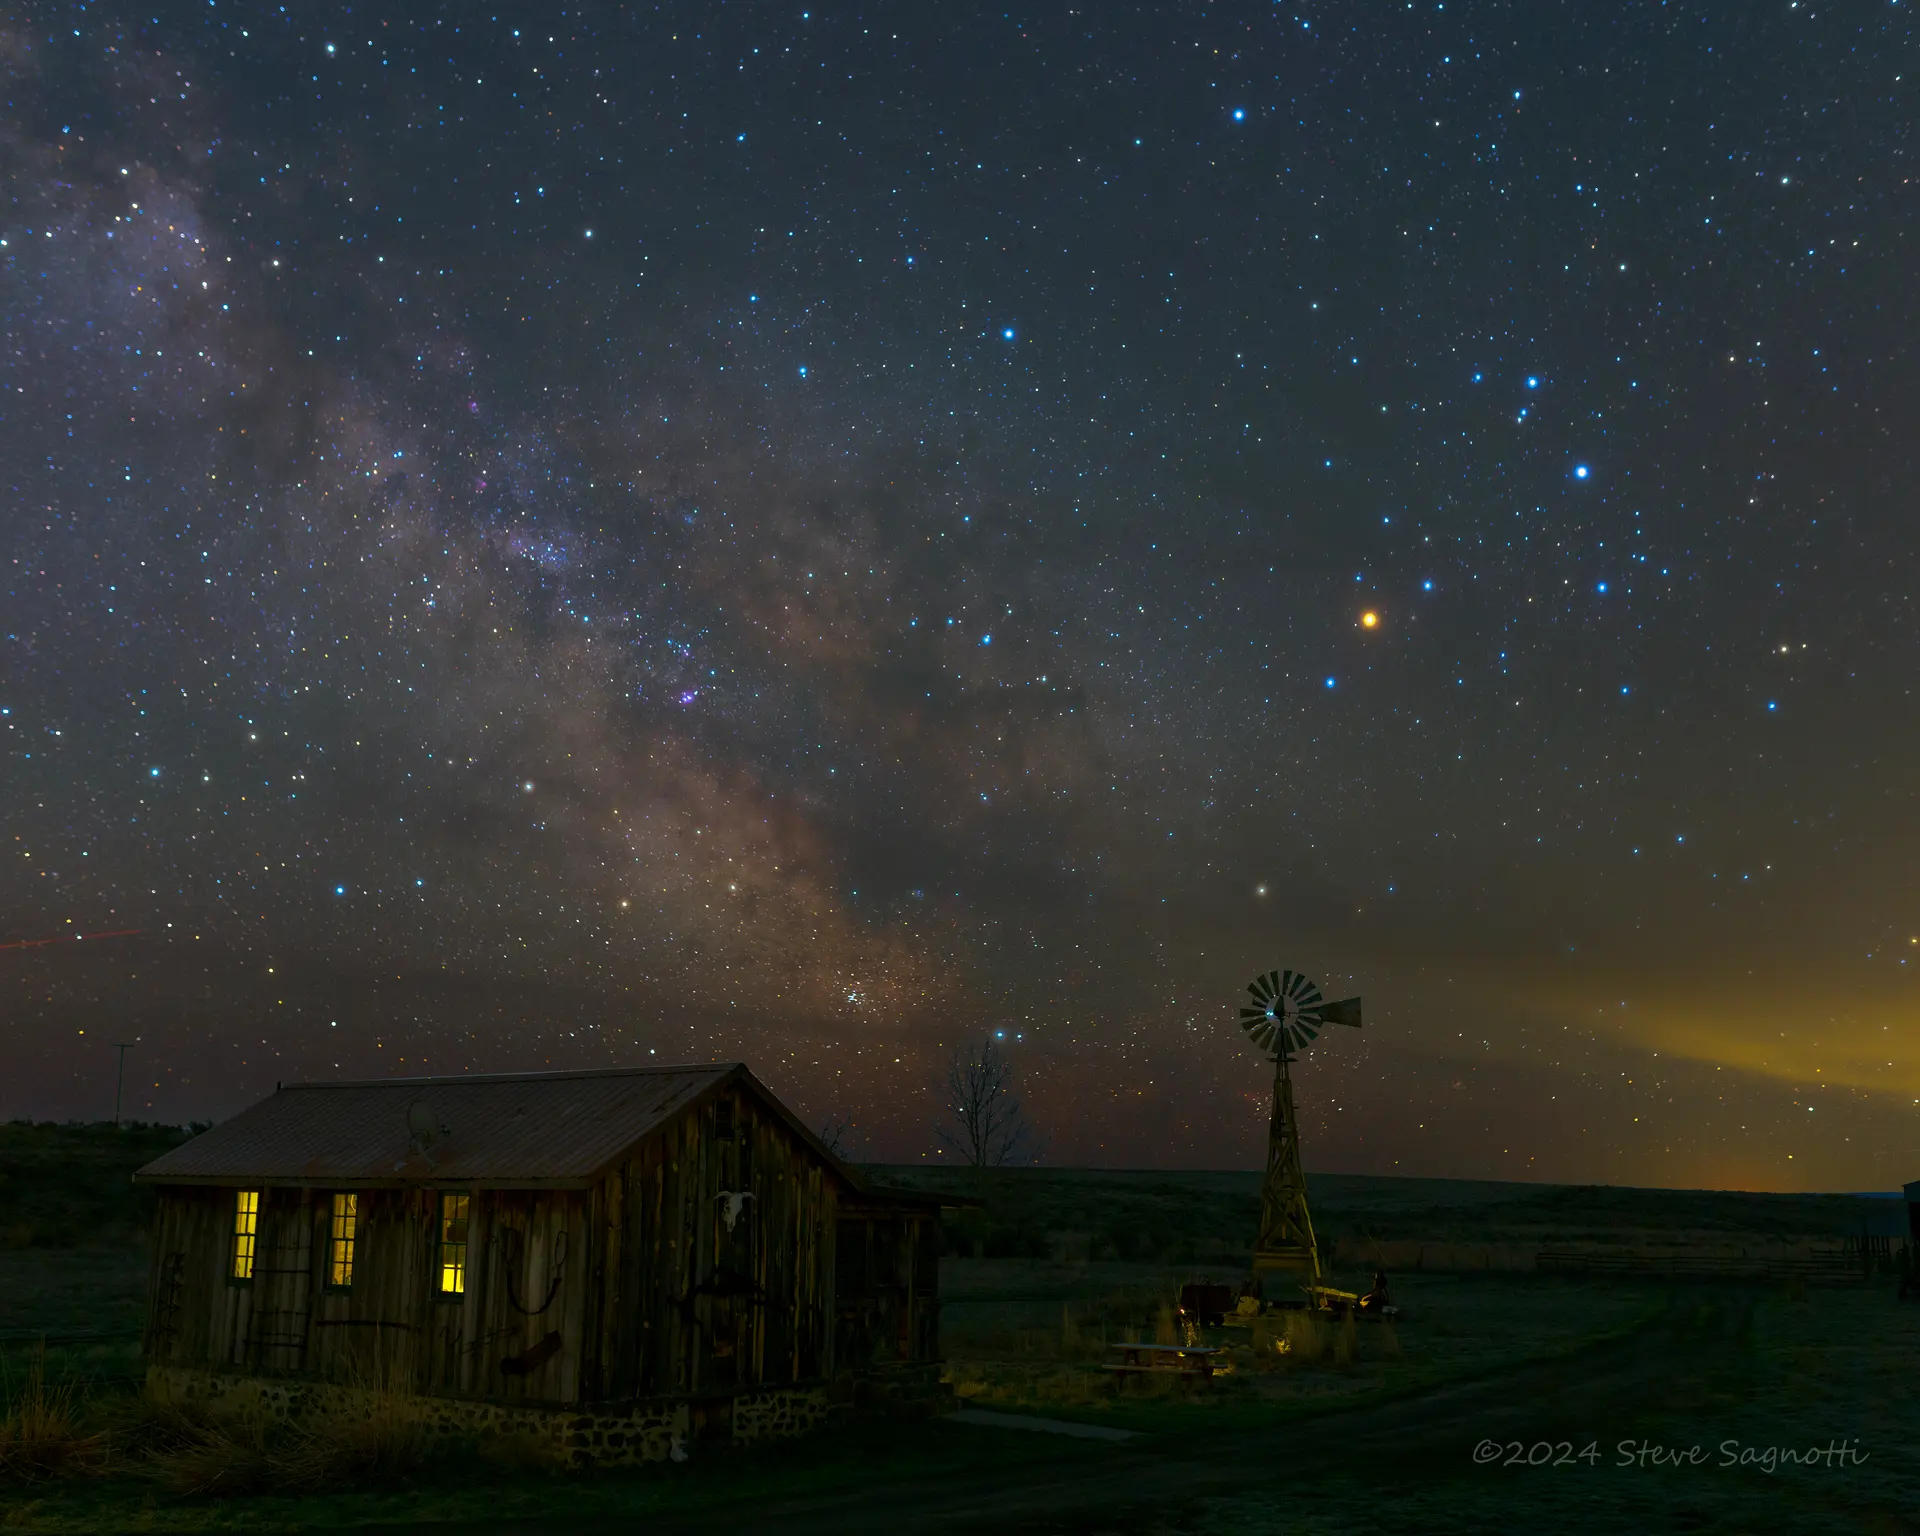
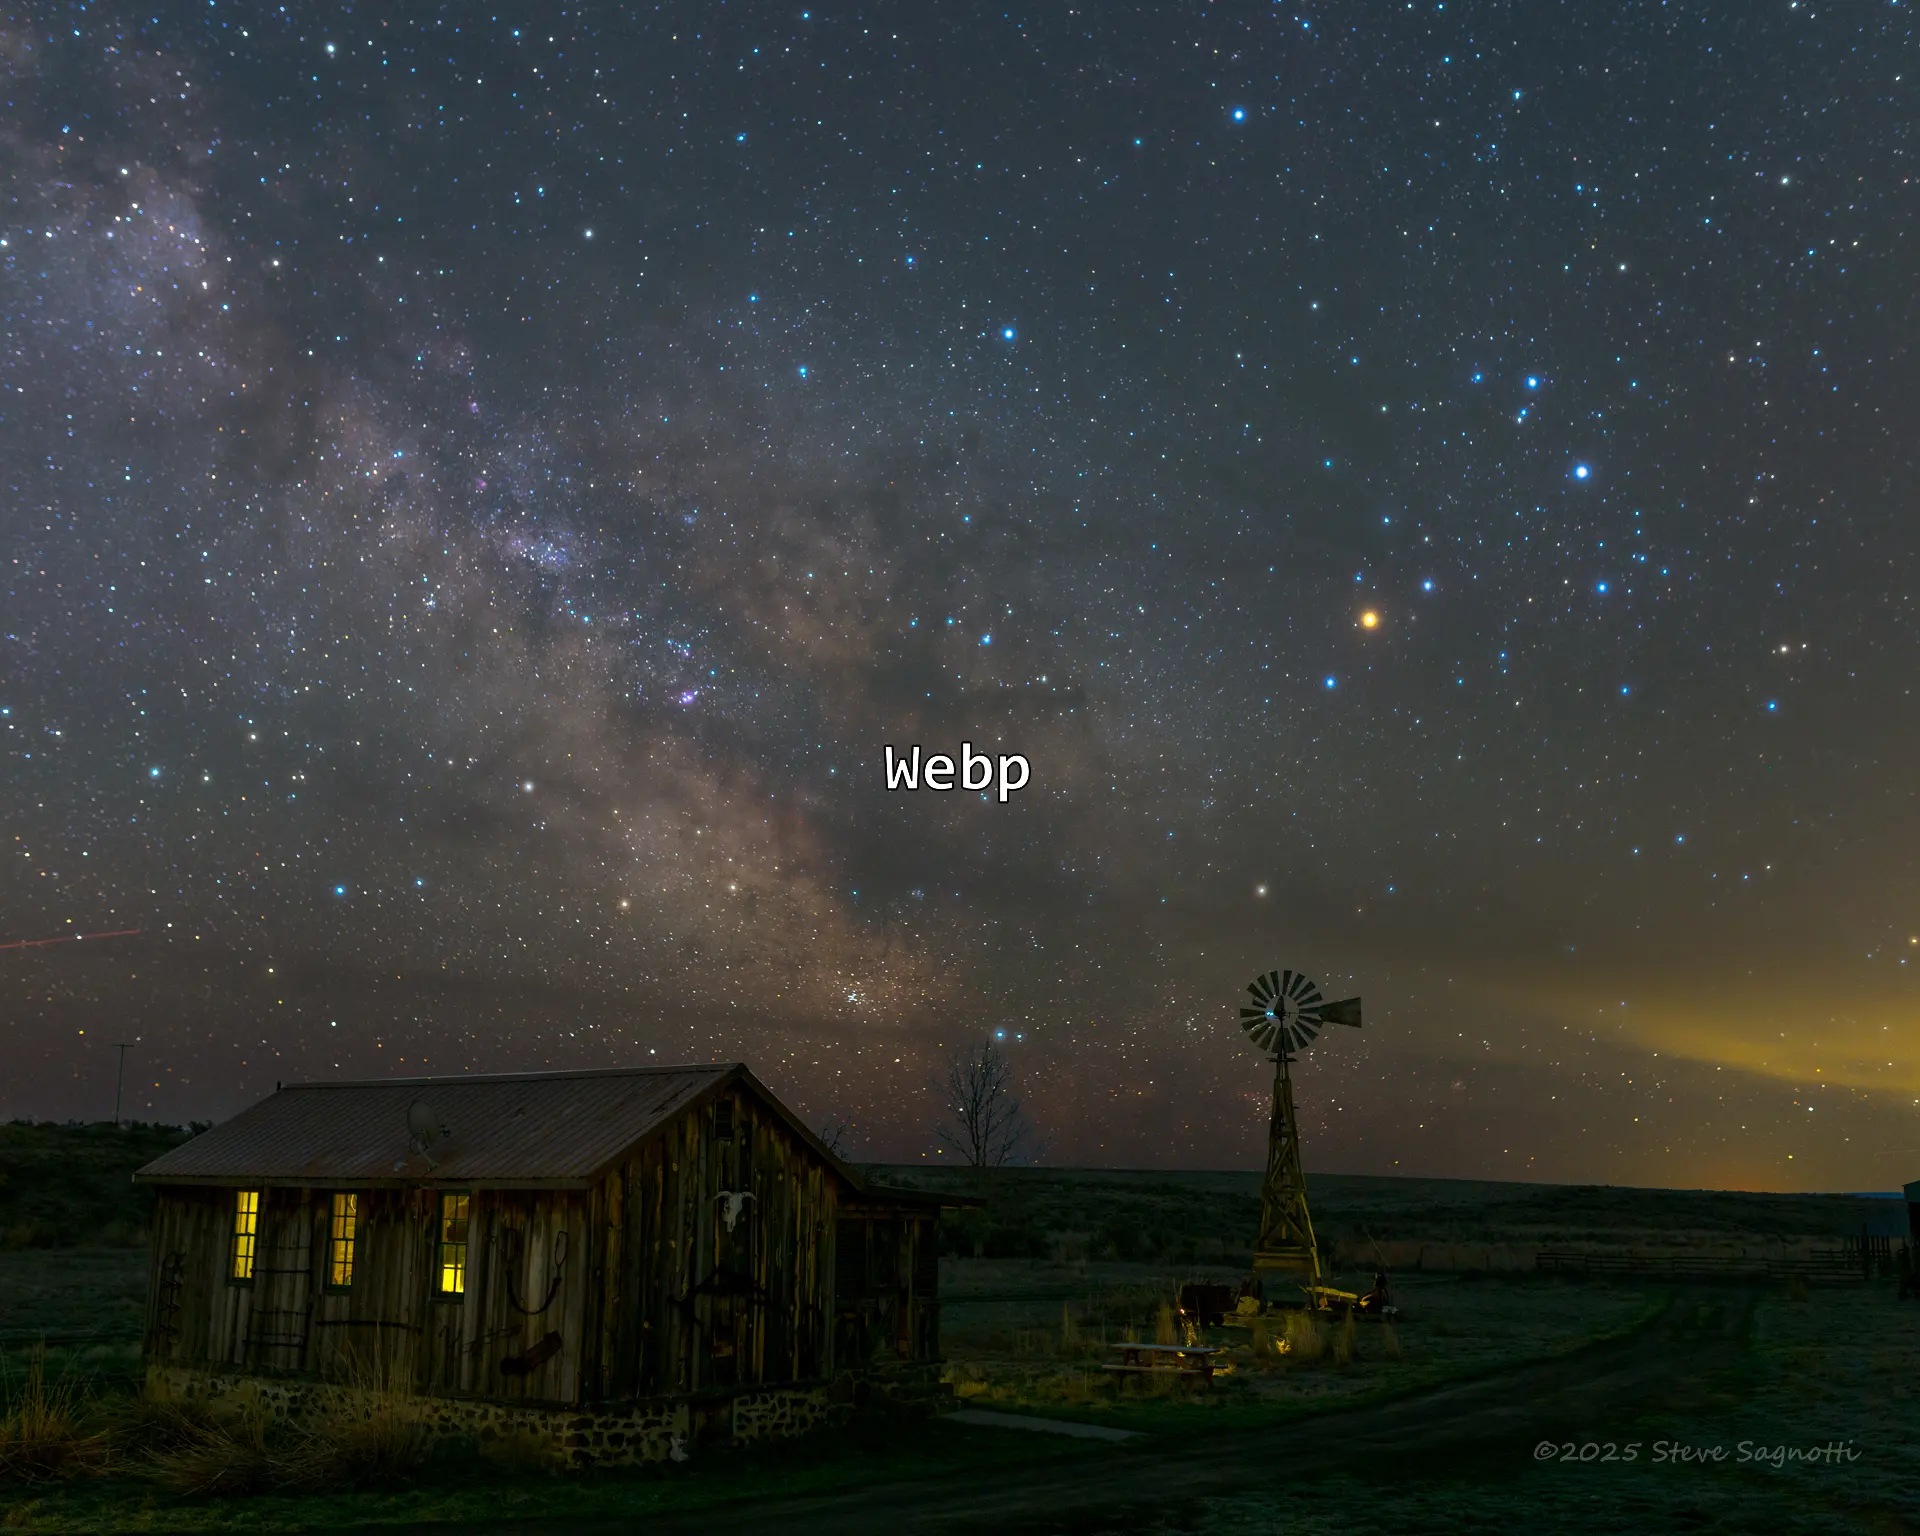
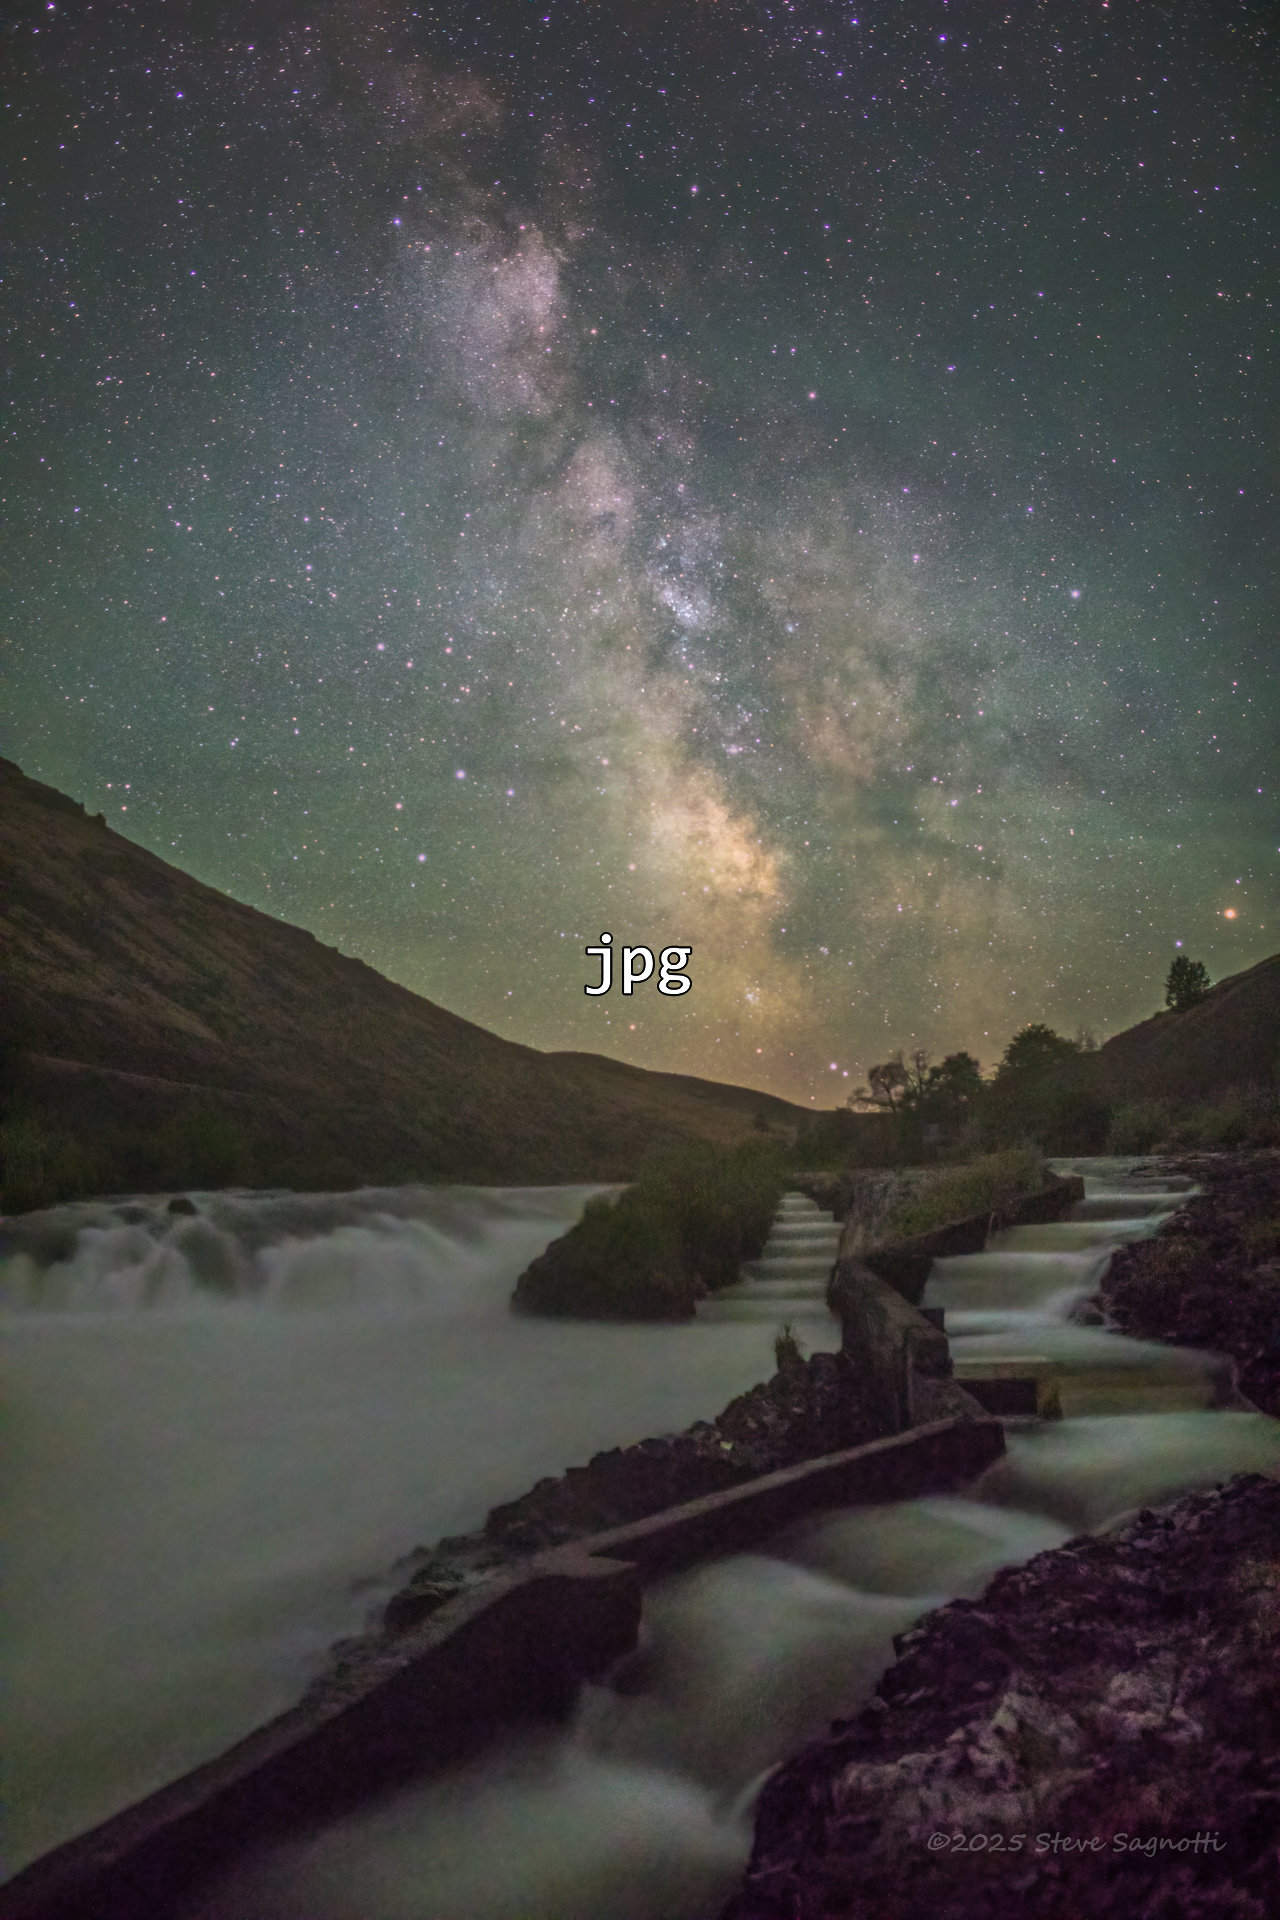
The two comparison images were produced from the same full resolution image ~4k x 6k. I used XnConvert to resize and generate a .jpg and a webP to use here.
❐
PS: I have been using AI (Gemini 3) heavily the past few months. One of my questions was about improving page load times (shorter/less time), that’s when it mentioned webP. I had it educate me a bit, then produce and article (the above). It also told me about XnConvert, among a few others, to do the conversion & resize. That meant I needed to do a side by side comparison. I’ve seen those on the internet so asked AI. it quickly generated some code, that after a few turns back and forth is the comparison widget you used above.
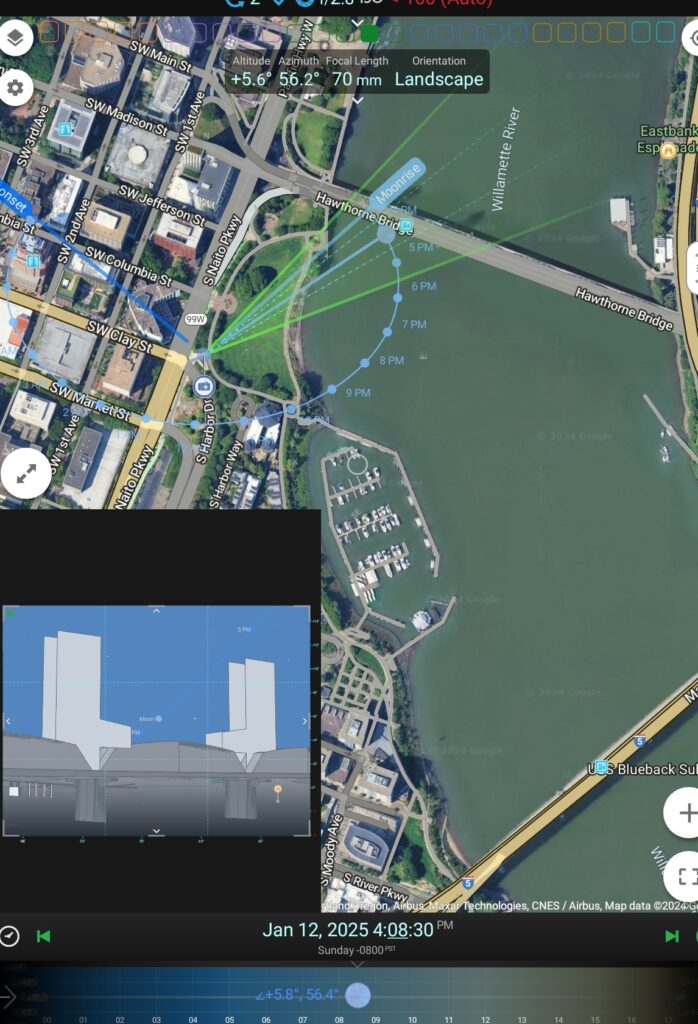
I prefer photographing the full moon the day before it is full. In the camera you can’t tell the difference in the moon, but the ground has more daylight the day before, making for a better lighting balance between moon and ground.
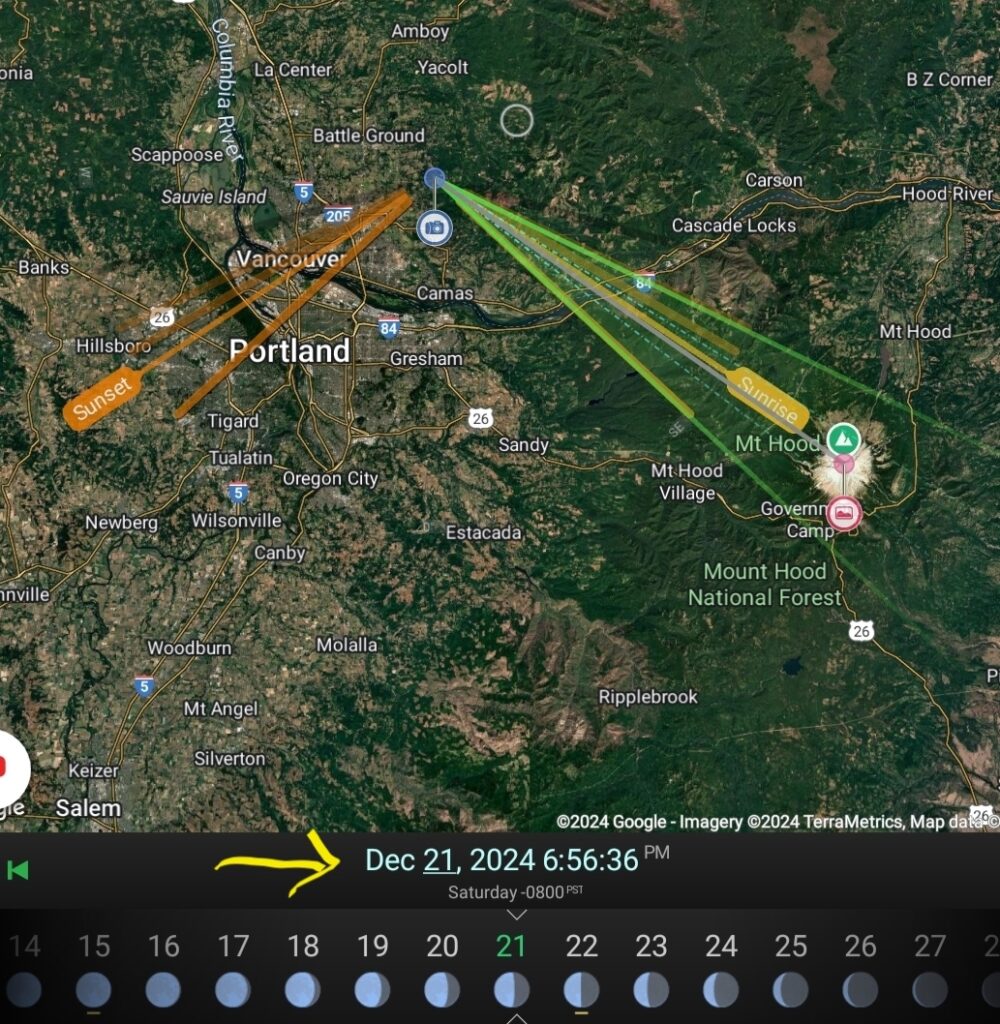
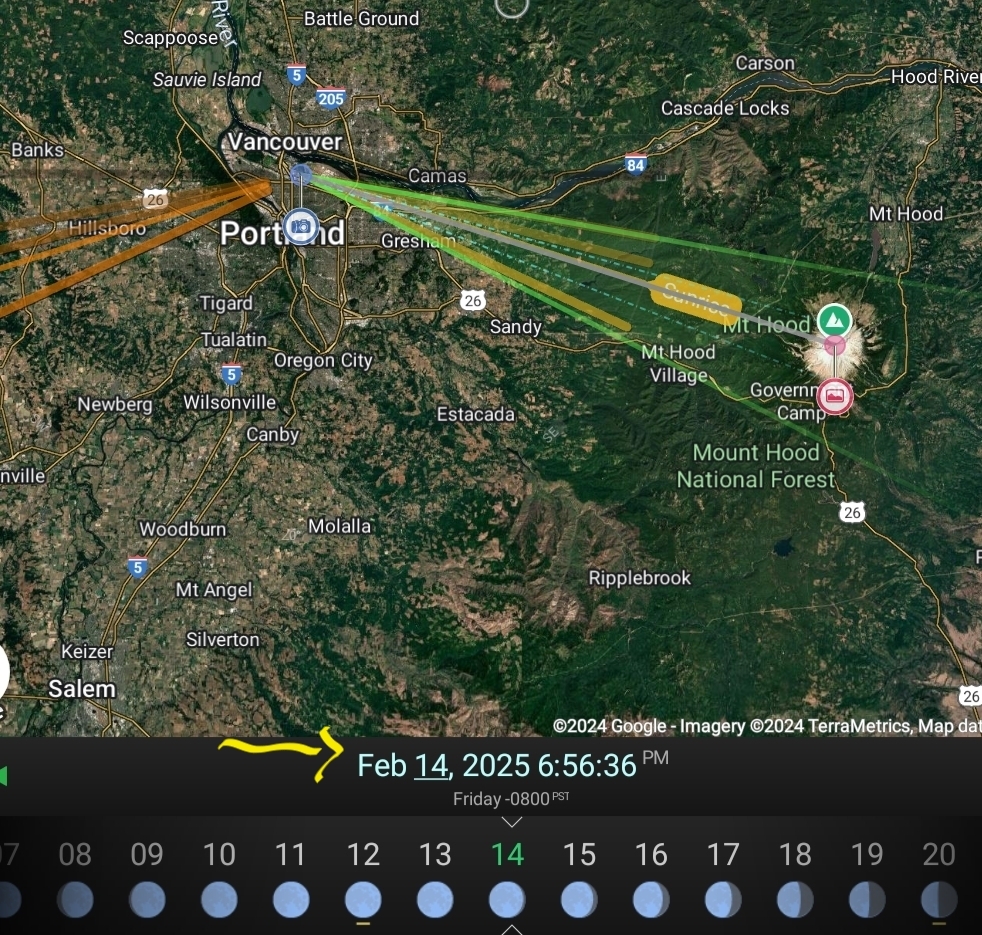
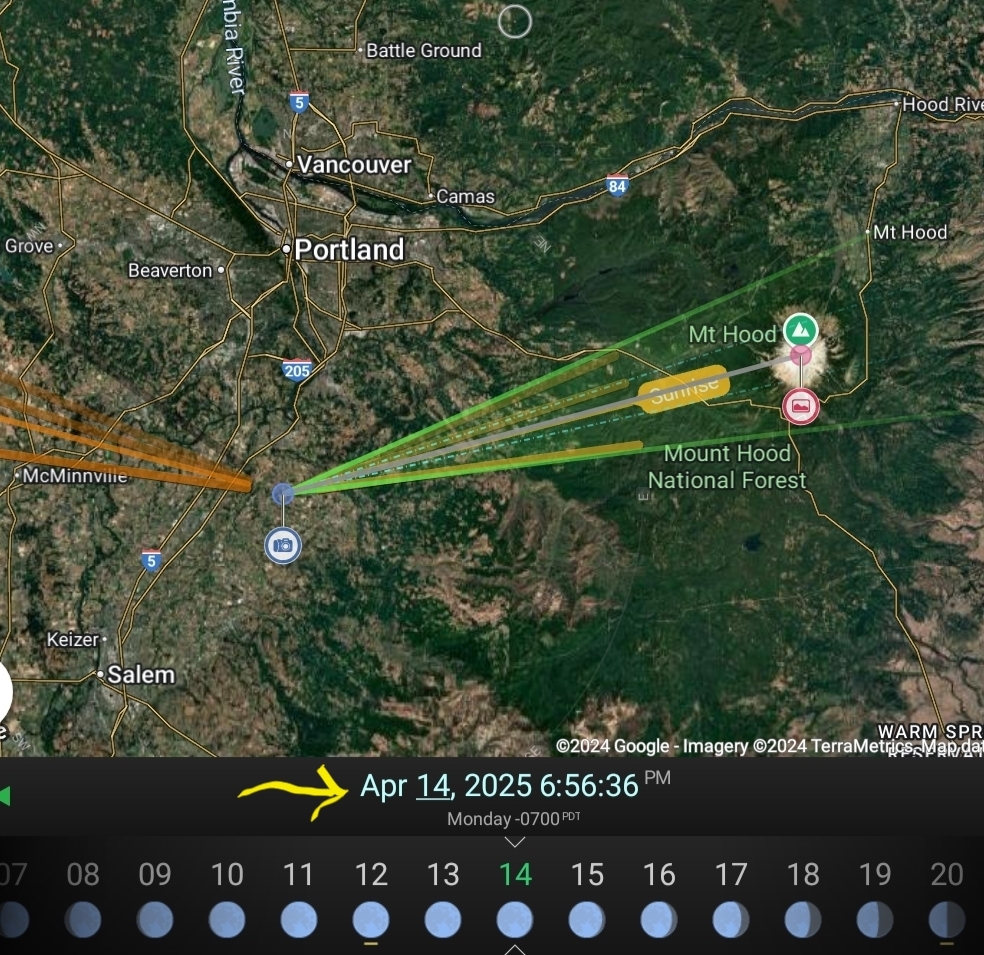
Here are a few local locations for moon rise alignment comps, of course they depend on mostly clear skies, which can be rare here in the Pacific NorthWET.
December 21st was the winter solstice and the official start of winter. It is also the time the Sun starts marching north from our perspective here on planet earth.
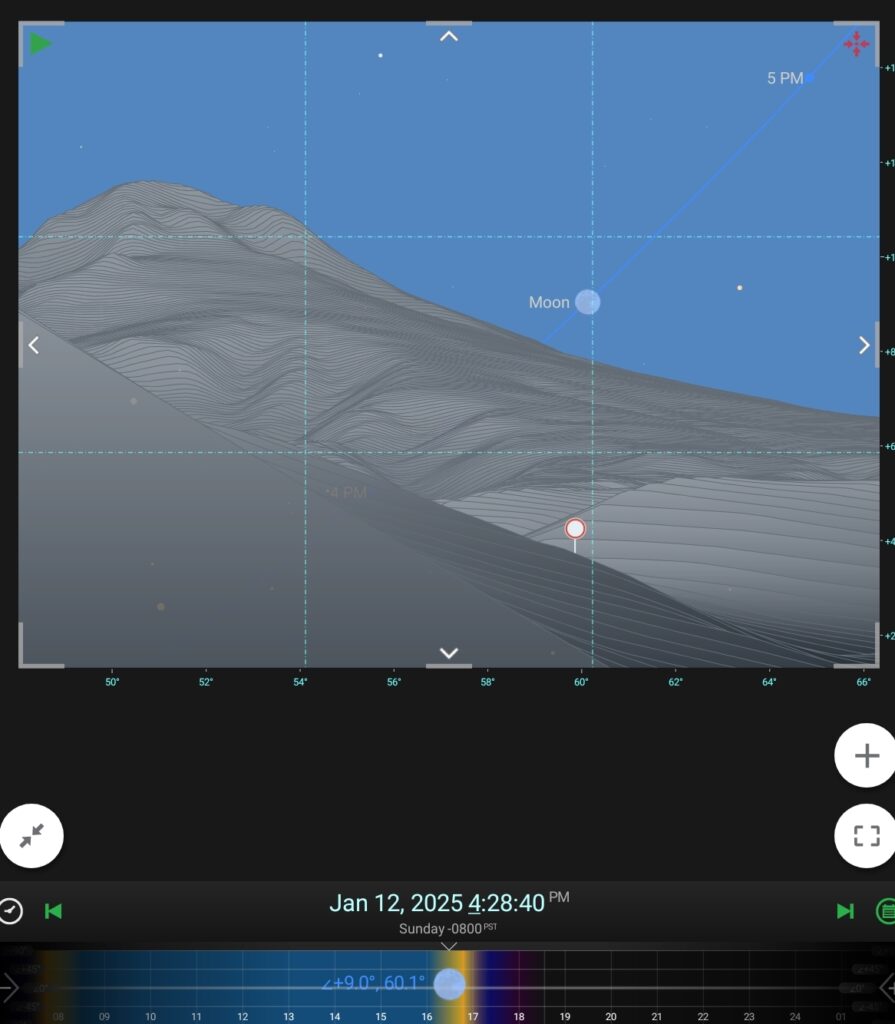
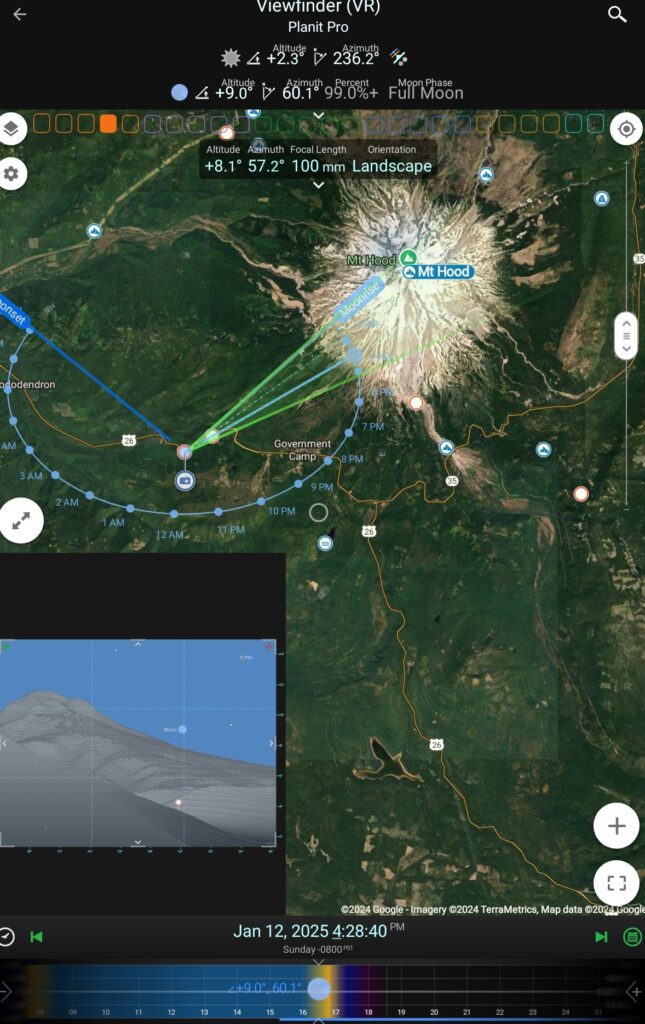
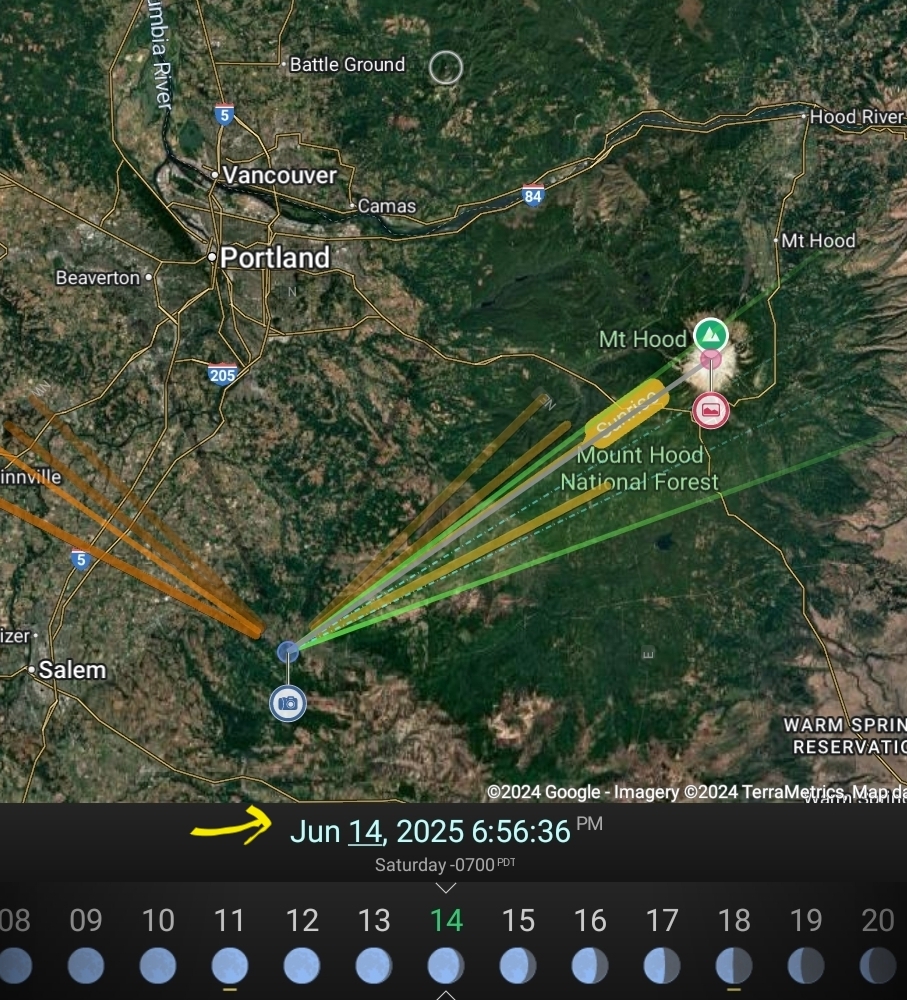
I take a prominent object on the skyline, visible from many angles and use that as a seasonal pivot. Because I’m in Oregon our most prominent skyline object is the snow capped Mt. Hood.
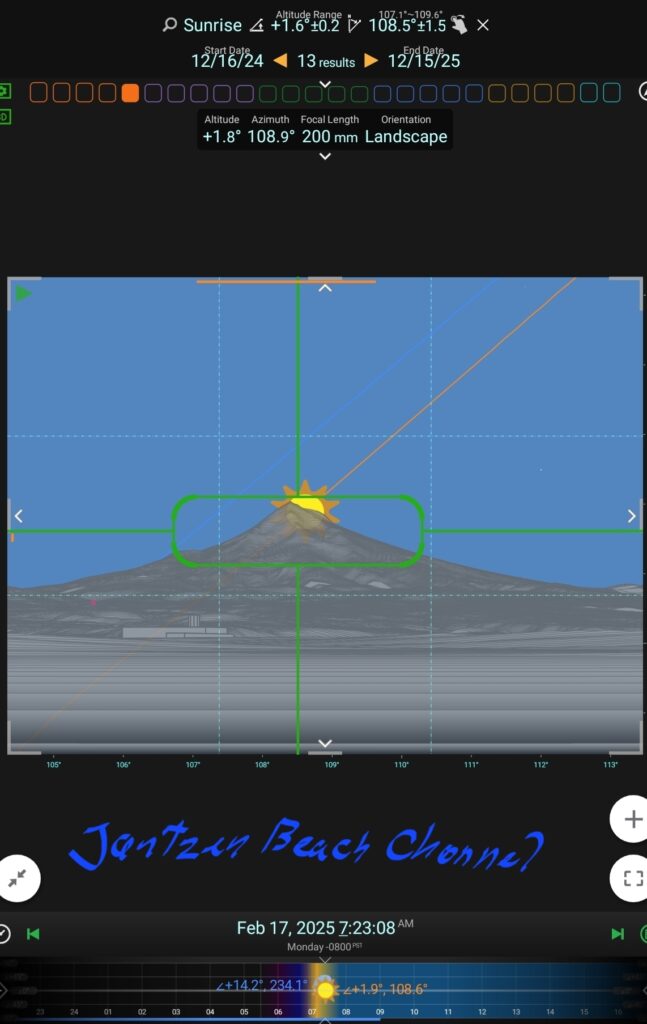
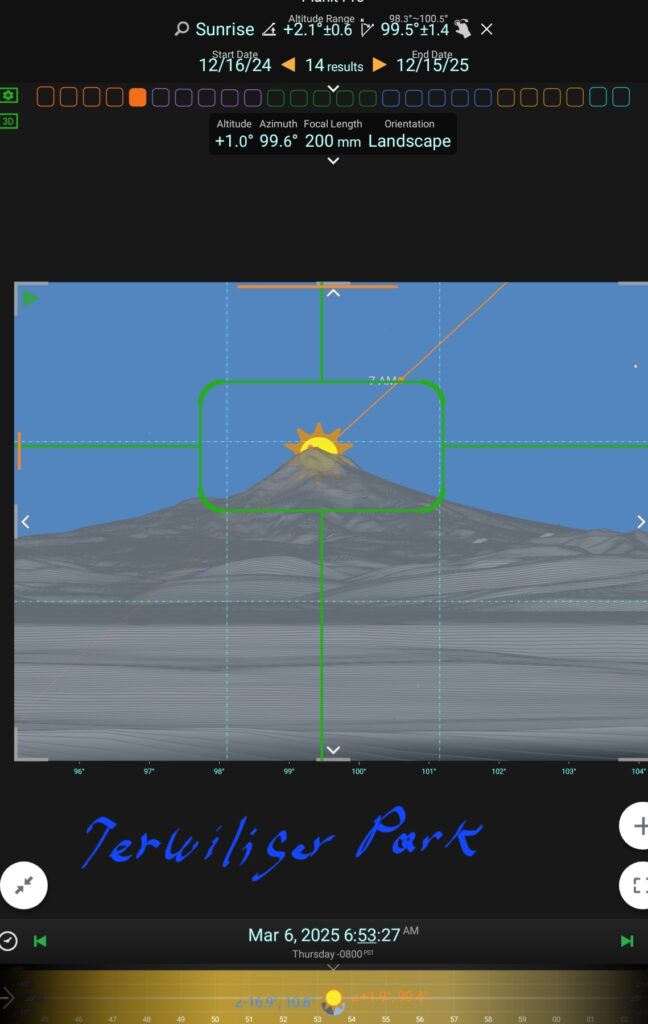
Throughout the year I will visit different vantage points so that the sun will always rise from behind the mountain peak or close by from one of it’s flanks.
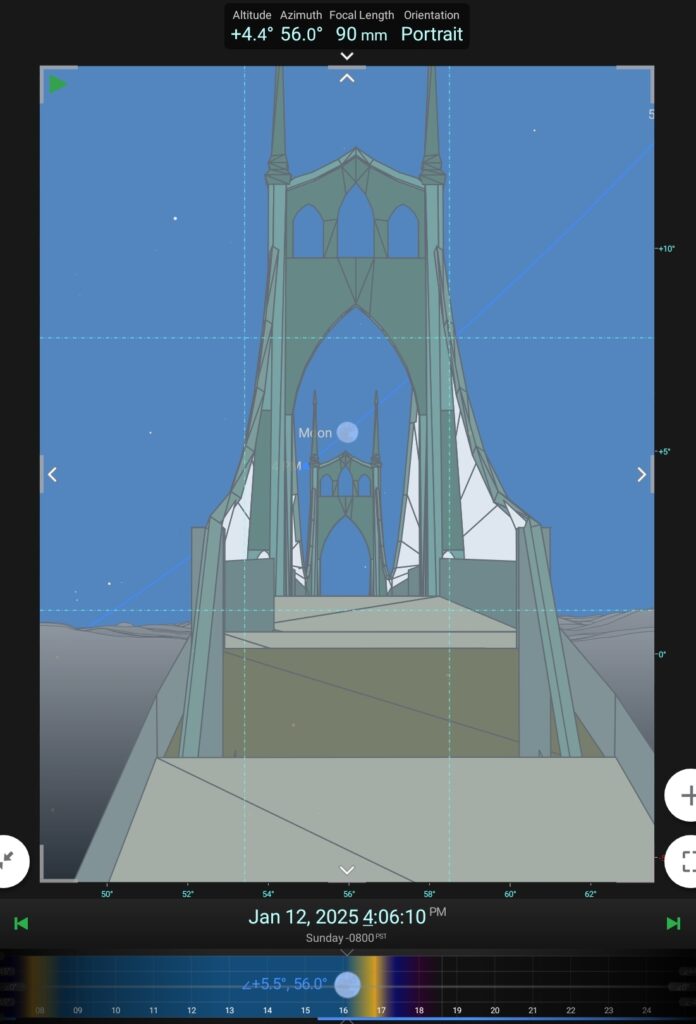
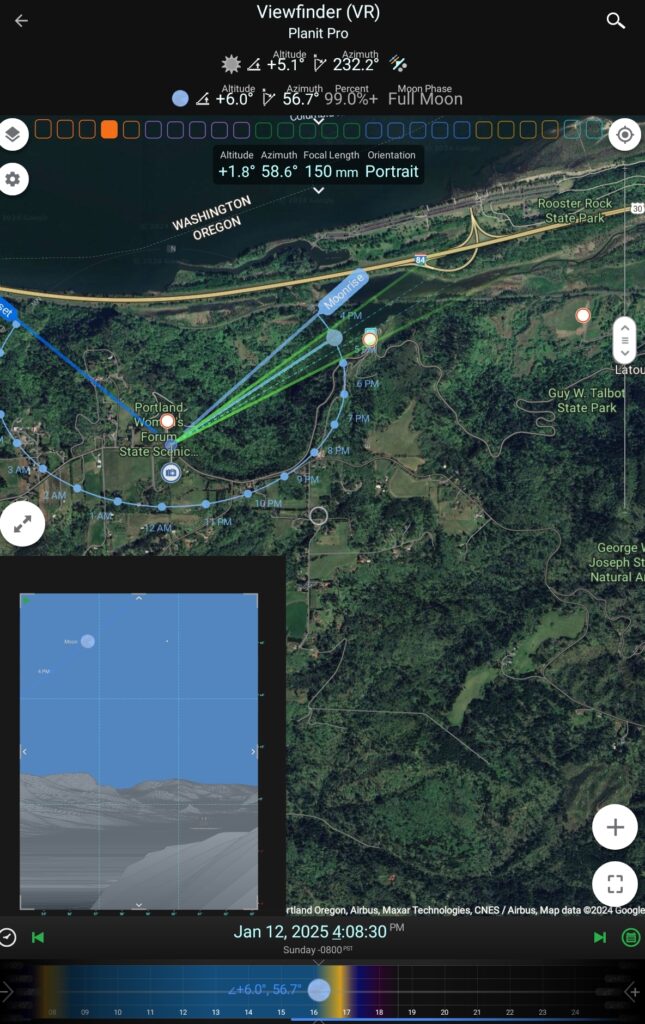
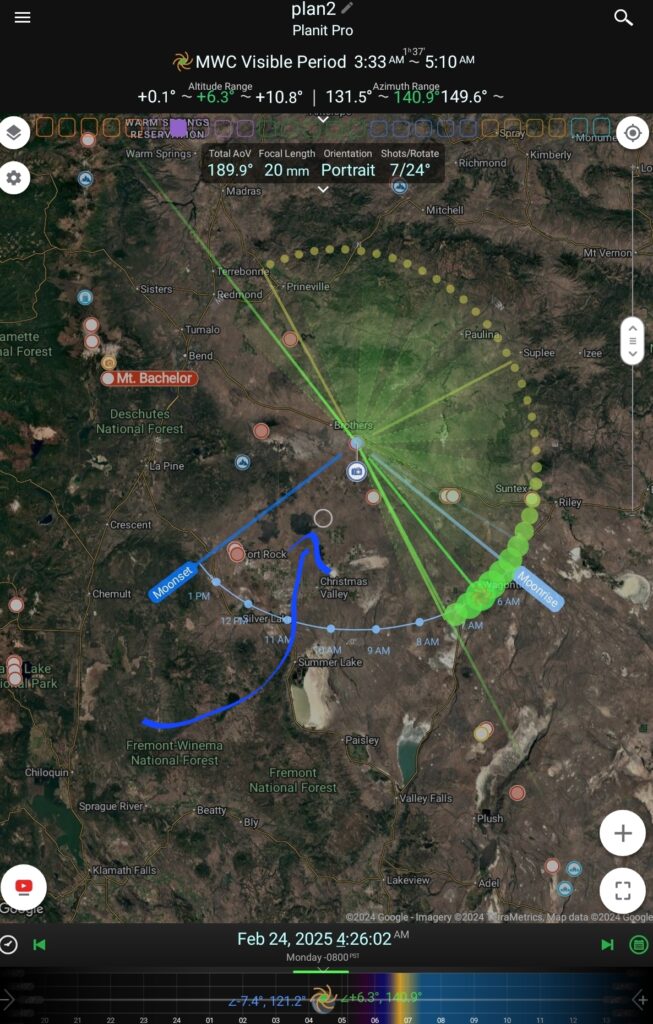
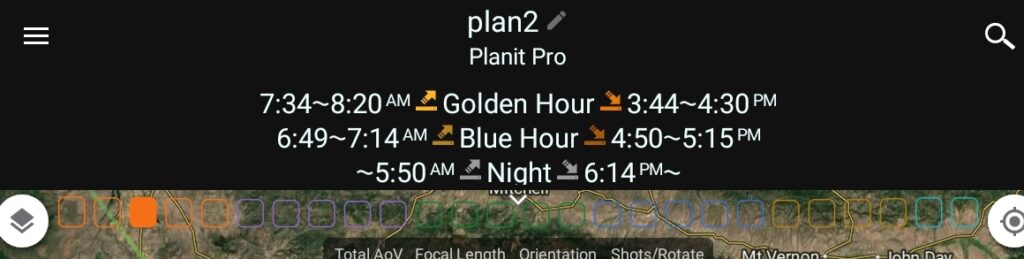
I use PlanIt Pro to do this planning. The VR viewfinder mode sets Planit apart from all other ephemeris apps. The user simply draws a box on the screen and selects sunrise, moonrise, or sets, or crescent moons from the drop down, the date range for the occurance and the number of results are listed. clicking on the results lists them out. Adjusting the box dynamically updates the date list.
This makes it real easy to know where to be to get that great sunrise, moon rise, etc. With the 3D model subscription you can preplan with many provided well known buildings, bridges & landmarks around the world to use with alignments with the sun or moon or Milky Way.
If you are in the Portland metro area, or will be this spring. The calendar here has several sunrises listed for public parks and spaces. Lastly, after the summer solstice this pattern repeats marching south. The same locations can be revisited 6 months from last time, sometime to the day, but plan it out.
Ever since I discovered Planit for Photographers I’ve been hooked, it’s way better than sliced bread. Rises and sets of the sun and moon, providing time and azimuth from any point on the planet. Tides for shorelines, also anywhere. How about a planet, star, constellation, asteroids, comets, all covered in Planit Pro for a 1-time fee $10, or most of the features in the free version.
All of my sky shots are pre-planned using Planit.
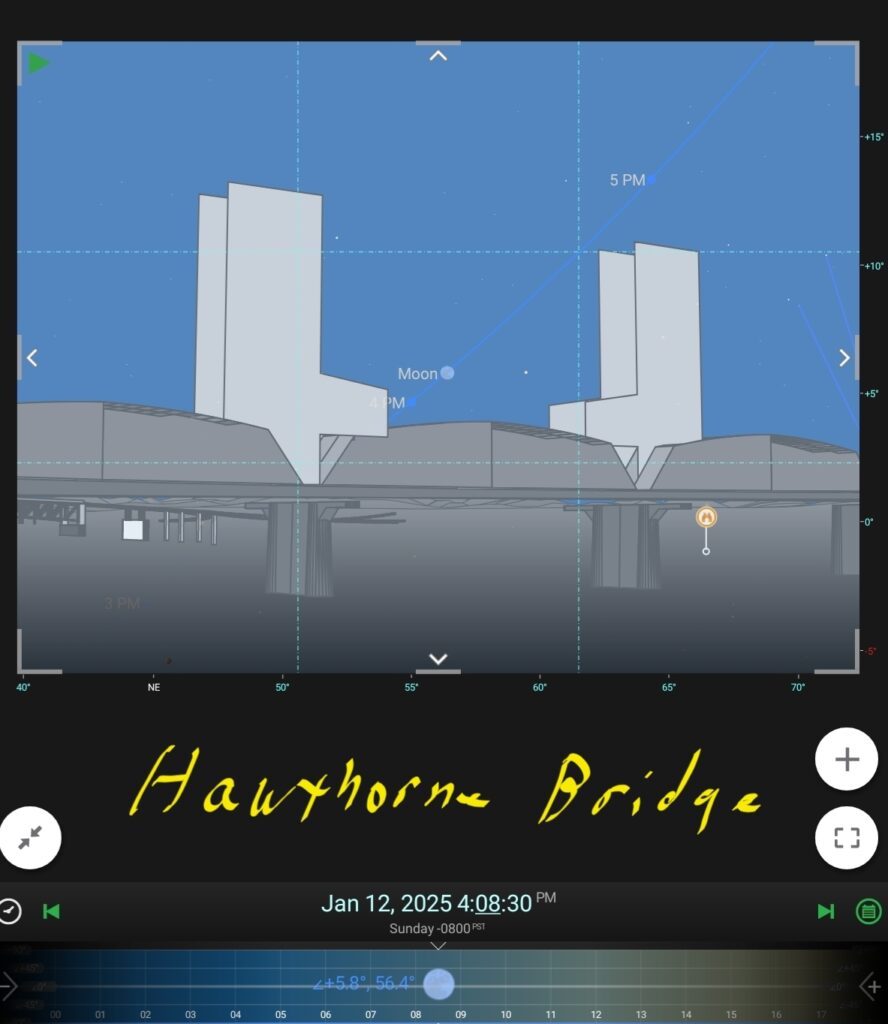
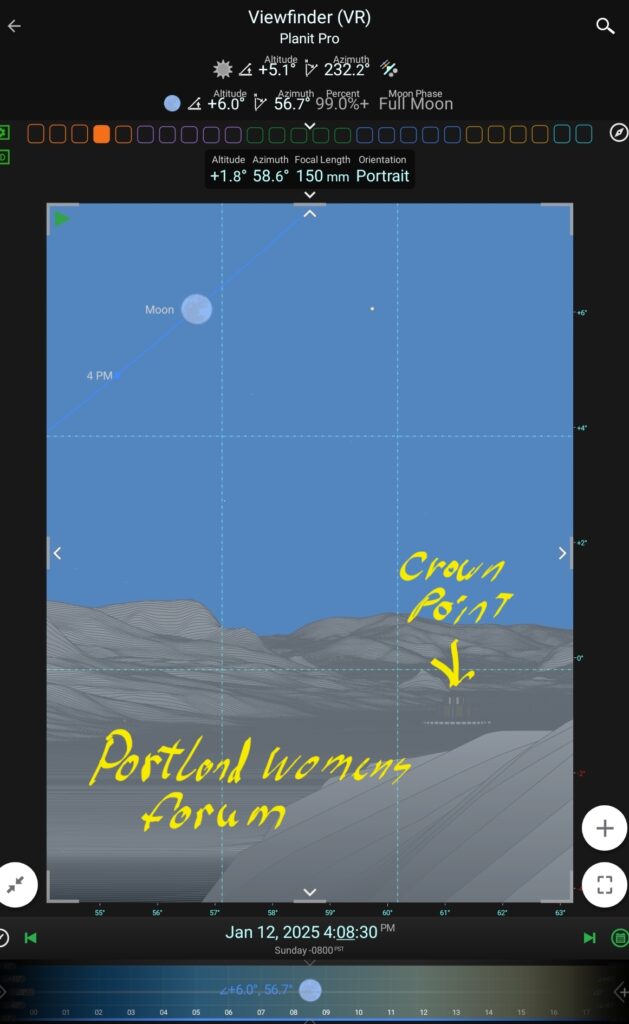
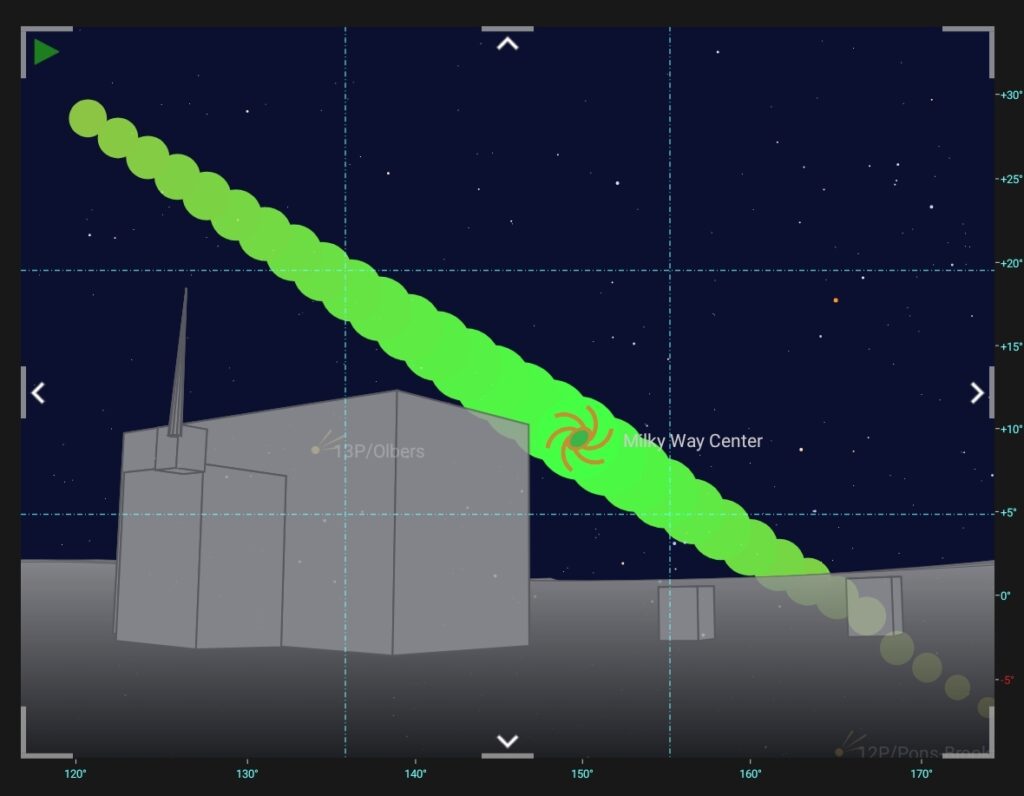
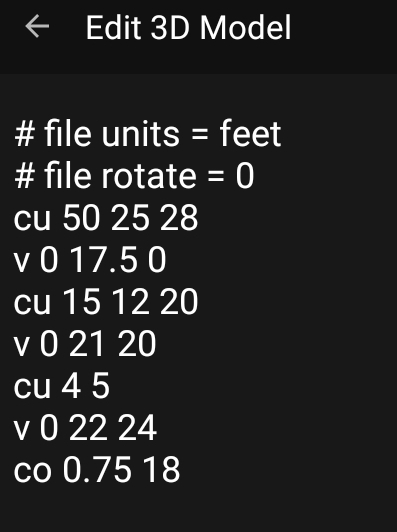
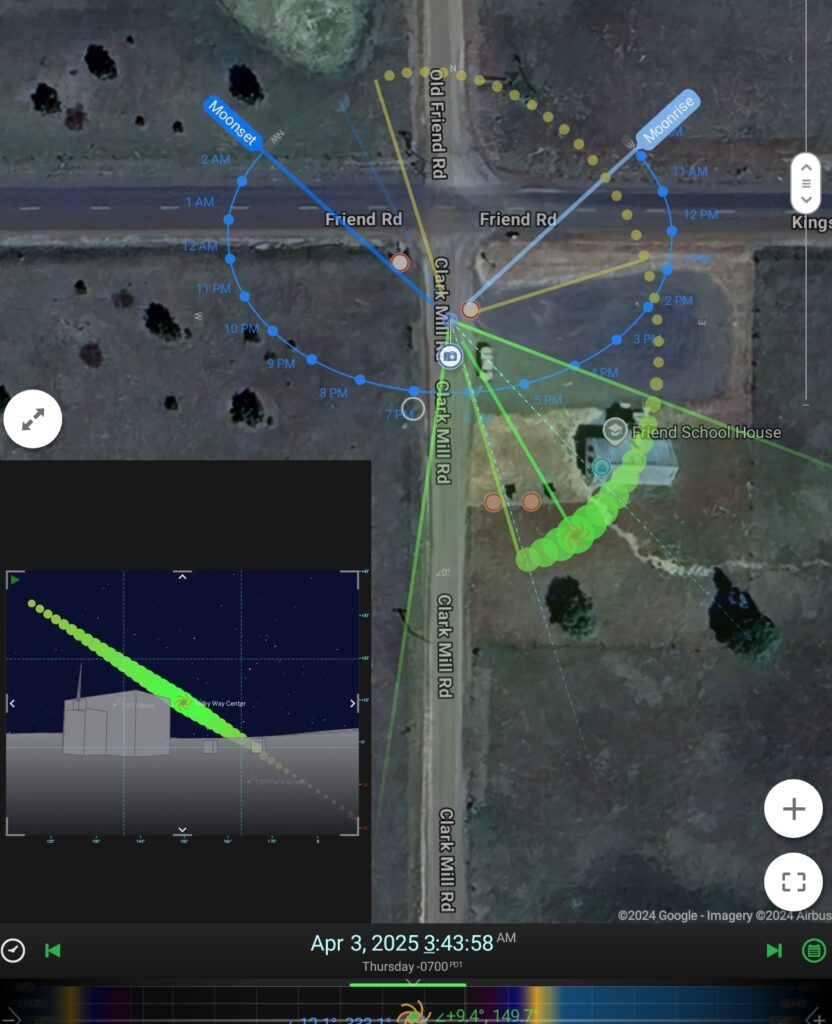
Add the 3-D model subscription and get 3-d models in viewfinder view for planning precise alignments between celestial and earth-bound objects. A few lines of code allows me to create simple models that are good enough for my needs. The model below allowed me to pre-plan the image above.
To create the model it required this code. There are 3 cubes (cu), 3 cursor relocates (v) and 1 cone (co). Not elegant, just a guess at dimensions and set by overlaying against a satellite image, tweak as needed. The default unit is meters and often have to rotate the image so these lines are included in all my models. The model UI has an embedded cheat sheet that can be clicked to select object, then just enter dimensions.
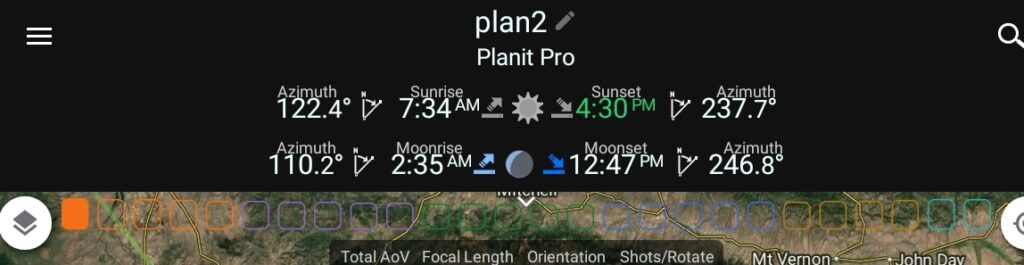
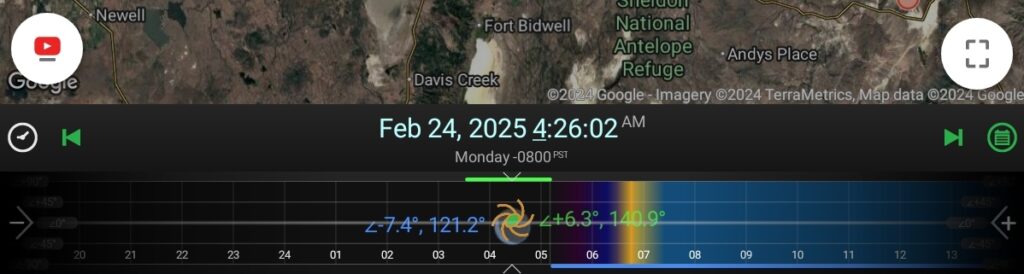
The User interface for Planit is elegant and hide lots of complexity; Just about everything can be clicked on or long-press, or both to get to ancillary functionality. The top bar is the ephemeris functions, the middle is the map & viewfinder; the bottom bar is the time line with multiple viewing modes. Note the YT icon in lower left, contextual video tutorials at a click
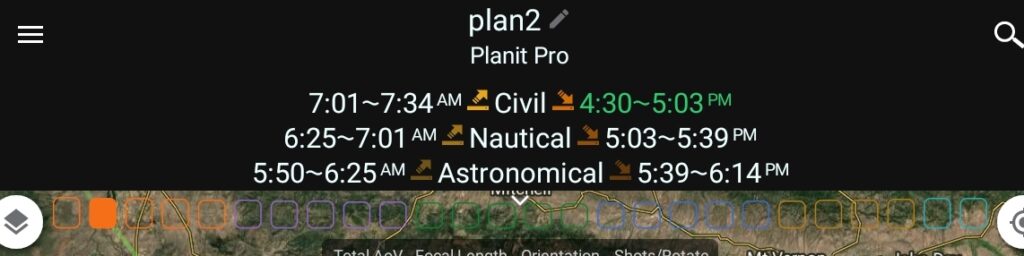
The top bar contains all the ephemeris functionality. Swiping left or right on the top bar navigates from one function to the next, clicking the colored bubbles just below the top bar will navigate directly to the selected function.
Swiping down on the top bar brings up the main menu. Each row is color coded, grouped by function and are direct equivalents of the bubbles below the top bar. If you don’t see the bubbles, but get labels, this can be selected in the settings.
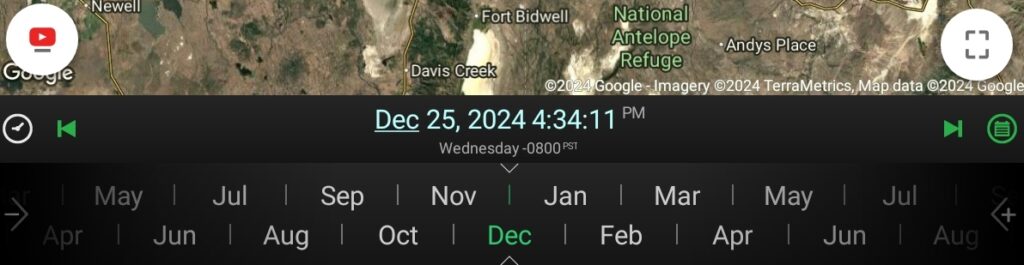
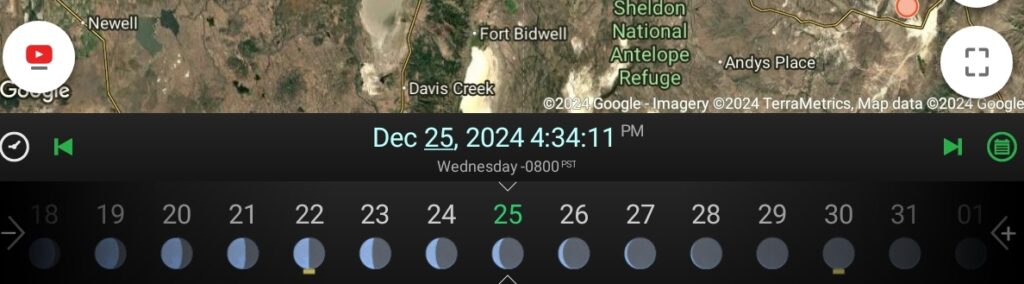
The timeline has 5 views; year, month, day, hour & minute. Tapping on the left half of the timeline increases the time increments, tapping on the right half decreases the time increments. This is a continuous loop so you can go years to minutes or minutes to years. Swiping left or right changes the date/time, causing the rest of the app to react to the change in real time.
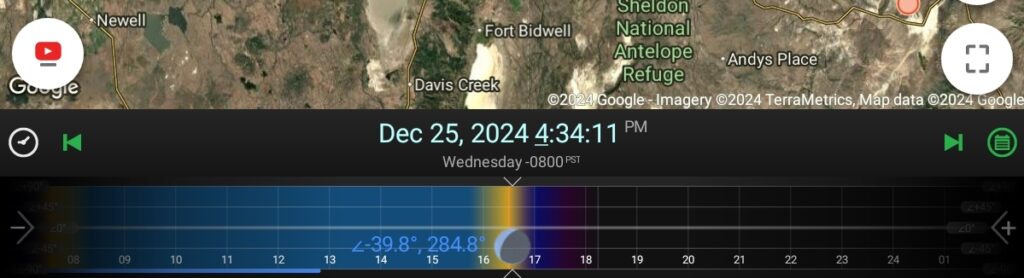
The day view shows the phase of the moon with the quarters, new and full underscored. The hour view has black for night, blue for day and a rainbow for sun rise & set. If the moon is above the horizon it is represented by a blue line on the bottom of the time line. If a Planet, comet, what ever the ephemeris is set for, a yellow line appears on the top of the time line when it is above the horizon in true dark. In the case below the Milky Way is shown above the horizon and the details of elevation and azimuth are in the timeline for both Milky Way core and also the moon. This is a great UI jam packed with nuance, elegant in a word.
It is possible to have PIP with Planit. By moving the camera pin in the satellite view the inset viewfinder view is updated in real time. By tweaking the camera pin and the timeline I know exactly where and when I need to be to get the shot
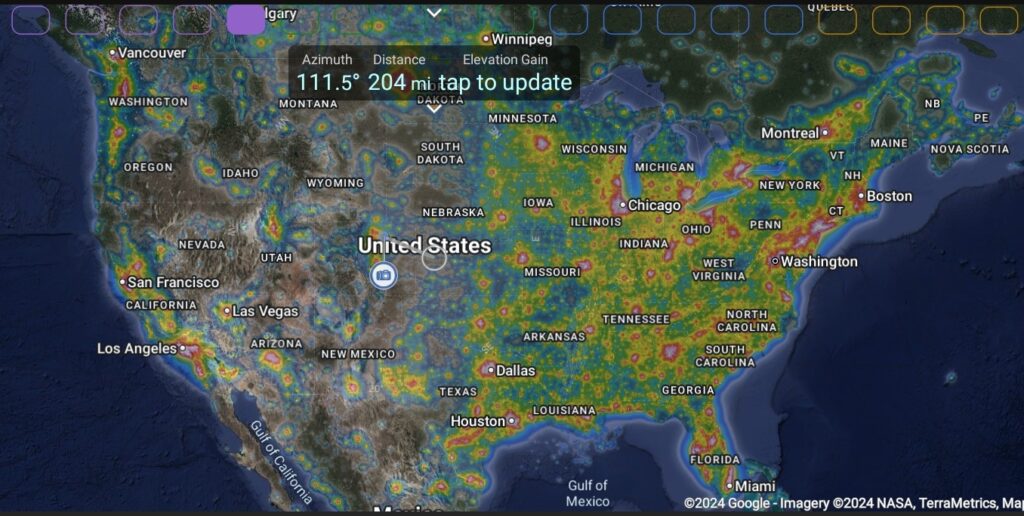
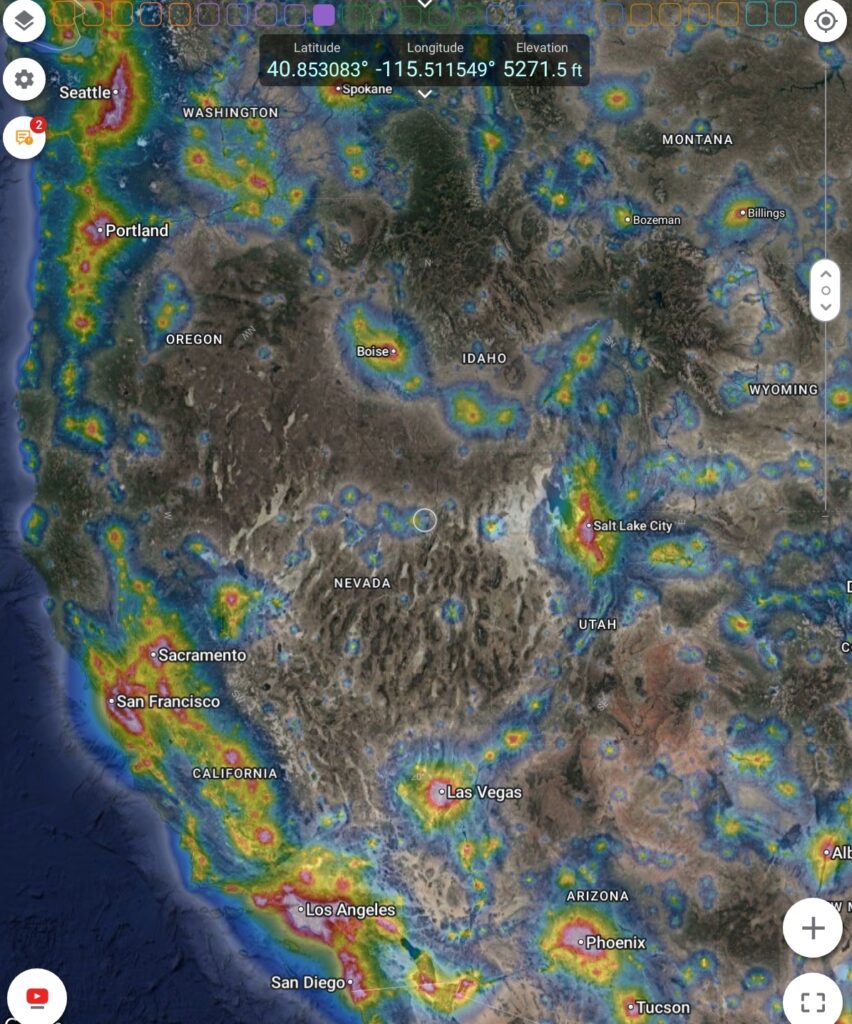
A light pollution map is also part of Planit. I get to call Oregon home, it is one of the last large dark sky areas in the US. Lake County, along the CA border was recently named the world’s largest dark sky park. Neighboring Harney and Malheur counties slated to join too.
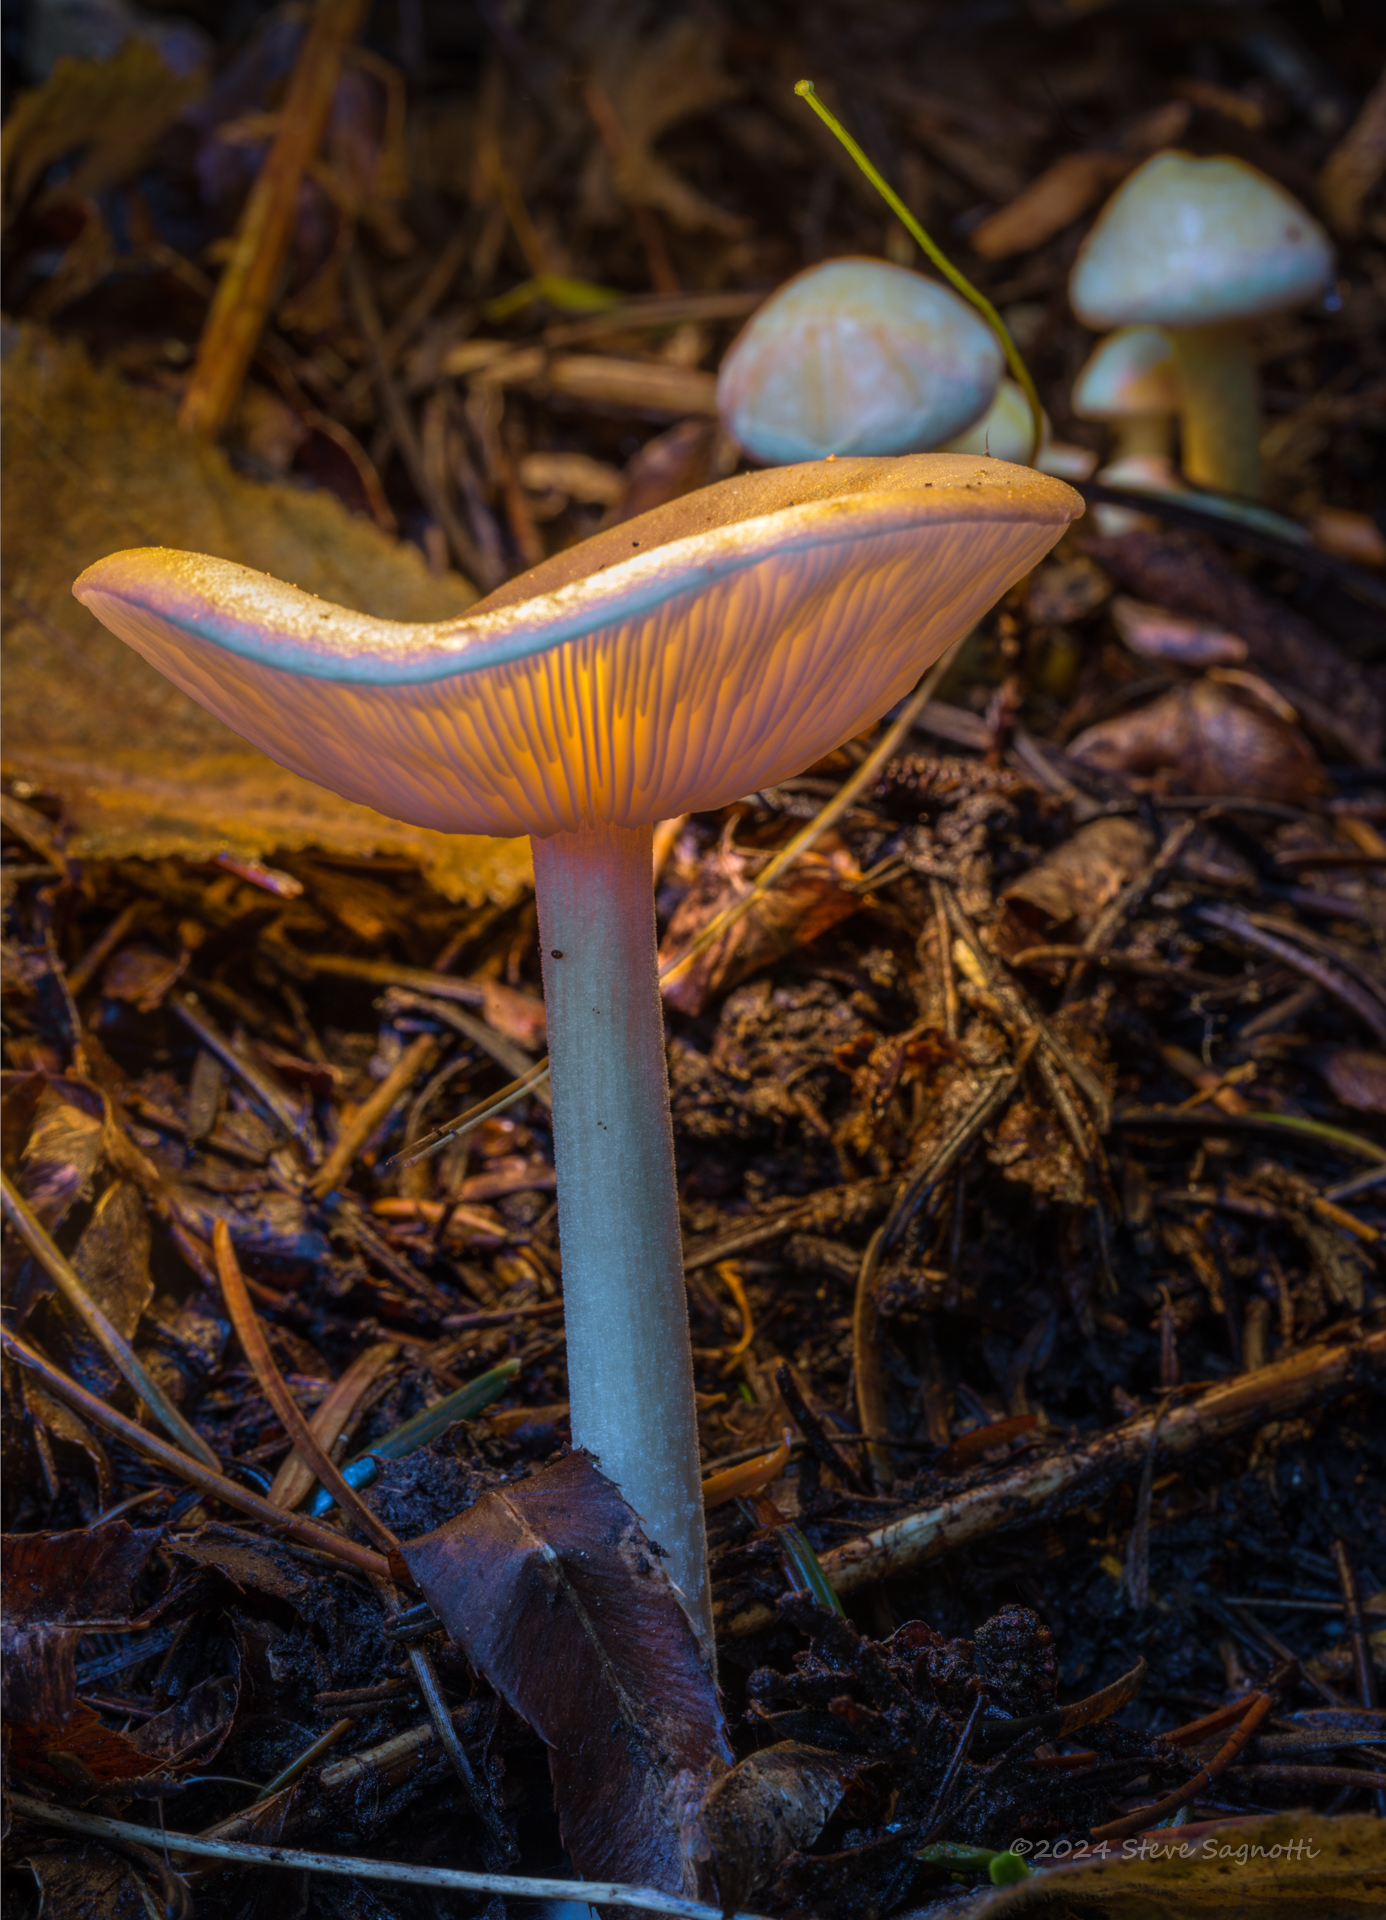
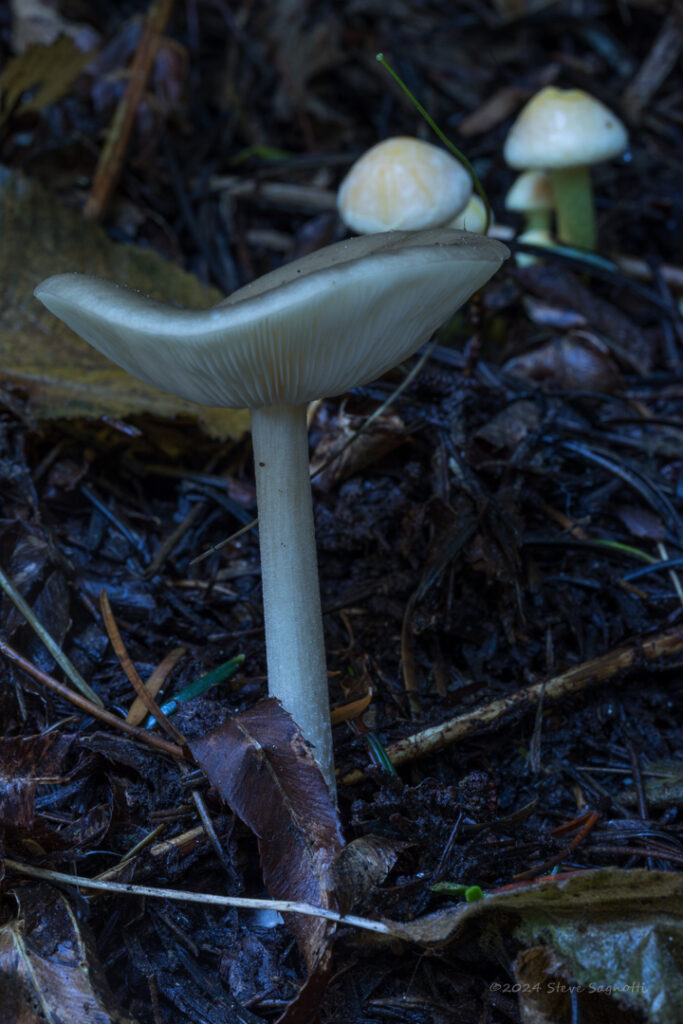
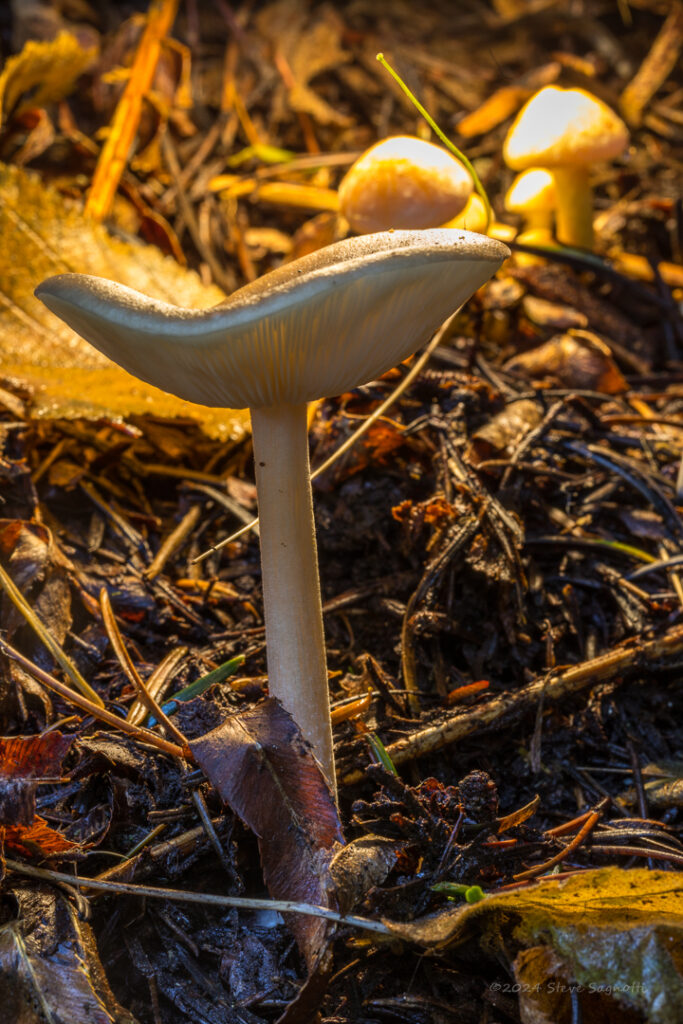
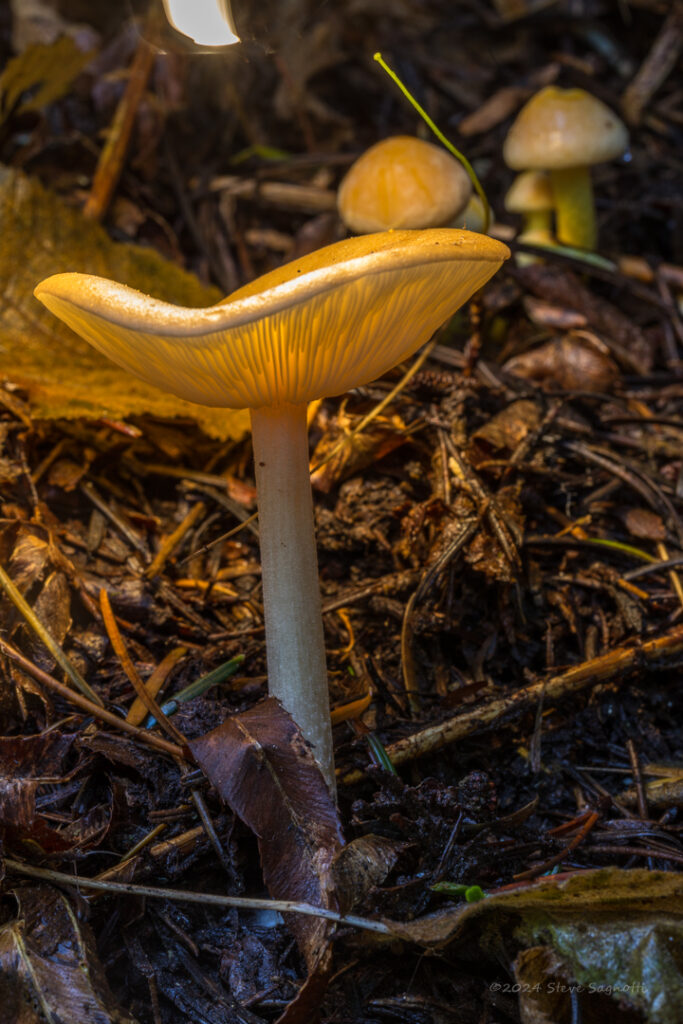
Light painted mushrooms are fun and easy to make, both when capturing the photons & processing the pixels. It is a great way to learn Photoshop or any layered image editor, how to master the use of layers and masks.
To take the picture you just need a way to support the camera at mushroom height and able to focus from a few inches away. A bean bag or tripod with a column that inverts will hold the camera low to the ground. A macro lens or focus-tubes, hollow tubes placed between the lens and camera that allows the lens to focus very close to the front of the lens for macro work will be needed. Also a small flashlight that isn’t terribly bright, the flashlight on a phone will work if that’s all that’s available.
Take your time getting a pleasing composition; make sure the sky is not in the picture (will be too bright) and that there are no distracting elements. Once you are happy with the composition do not move the camera for the duration of the shots other than to change exposure and be careful to not bump the camera when doing so
A base image is needed. this will be what you build the rest of the image from. It needs to be underexposed about 1-stop with an exposure of 1″-2″ and aperture of f/11, adjust ISO to get that exposure using the other values given.
Once you have a base image carefully, without bumping the camera change the aperture to f/16 and shutter to 3″-5″. This will have 2 affects on the resulting images; the aperture change will increase the depth of field (more will be in focus front to back) and it will dim the rest of the image. The longer exposure time allows more time to move your light so you aren’t rushed and can take your time light painting. be careful to not overexpose with the light, watch the histogram for any crushing on the right side.
Rinse and repeat with other comps or mushrooms. Most of all have fun being out in nature.
I use a Lightroom to Photoshop workflow for images like this. I’ll do a base adjustment in LR and then bring them into PS to blend into the final image.
In LR I adjust the base image to have good details in the shadows but is overall underexposed slightly. The light painted images I tend to darken further and drop the highlights, what I want to see is clear details in the highlights and gills of the shroom, don’t blow these out during capture.
Once all the images are ready in LR, select the base and painted images for merging the edit as layers in PS. Once all the layers are in PS select the base image and move to be the bottom layer. Select all the layers then align the layers.
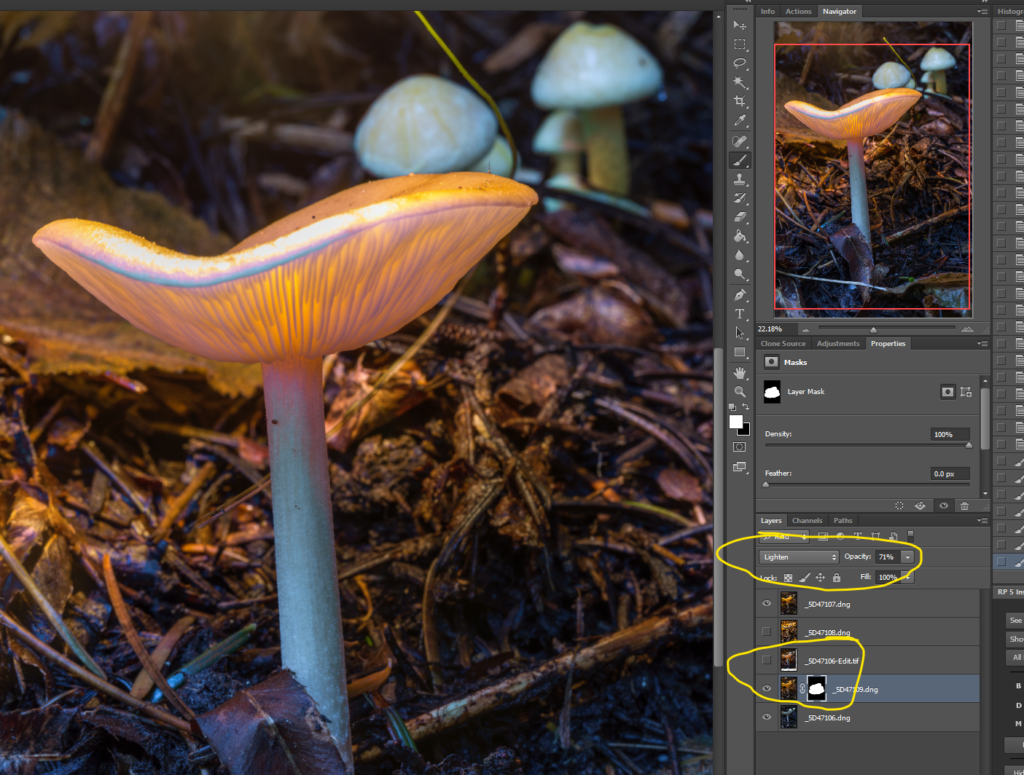
The next step is to simply select each light painted layer one at a time and change the blend mode to lighten. This will allow the light parts of the light painted image to be seen over the base image. Each layer can be toggled on and off (eyeball icon) to see what it adds to the image. A mask can be added to the layer to block out unwanted portions of the light painting from getting through. Also, the layer can be turned down it does not come through as strong.
Now it’s just a matter of playing with each layer until you get what you want. Have fun creating something unique.