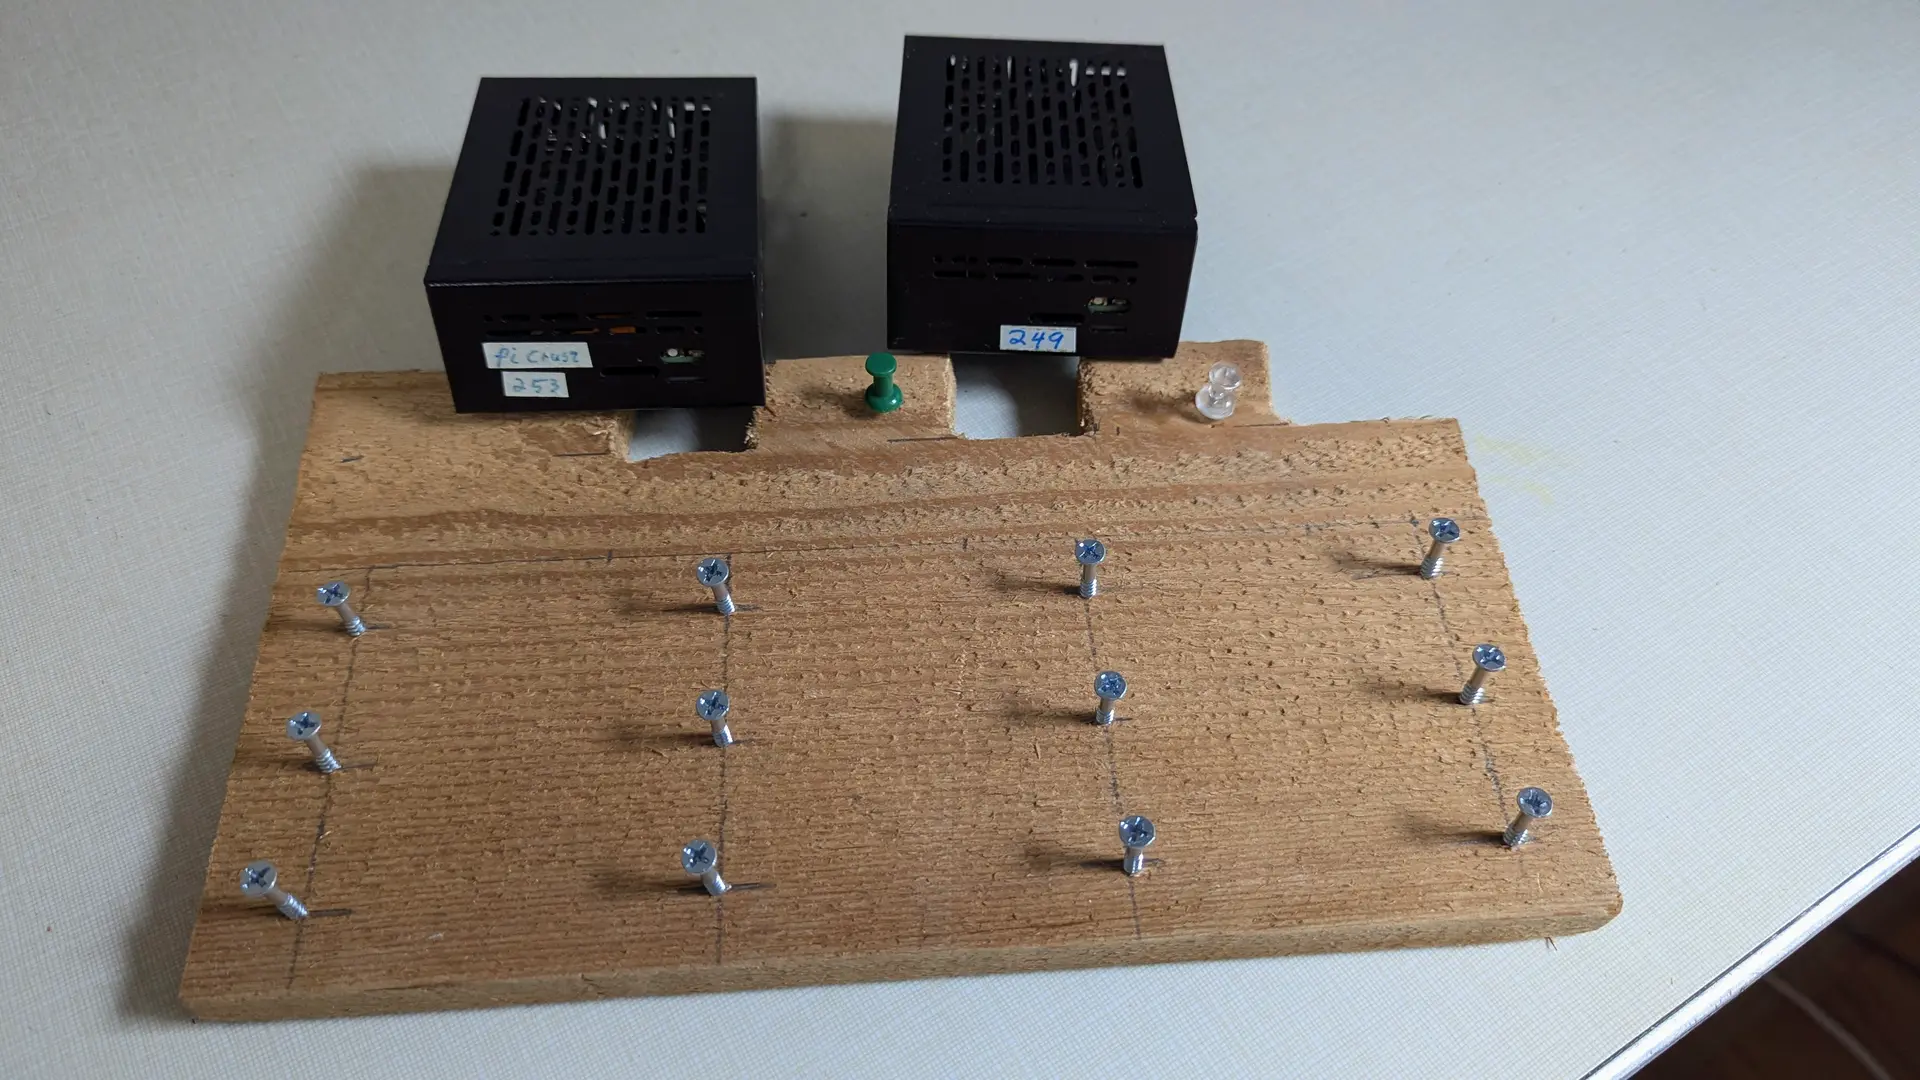
“I’m building a computer,” I responded in 1962 when asked what all the noise was as i drove nails into a board after returning from the 1962 Seattle World’s Fair. Fast forward to 2025 and I was back at it, this time with screws. It wasn’t a computer I was building, but a Pi plate to hold my Pis. Before we get into that, let’s first start with the basics of a Pi
The Raspberry Pi line started as a low cost entry for learning computers, programming and hobbyists projects. With the release of the Pi 5 it was finally able to step away from SD cards for storage and start using NVMe SSD drives, the same ones used in your laptop or modern desktop computers. This made it possible to use as home servers for home automation and home security as well as a host for other useful home and personal services.
Current prices as of January 2026
| Pi 5 8GB | $142 |
| heatsink w/fan | $12 |
| 27 W power supply | $13 |
| NVMe board | $15 |
| SSD 2TB | $285 |
| Case | $22 |
| $489 |
Since I purchased my last Pi in 2024 they have gone up 35% and the NVMe SSDs have doubled in price. I paid about $280 with nvme, pi & case for each of mine.

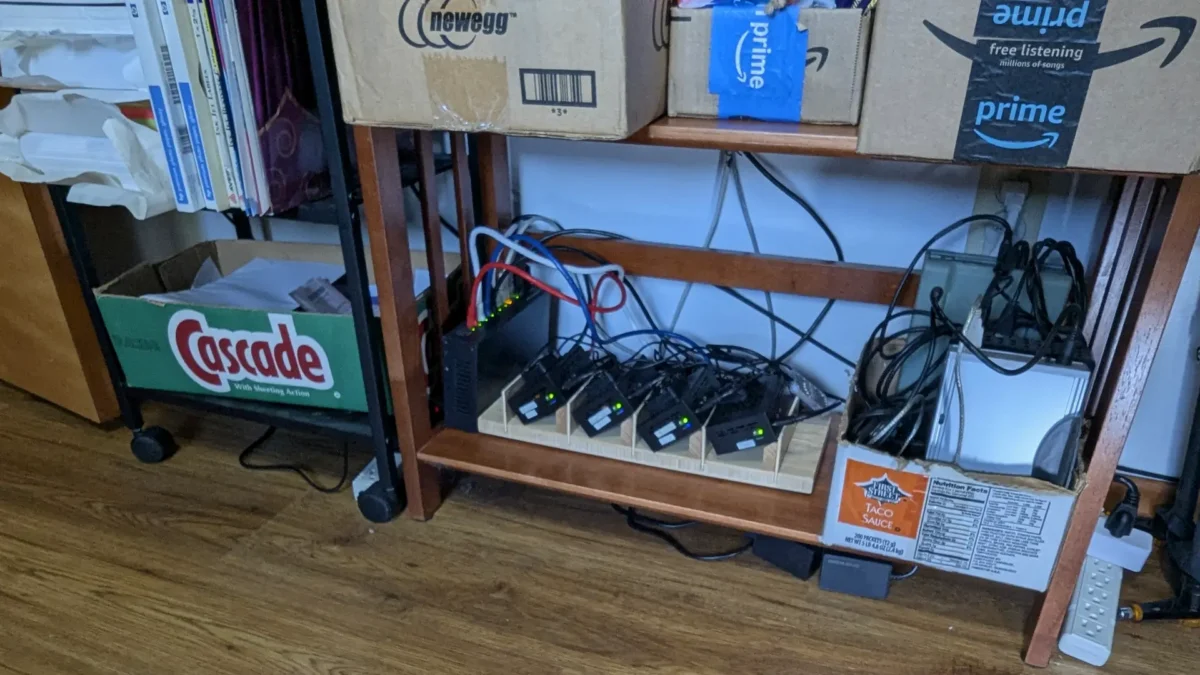
Early on I was having intermittent shut-downs I could not understand. I finally discovered I was having thermal shutdowns due to heat being trapped inside the case. The fan and heat sink are for the CPU and chips on the top of the board. the NVMe board I chose goes on the bottom of the board. SSDs generate a fair amount of heat. This would build up causing the shutdowns.
This is were the Pi plate came into being. The first prototype proved the theory, but was a poor implementation so I tried another variation and augmented it with some 40mm usb fans.
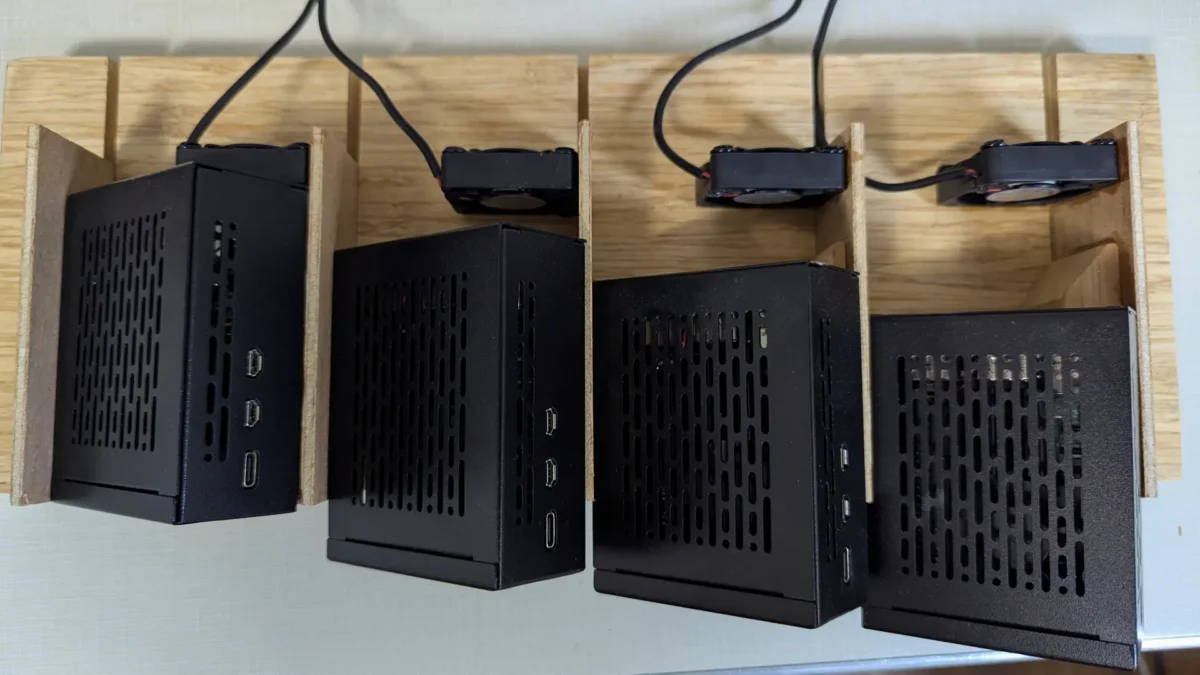
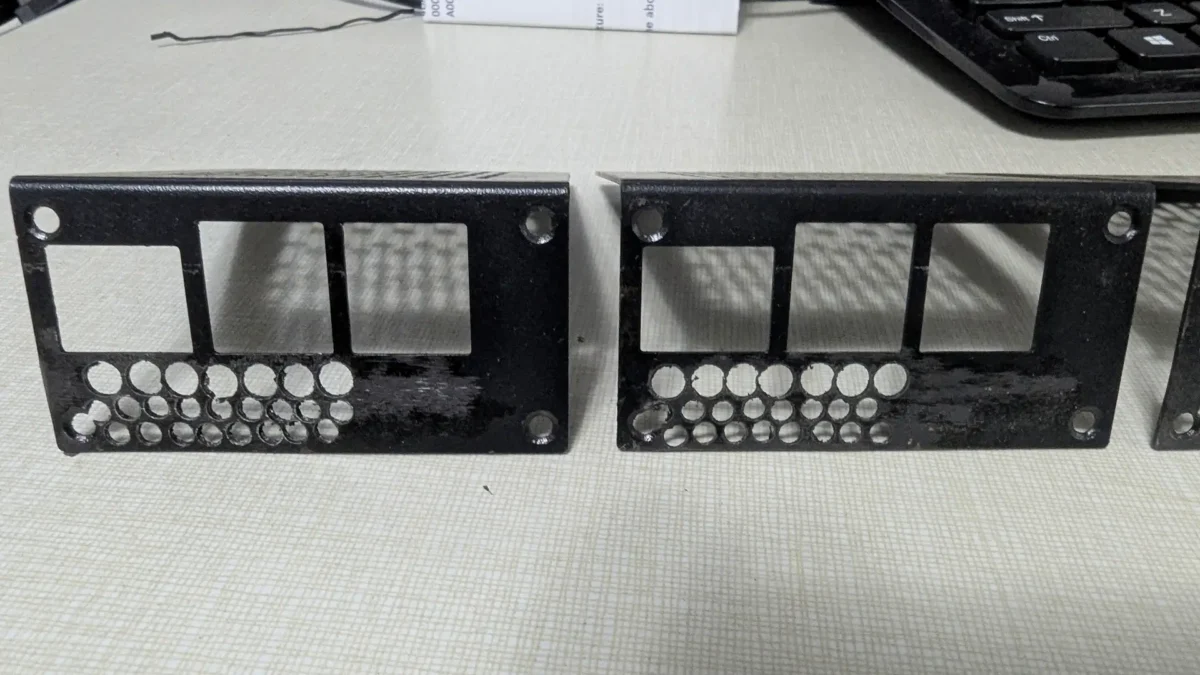
To help with air-flow getting directly to the NVMe drive I added a few holes to each case.
There have been no thermal shutdowns since these modifications were made. Now the NVMe drives run between 22-32° C (70-90° F) and the CPUs run 32-33° C (90 -91° F) fairly cool to help them last a long time.
Retailers used to have the concept of a ‘bargain basement’ or ‘bottom shelf’ My home office is in the basement and my Pi shop is definitely on the bottom shelf. With power consumption slightly more than a string of Christmas lights at 23 watts it also comes in as a low budget, low cost operation.
Adding Home Automation
Home Automation comes in a few different forms. Google and Amazon have their own ecosystems, complete with subscriptions and lock-ins, there are others that do similar. The devices themselves come in a few different flavors, wifi (bad), zigbee & Matter (good). Home Assistant is a big name with loads of community support, in fact a big part of HA is the HACS add-in (Home Assistant Community Store). Home Assistant on Raspberry Pi is supported and comes in 2 flavors; as the base OS on the Pi, or as an app on the Pi as just another service. I have gone with the later and run HA in a Docker container.
Early automation devices used wifi, since that was readily available. Due to address use/contention, security risks & exposure wifi devices are discouraged. In stead Zigbee and Matter are the current ways for devices to communicate. I am not familiar with Matter, other than knowing it is the up & coming method. I’m using Zigbeee, which uses a mesh network. That simply means the more end devices you install the stronger your device network coverage becomes as each devices meshes and strengthens your net.
Regardless of how you choose to get into home automation you will need more hardware. The first piece is a dongle to plug into a USB port on the computer so it can to talk to the devices. Because the dongle uses radio waves (RF) and the Pi is noisy in RF spectrums, like many electronic devices, it is recommended to move the dongle a few feet from the computer using a USB extension. Mine is hidden behind the 3rd shelf next to the printer.
There are several different dongles many from SONOFF. I tried to go cheap and lost a week with returns and futzing when spending a few dollars more made it all moot. Different chipset on the cheaper version that wouldn’t play nice. Switched to a dongle using a TI chipset and it was plug & play; $40 v $27

Adding full time live video to your HA setup is yet another step up in hardware requirements and infrastructure to support them. We have a Blink camera system. Great little wifi based battery powered cameras, can install them anywhere. The problem is not the wifi, it’s the battery power. In order to get long life they only wake up on motion, record, then go back to sleep. For always on, you need power, not much, but more than a small solar panel provides. Many of the cameras work with POE (power over ethernet) if you already have a POE switch that’s an option, I don’t.
Most homes in the US have transformer powered doorbells, typically part of the chime, that provides enough current to power a doorbell camera full time; that’s what we opted for.

When you add video to your HA set up that too ups the bar. You need to store it and ideally have some way of identifying what’s in front of the camera and whether or not it warrants notifying you about it. That takes more hardware to not overwhelm the Pi and software to make it happen. The software is called Frigate, it is a digital video recorder and object identifier (pet, person, car). You can set masks and thresholds to tune what gets passed on as notifications.
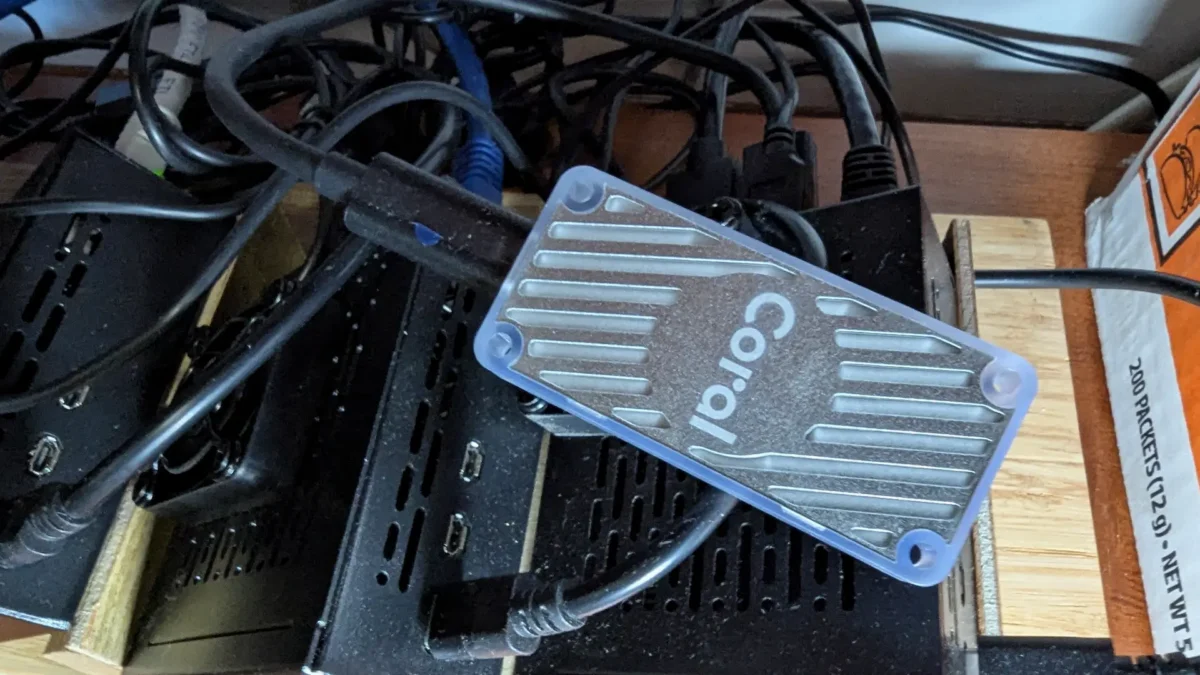
Adding the doorbell camera and Frigate also added a 30-40% load on the Pi’s CPU. To remedy that I added a Coral TPU, a coprocessor to handle the video identification. It plugs into a USB port on the Pi and flashes a blue led when active. CPU activity returned almost to pre camera & DVR levels. The Coral TPU is currently $180, about $75 more than it was in early Dec. 40 days ago.