Ever since I discovered Planit for Photographers I’ve been hooked, it’s way better than sliced bread. Rises and sets of the sun and moon, providing time and azimuth from any point on the planet. Tides for shorelines, also anywhere. How about a planet, star, constellation, asteroids, comets, all covered in Planit Pro for a 1-time fee $10, or most of the features in the free version.
All of my sky shots are pre-planned using Planit.
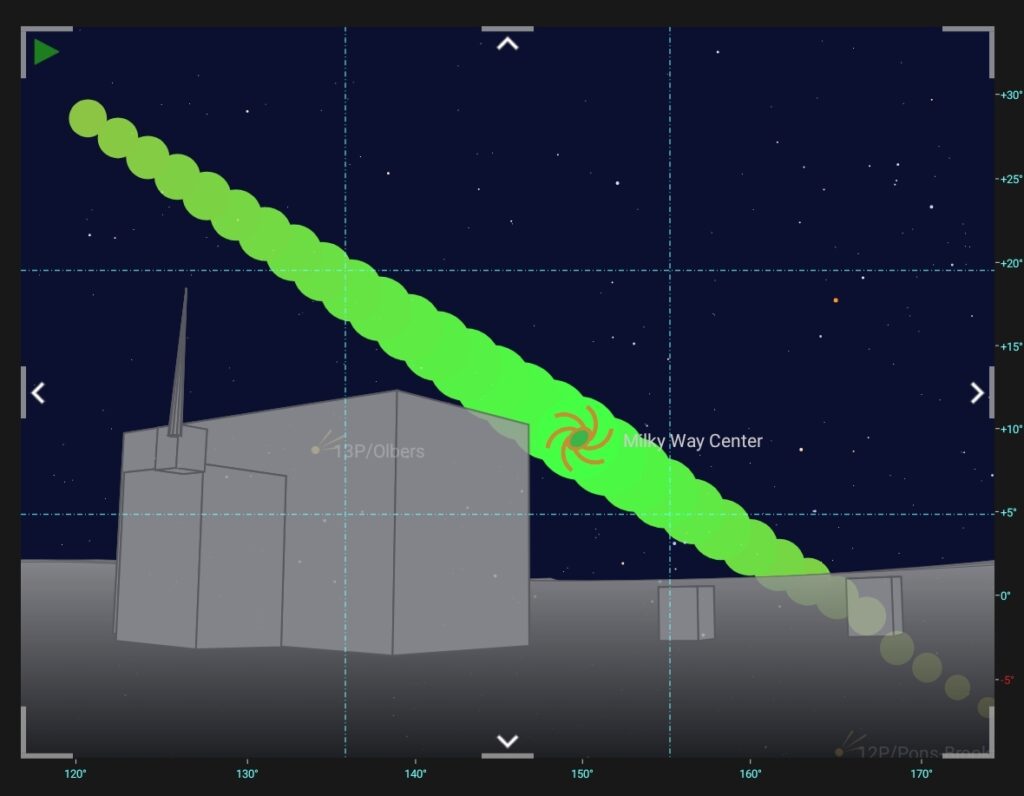
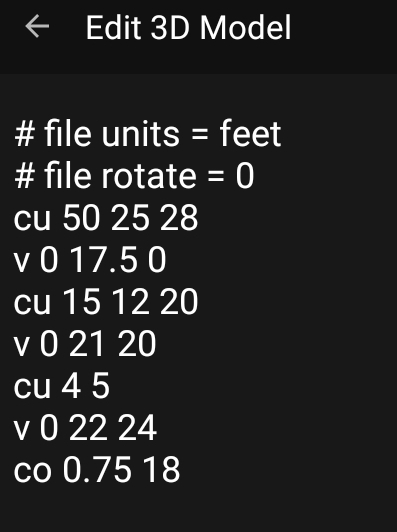
Add the 3-D model subscription and get 3-d models in viewfinder view for planning precise alignments between celestial and earth-bound objects. A few lines of code allows me to create simple models that are good enough for my needs. The model below allowed me to pre-plan the image above.
To create the model it required this code. There are 3 cubes (cu), 3 cursor relocates (v) and 1 cone (co). Not elegant, just a guess at dimensions and set by overlaying against a satellite image, tweak as needed. The default unit is meters and often have to rotate the image so these lines are included in all my models. The model UI has an embedded cheat sheet that can be clicked to select object, then just enter dimensions.
The User interface for Planit is elegant and hide lots of complexity; Just about everything can be clicked on or long-press, or both to get to ancillary functionality.
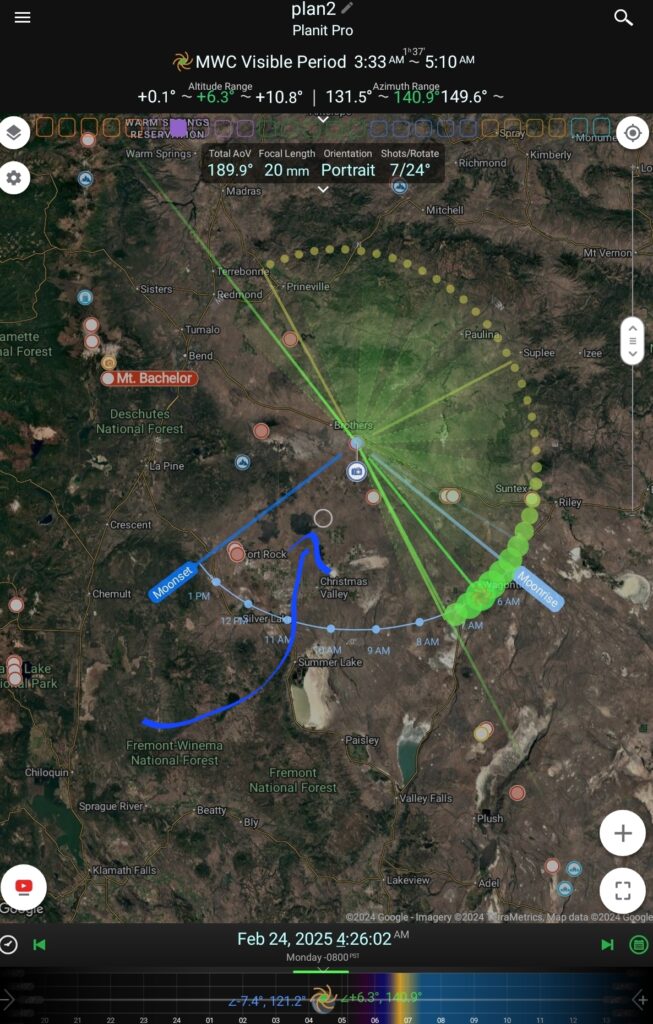
The top bar is the ephemeris functions, the middle is the map & viewfinder; the bottom bar is the time line with multiple viewing modes. Note the YT icon in lower left, contextual video tutorials at a click
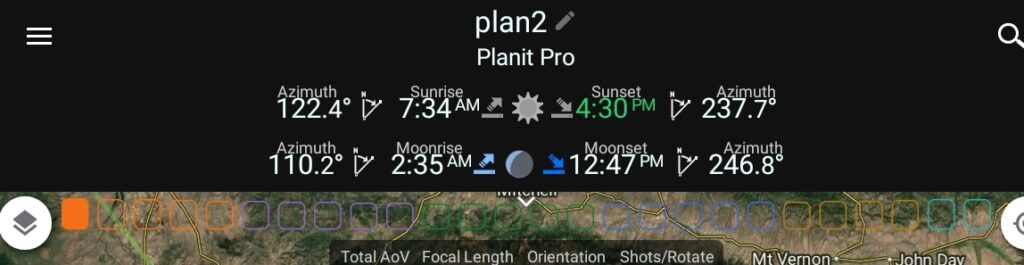
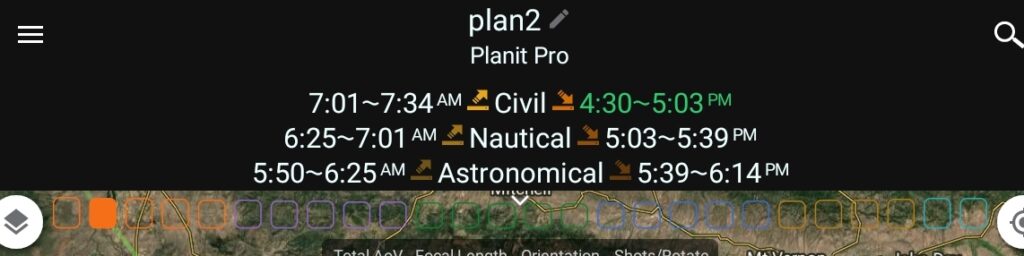
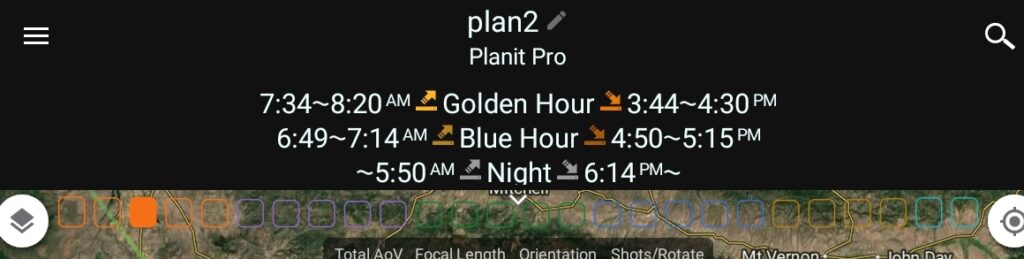
The top bar contains all the ephemeris functionality. Swiping left or right on the top bar navigates from one function to the next, clicking the colored bubbles just below the top bar will navigate directly to the selected function.

Swiping down on the top bar brings up the main menu. Each row is color coded, grouped by function and are direct equivalents of the bubbles below the top bar. If you don’t see the bubbles, but get labels, this can be selected in the settings.
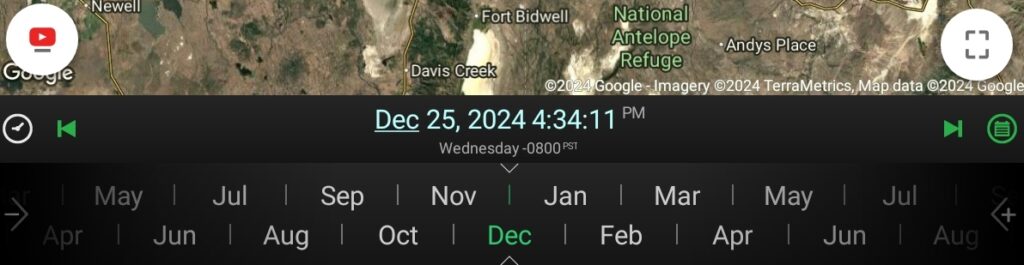
The timeline has 5 views; year, month, day, hour & minute. Tapping on the left half of the timeline increases the time increments, tapping on the right half decreases the time increments. This is a continuous loop so you can go years to minutes or minutes to years. Swiping left or right changes the date/time, causing the rest of the app to react to the change in real time.
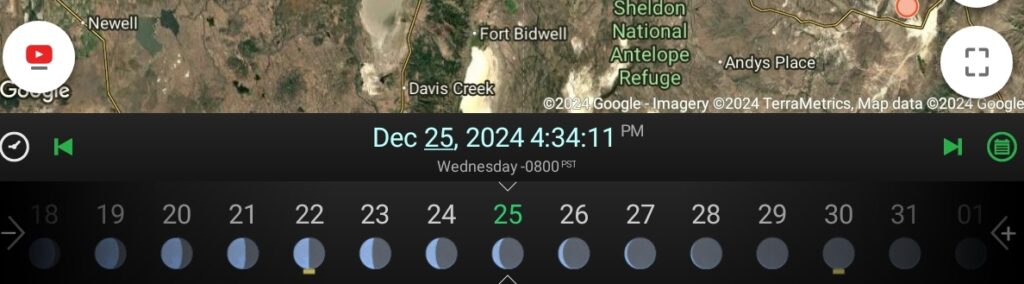
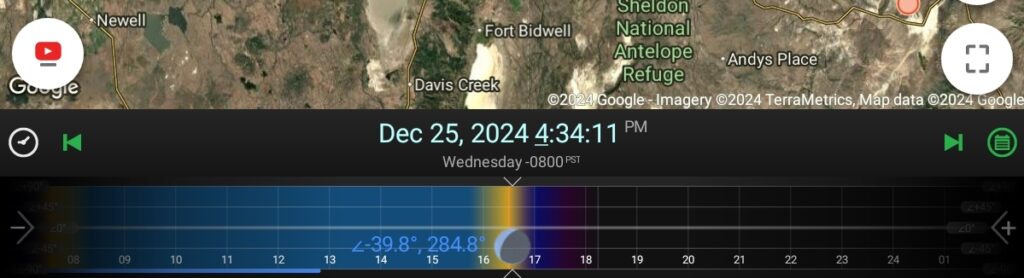
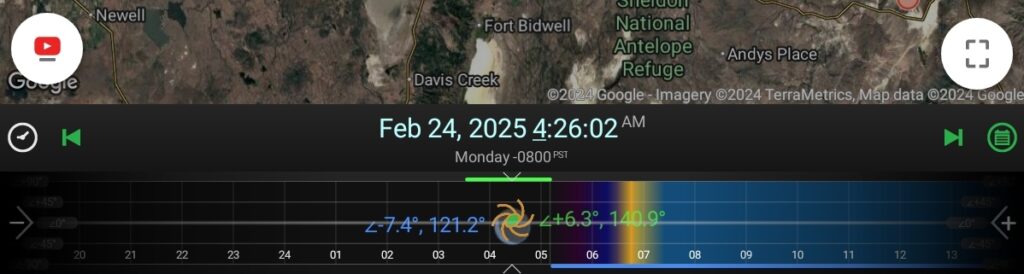
The day view shows the phase of the moon with the quarters, new and full underscored. The hour view has black for night, blue for day and a rainbow for sun rise & set. If the moon is above the horizon it is represented by a blue line on the bottom of the time line. If a Planet, comet, what ever the ephemeris is set for, a yellow line appears on the top of the time line when it is above the horizon in true dark. In the case below the Milky Way is shown above the horizon and the details of elevation and azimuth are in the timeline for both Milky Way core and also the moon.
This is a great UI jam packed with nuance, elegant in a word.
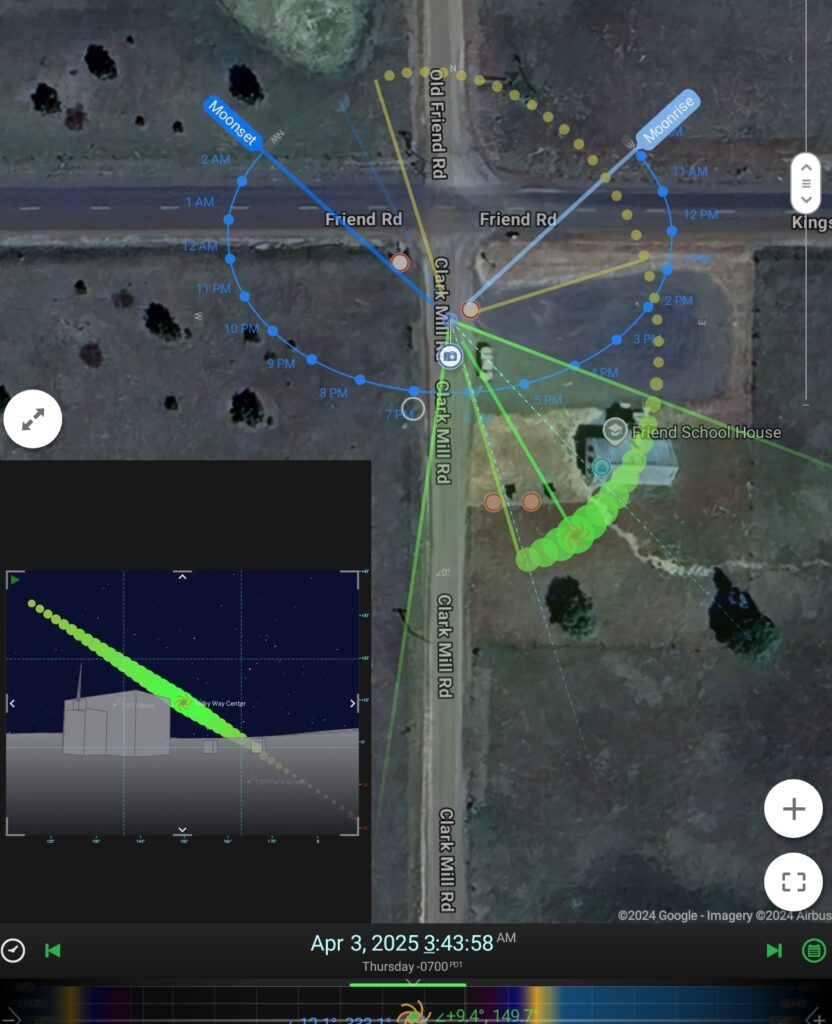
It is possible to have PIP with Planit. By moving the camera pin in the satellite view the inset viewfinder view is updated in real time. By tweaking the camera pin and the timeline I know exactly where and when I need to be to get the shot
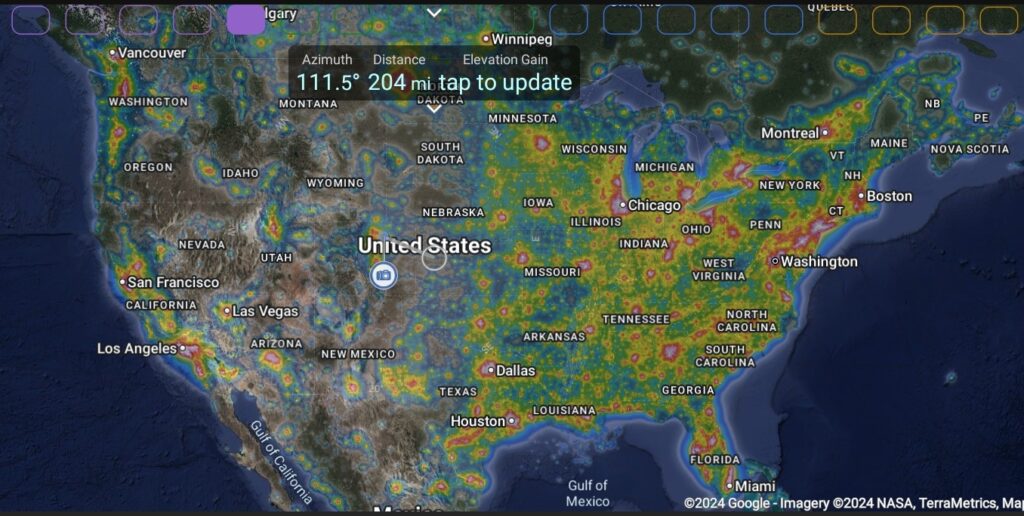
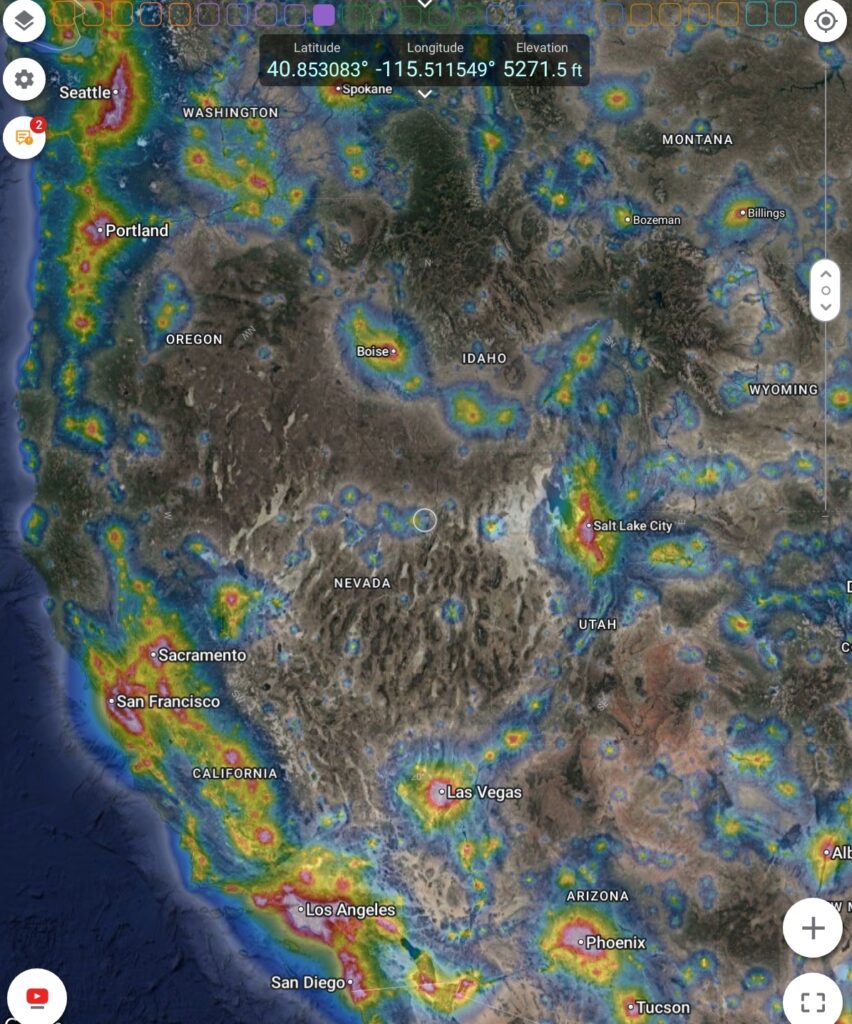
A light pollution map is also part of Planit. I get to call Oregon home, it is one of the last large dark sky areas in the US. Lake County, along the CA border was recently named the world’s largest dark sky park. Neighboring Harney and Malheur counties slated to join too.
Leave a Reply